Installation, Ultravista sx installation – Rose Electronics UltraVista SX User Manual
Page 8
INSTALLATION
4
INSTALLATION and OPERATIONS MANUAL
UltraVista SX Installation
Installation of the UltraVista SX consists of:
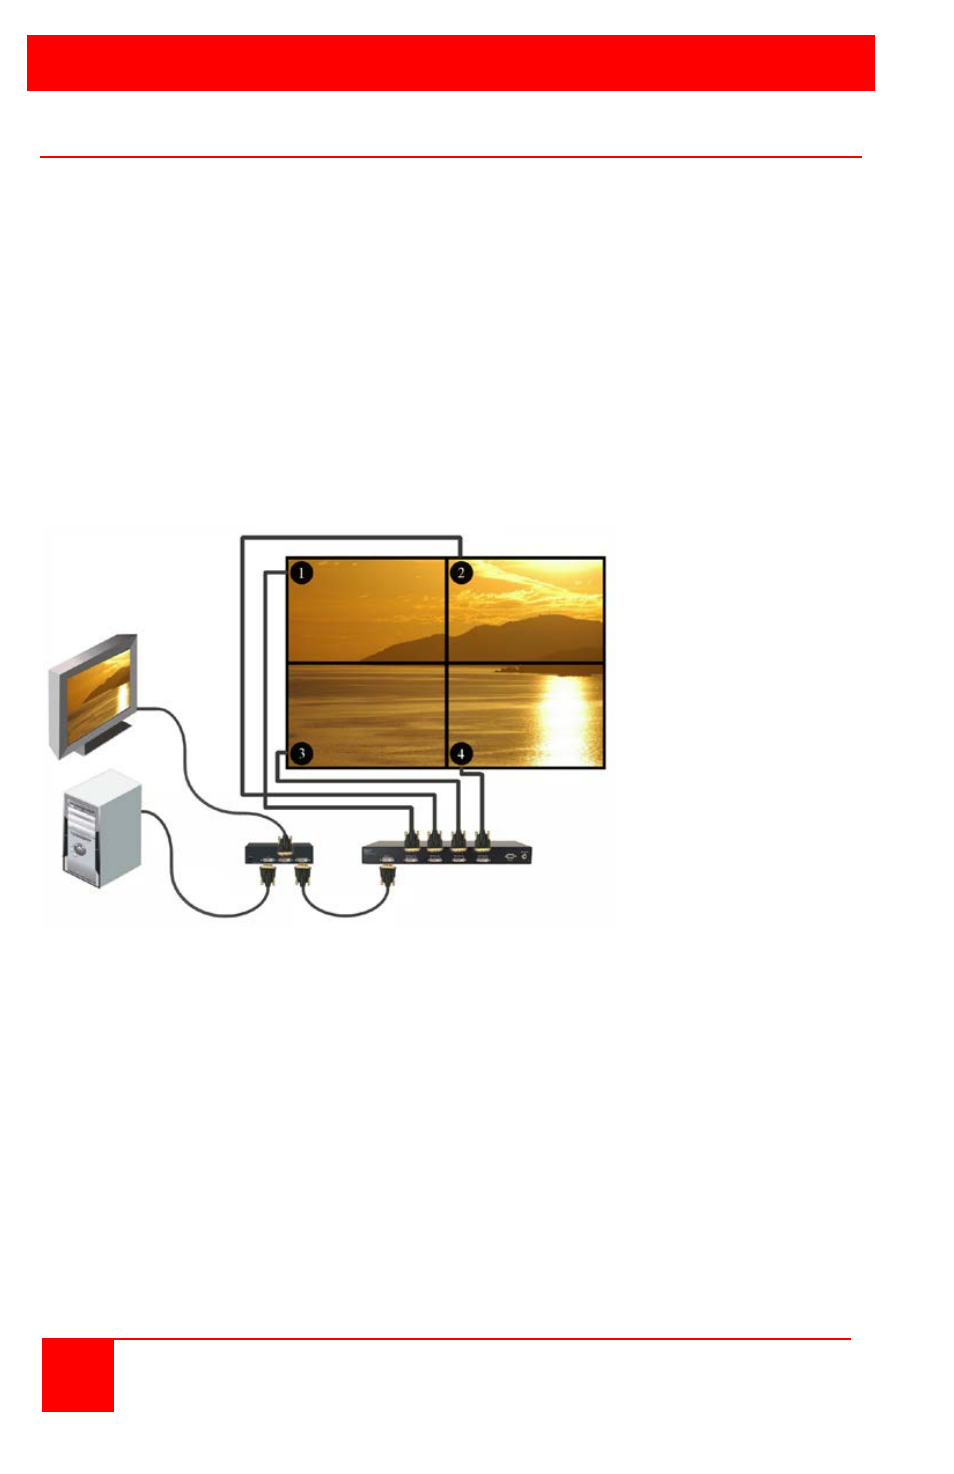
1. Connect your single-link DVI-D video source to the DVI-I input
connector on the rear panel of the UltraVista SX using a DVI-D mm
cable. (Optionally, connect to a 1x2 DVI video splitter as shown)
(NOTE: The connectors on the UltraVista SX are DVI-I connectors
but the input video must be single-link DVI-D)
2. Connect four displays to the output connectors on the rear panel. If
the displays are VGA displays, a DVI to VGA adapter must be used.
3. Connect the provided power adapter to the UltraVista SX unit and
apply power. Use only the provided power adapter.
Figure 1. Installation Diagram
When all connections are completed and power applied to UltraVista SX,
monitors, optional video splitter, and the PC, UltraVista SX will perform a
self test to verify that the unit is functioning properly. Upon a successful
test, the unit will recognize the video input and display the image on the four
monitors.
The UltraVista SX supports multiple DDC tables for a PC or Mac. The unit
will emulate the monitors even if no monitors are connected. This “Learn”
feature allows the connected computer to boot without the displays
connected. This gives you the ability to manage the display content or
modify a presentation without displaying your work on the video wall.
UltraVista SX
Optional 1x2 Video Splitter