Maintenance procedures – SAF-HOLLAND XL-FW10025OM 17 Series Fifth Wheel User Manual
Page 14
14
XL-FW10025OM-en-US Rev A 08-10 Amendments and Errors Reserved. © SAF-HOLLAND, Inc.
NOTE: If there is still excessive free play in
the locks with the adjusting pin on
the last (third) notch, then the fifth
wheel should be rebuilt using the
appropriate SAF-HOLLAND service
kit.
Maintenance Procedures
5.
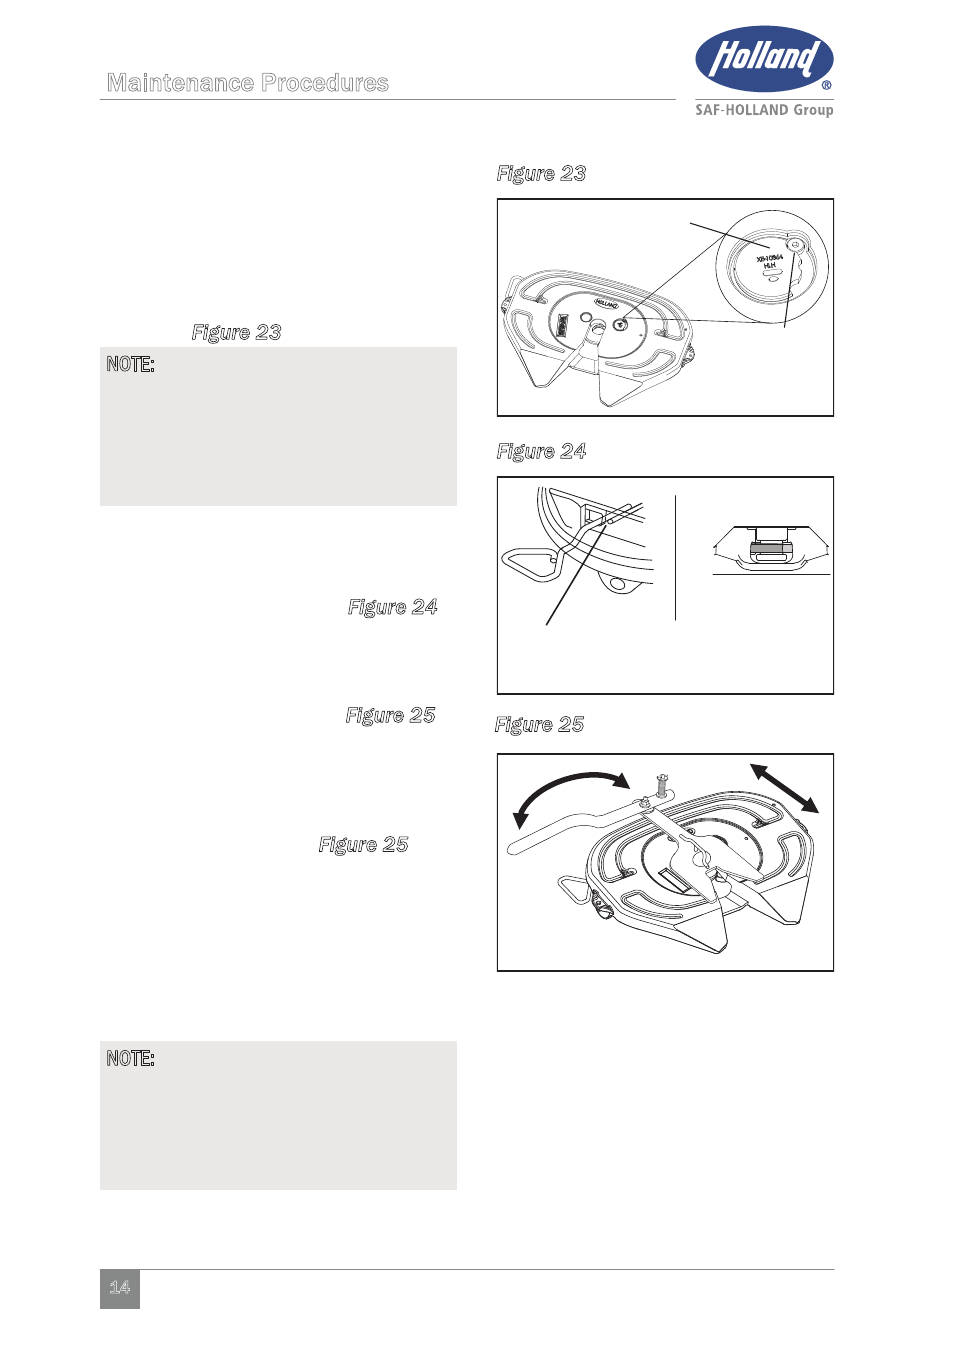
To adjust lock, unscrew the socket
head cap screw until the head clears
the adjusting pin and rotate adjusting
pin counter-clockwise until the next
notch lines up with the socket head
cap screw. Re-tighten socket head
cap screw. Adjust only one notch at a
time (Figure 23).
6. Verify
the
proper
adjustment by lock-
ing and unlocking fifth wheel several
times with lock tester. Check that fifth
wheel is properly locked (Figure 24).
7.
Rotate lock tester from side-to-side to
ensure that lock is not overtightened.
Lock should not grip kingpin and the
tool should rotate freely (Figure 25).
8.
Disengage lock tester J-hook from
front skirt of casting and re-check for
free play in lock by sliding lock tester
forward and backward using pin gage
to measure free play (Figure 25).
Free play should be 0.040” minimum.
If there is still excessive free play in
the locks, repeat procedure and
adjust one more notch.
9.
To unlock, push down on lock tester,
and rotate “J” hook under the fifth
wheel, then pull handle back.
Figure 23
Figure 24
LOCK
COMPLETELY
CLOSED AROUND
KINGPIN
LOCK NOTCH
BEHIND RIB
ADJUSTING
PIN
SOCKETHEAD
CAP SCREW
Figure 25
Rota
te
NOTE: If the screw cannot be removed,
remove the cotter pin from the
bottom of the adjustment pin, then
lift and rotate the pin to the next
notch. Re-install the cotter pin and
spread the pin legs beyond 20º.