Rear panel, Panel descriptions – Roland Direct Streaming AV Mixer User Manual
Page 4
4
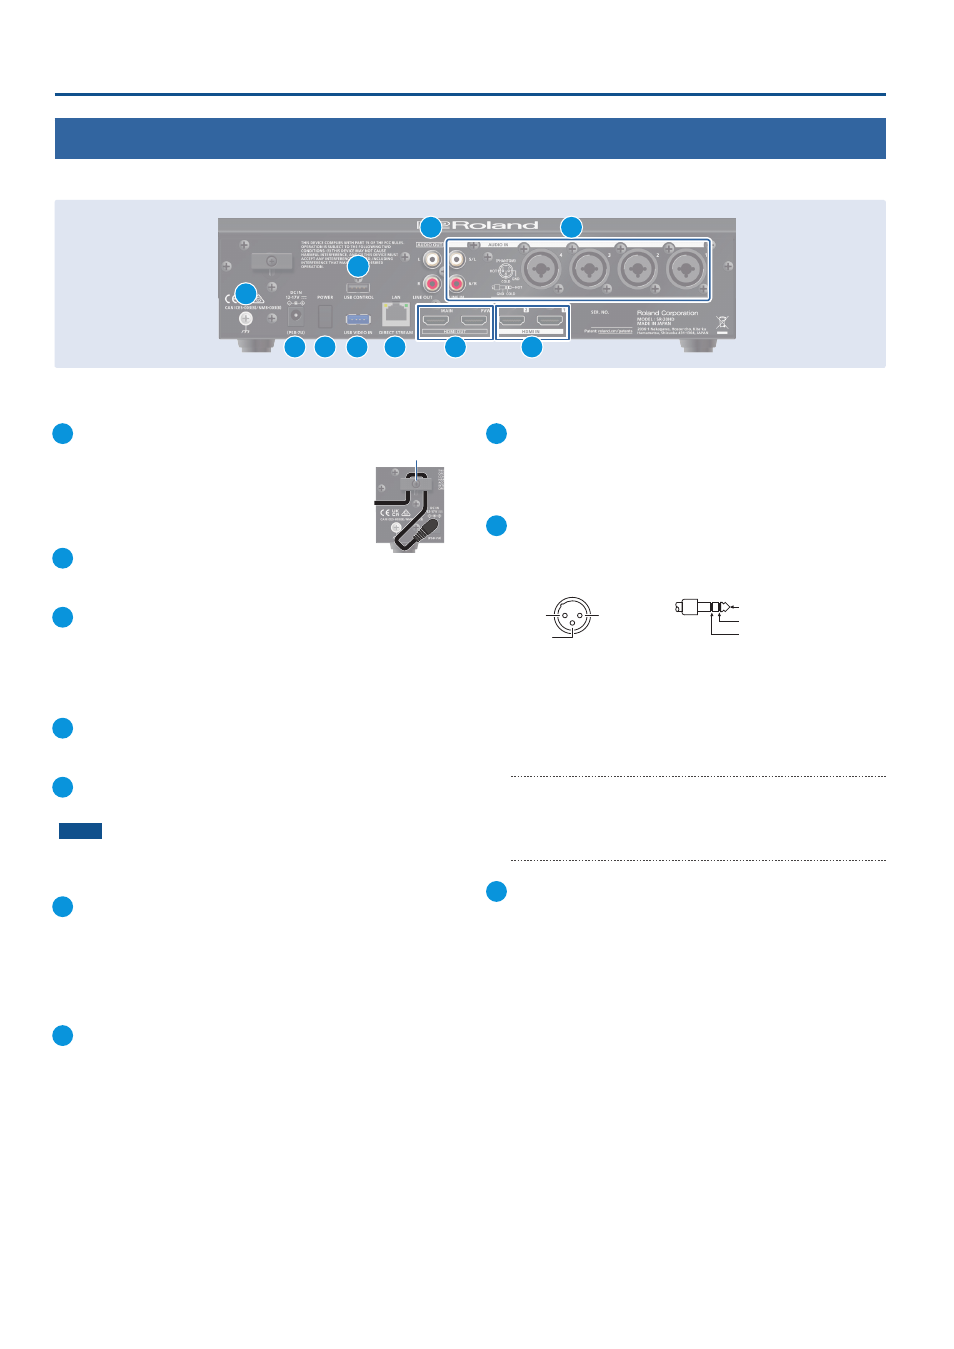
Panel Descriptions
1
DC IN jack
Connect the included AC adaptor to this jack.
* Use the cord hook to secure the cord of the AC
adaptor as shown in the illustration.
2
[POWER] switch
Turns the power on/off.
3
USB CONTROL port
¹
You can connect your smartphone to this port and use it for tethering.
¹
Connect a USB flash drive to import still images, or connect a USB
keyboard for inputting text.
4
USB VIDEO IN port
Connect a USB-compatible Web camera here.
5
LAN (DIRECT STREAM) port
Connect this port to a network device for livestreaming.
NOTE
As this port supports GbE, use a LAN cable with a CAT5e
specification or better.
6
HDMI OUT (MAIN, PVW) connectors
These connectors output video.
Connect external displays and projectors.
* You can also configure the menu (p. 7) settings to make the menus
that appear on this unit’s display also appear on the display that’s
connected to the HDMI OUT PVW connectors.
7
HDMI IN 1, 2 connectors
These connectors input video.
Connect a video camera or computer with an HDMI output
connector here.
8
AUDIO OUT (LINE OUT) jacks
These jacks output audio.
Connect them to an audio recorder, amplifier, speakers, or other
such equipment.
9
AUDIO IN 1–4 (XLR/TRS) jacks
These jacks input audio.
Connect a mic or line-level analog audio equipment here.
* Pin assignment of AUDIO IN 1–4 (XLR/TRS) jacks
2: HOT
1: GND
3: COLD
1: GND
2: HOT
3: COLD
TIP: HOT
RING: COLD
SLEEVE: GND
*
About phantom power
You can supply phantom power (+48 V) from the AUDIO IN 1–4
jacks (XLR). Turn on phantom power when you’re using a condenser
microphone that requires phantom power.
Use the [MENU] button
Ó
“Audio Input”
Ó
“AUDIO IN 1”–“AUDIO IN 4”
Ó
set “PHANTOM +48 V” to “On”.
AUDIO IN 5/L, 6/R (LINE IN) jacks
These jacks input audio.
Connect analog audio equipment such as an audio mixer here.
10
Ground terminal
Connect this to an external earth or ground if necessary.
Cord hook
Rear Panel
* To prevent malfunction and equipment failure, always turn down the volume, and turn off all the units before making any connections.
3
10
4
1
2
5
8
6
7
9