Importing the chord pattern (import chord pattern), Importing the chord pattern, Import chord pattern) – Roland FP-E50 88-Key Portable Digital Piano User Manual
Page 74: Saving the chord pattern to a usb flash drive, Importing chord pattern into the fp-e50, How to select with the check marks
Convenient Functions (Utility)
74
74
Importing the Chord Pattern
(Import Chord Pattern)
You can import the chord pattern that were previously exported.
Saving the chord pattern to a USB flash drive
1.
Prepare a CSV (chord pattern) file using the export
function on the FP-E50 which you’ll import into the
FP-E50 .
2.
Connect a USB flash drive to your computer .
* If this is the first time you’re using the USB flash drive, format it on
the FP-E50.
Ø
“Initializing a USB Flash Drive (Format USB Memory)” (p. 75)
3.
Save the CSV file to the “ROLAND” folder on your USB
flash drive .
4.
Remove the USB flash drive from your computer and
connect it to the FP-E50 .
Importing chord pattern into the FP-E50
1.
On the Utility screen, use the [
дд
] [
ее
] buttons to select
“Import/Export” and press the [Enter] button .
2.
Use the [
дд
] [
ее
] buttons to select “Import Chord Pattern”
and press the [Enter] button .
NOTE
If the USB flash drive doesn’t contain any user chord patterns, “EMPTY”
appears on the screen and no data is imported.
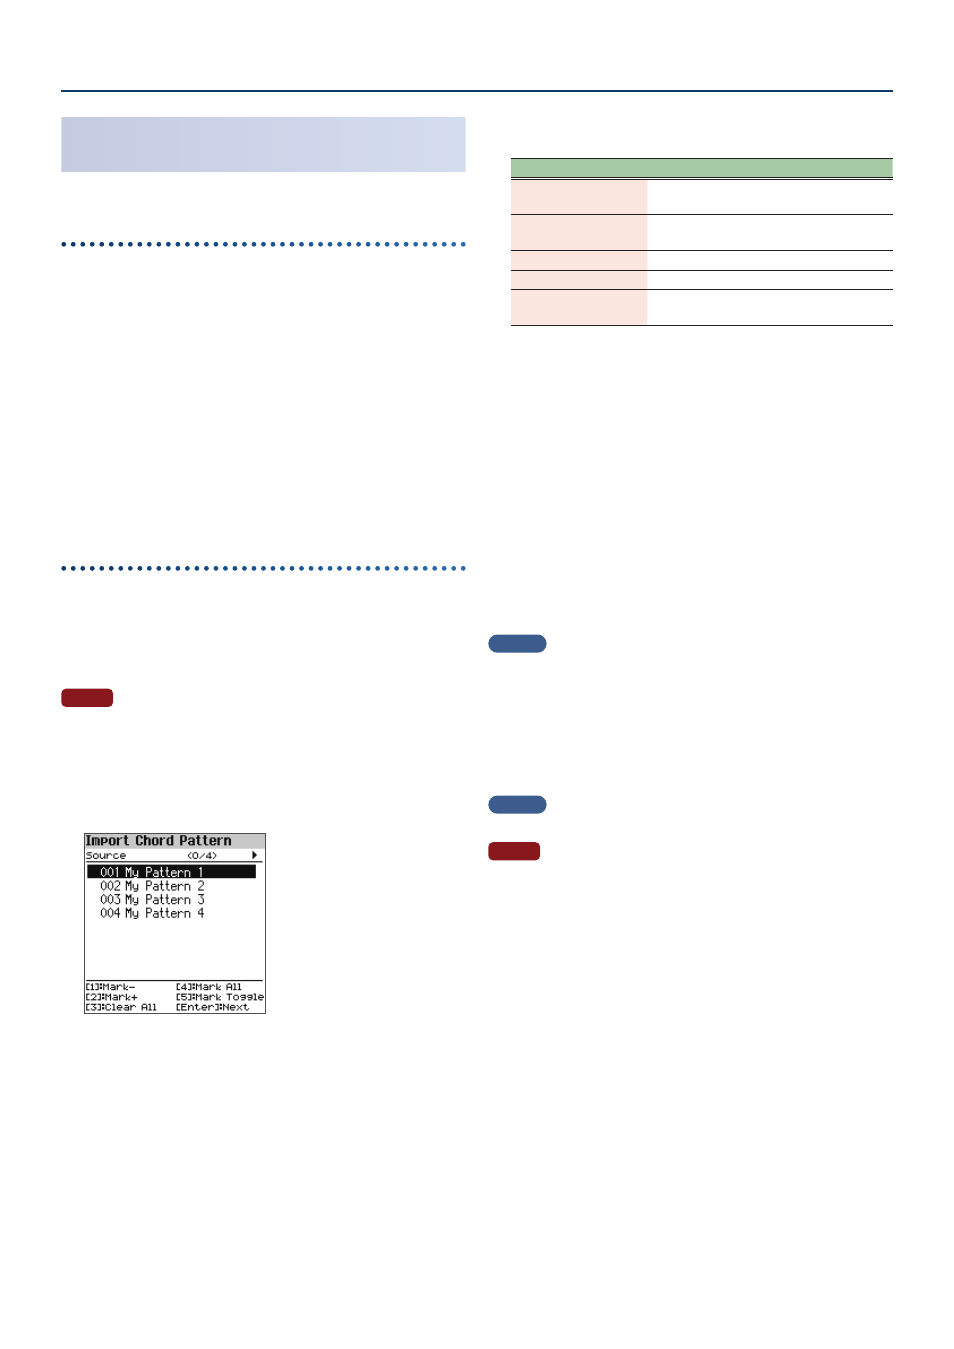
3.
Use the [
дд
] [
ее
] buttons to select the chord pattern you
wish to import, and press the [1] ([Piano])–[5] ([Other])
buttons to select the appropriate check boxes .
How to select with the check marks
Controller
Explanation
[1] Mark-
Removes the check mark and moves the
cursor forward one pattern.
[2] Mark+
Adds a check mark and moves the cursor
forward one pattern.
[3] Clear All
Removes all check marks.
[4] Mark All
Adds all check marks.
[5] Mark Toggle
Switches between adding and removing the
check marks.
You can check the number of chord patterns onscreen (meaning the
number of chord patterns that are selected as the import source from all
chord patterns).
4.
Press the [Enter] button .
The Destination screen appears.
Empty user chord patterns (shown in gray) are automatically marked. You
can select and deselect the marks.
5.
Use the [
дд
] [
ее
] buttons to select the import
destination, and press the [1] ([Piano])–[5] ([Other])
buttons to select the appropriate check boxes .
6.
Press the [Enter] button .
A confirmation message appears.
If you decide to cancel, select “Cancel” and press the [Enter] button.
MEMO
If data already exists in the user chord patterns on this instrument and at
least one of the data numbers being imported matches what’s already on
this instrument, a confirmation message asks you whether to overwrite the
data.
7.
Use the [
зз
] [
жж
] buttons to select “OK”, and then press
the [Enter] button .
When the import is finished, the message “Completed!” appears.
MEMO
Imported data is saved in the user chord patterns on this instrument.
NOTE
Never turn off the power or disconnect the USB flash drive while the
“Executing…” display or a similar message is shown.