Connecting the resolv monitors – Samson Resolv SE5 Two-Way Active 5" Studio Monitor (Each) User Manual
Page 11
ENGLISH
FRANÇAIS
DEUTSCHE
ESP
AÑOL
IT
ALIANO
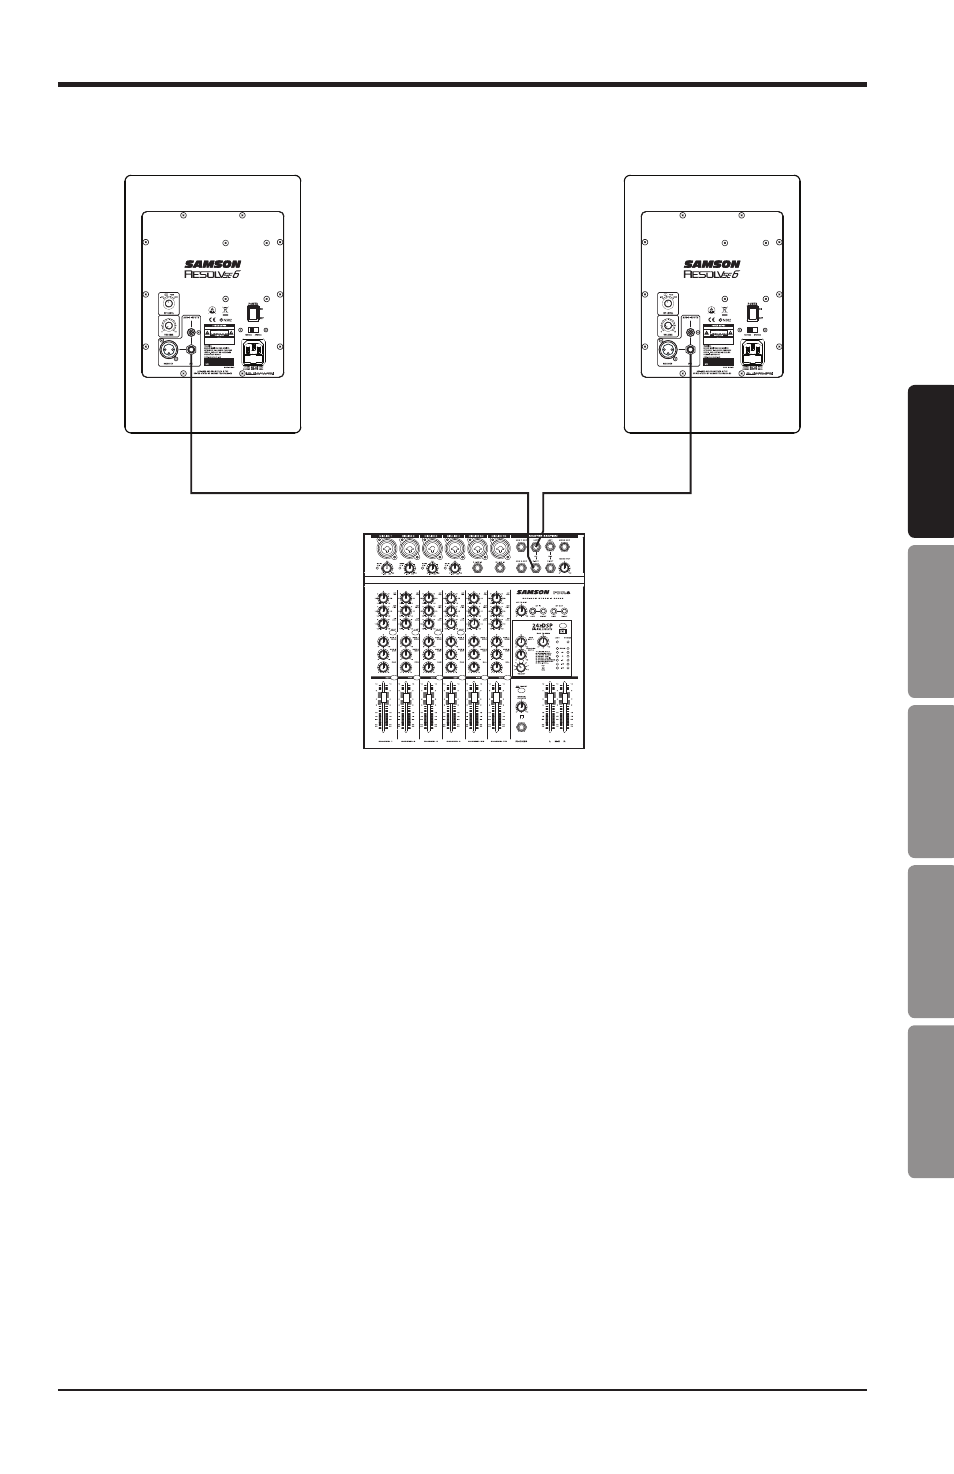
Connecting the Resolv Monitors
11
Resolv SE Studio Monitors
Control Room Outputs
The Resolv SE series monitors are the perfect addition to any project studio. When
connecting your monitors to a mixer, you should utilize the control room outputs of
your mixer so that you can independently control the level to the speakers without
affecting the main mix output. Follow the simple steps and diagram in this section
to quickly connect your monitors using a standard recording console’s control room
outputs.
1. Lower your mixer’s master outputs until they are completely off.
2. Connect the mixer’s Left Control Room output to the left-side Resolv SE Series
LINE INPUT and the mixer’s Right Control Room output to the right-side Resolv
SE Series LINE INPUT. The Resolv SE series connections can be made via one
of the three rear panel Audio Inputs. You can use RCA inputs for unbalanced,
-10dBV level signals, or either the ¼” or XLR (SE6 & SE8 only) inputs for bal-
anced, +4dBu level signals.
Note: Before plugging in and powering on the untis, remember the “last on, first off” rule of
power amplifiers (and powered monitors). When powering up your system, be sure that all the
wires are connected, turn your mixer and any other outboard gear on, and then finally turn your
Resolv SE Series on.
3. Set the Resolv SE Series input Volume control to the 12-o’clock (center detent)
position.
4. Run an audio signal (such as music from a CD) through your mixer and raise the
Control Room level to a comfortable listening volume.