Parts list supplied with the mount – Pelco IME3ICM-E In-Ceiling Mount for Sarix Enhanced 3 Series Cameras User Manual
Page 14
C6644M (2/20)
14
IN-CEILING INSTALLATION: WITH IME3ICM-E (NOT SUPPLIED)
PARTS LIST SUPPLIED WITH THE MOUNT
1.
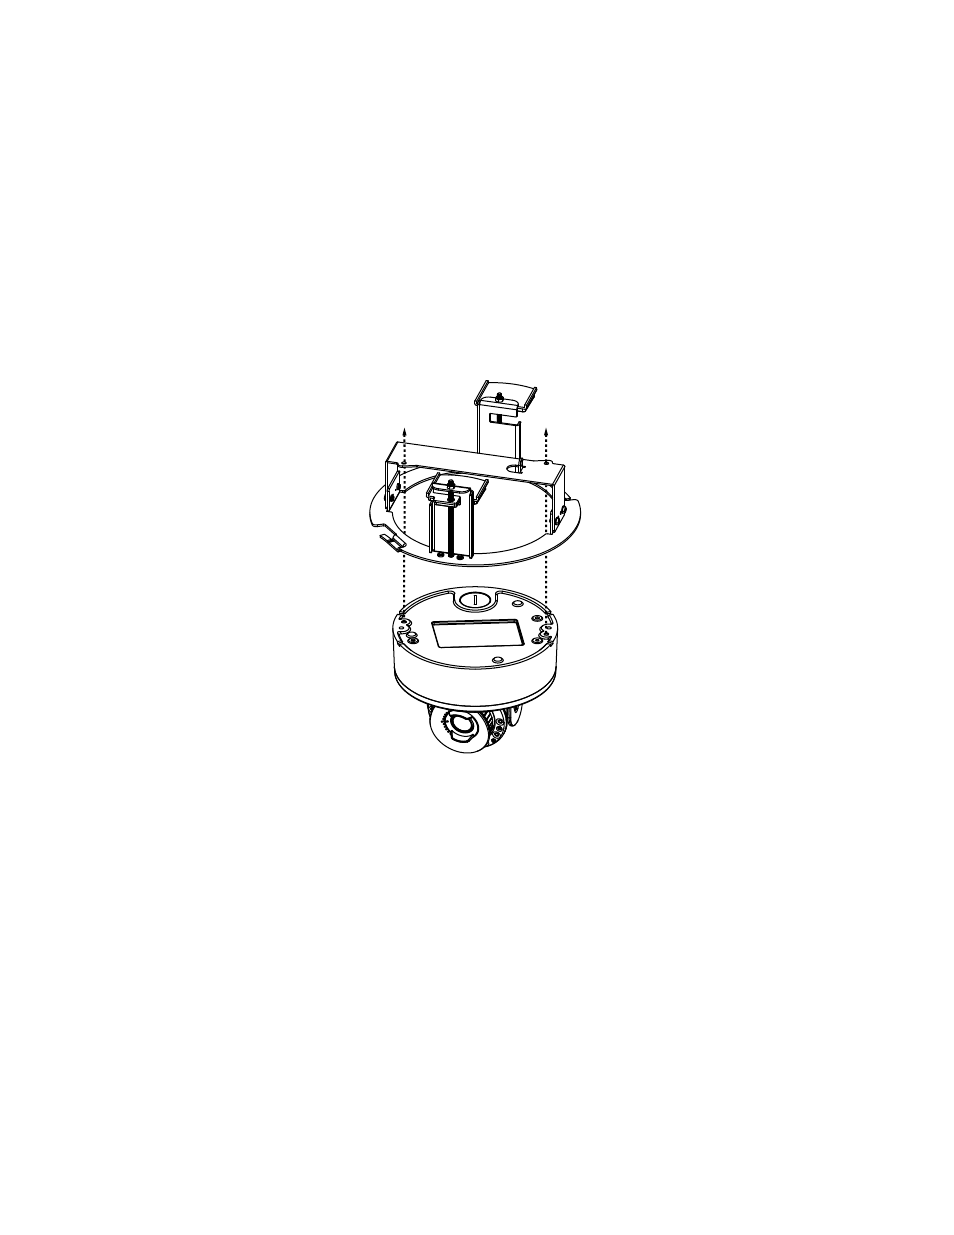
Secure the back box to the in-ceiling mounting bracket with the M4 screws (supplied).
NOTE:
When mounting the backbox, be mindful of the location of the microphone (See Figure 1) so that it is pointed towards areas of
interest.
Figure 6.
Attaching the Back Box to the In-Ceiling Mounting Bracket
2.
Determine the mounting location in the ceiling.
NOTE:
In-ceiling mount can attach to a minimum surface thickness of 3/8” (0.375 inches).
3.
Use the template to mark the hole on the ceiling or ceiling tile.
4.
Cut the hole for the camera.
5.
Pull the wiring through the hole.
6.
Based on your needs, move the conduit plug to the side or the top to use the other hole for cable entry. Tighten the plug.
7.
Install the mount into the ceiling as follows:
a.
If using conduit (not supplied): Feed the cables into the back box, then attach and seal the conduit to the backbox.
b.
Fold the paddles inside to clear the hole.
c.
Push the mount through the hole.
d.
Rotate the screws clockwise and fasten completely to secure the bracket to the ceiling.
8.
Refer to Connecting the Cables, Positioning the Camera, and Completing the Camera Installation sections before proceeding.
Qty Description
1
In-Ceiling mount
1
Ceiling template
2
M4 x 8 mm Phillips screws
1
Trim ring