Connecting your monitor, Turning on the monitor and computer – Sony SDM-X202 User Manual
Page 3
3
(US)
US
C:\Documents and Settings\Power\My Documents\_upload
job\4093783012\4093783012SDMX202UC\4093783012Win\02US-SDMX202UC\02US02BAS-
UC.fm
masterpage:Right
SDM-X202
4-093-783-01(2)
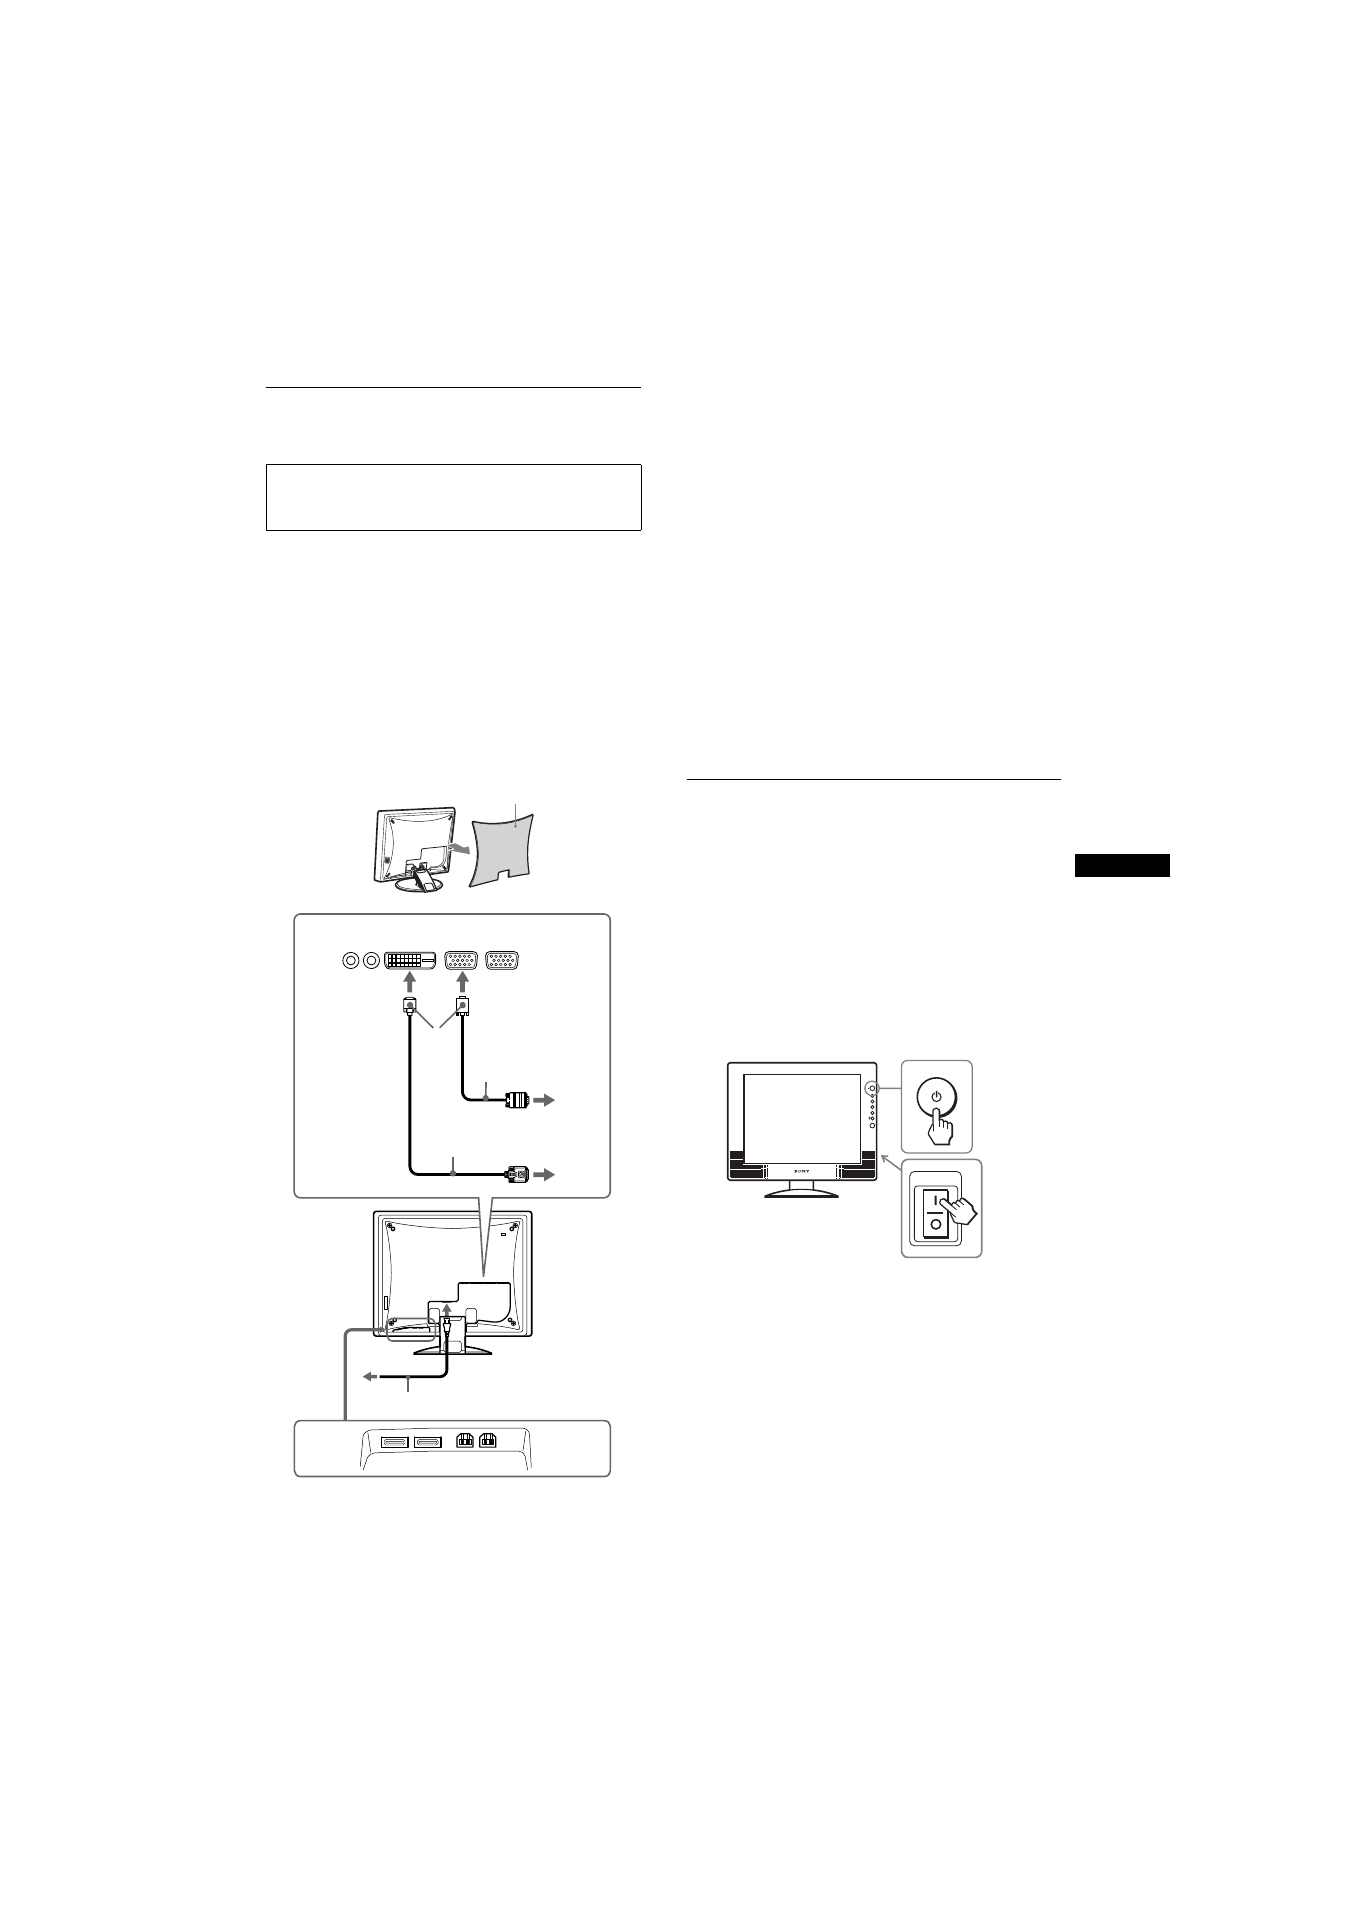
Connecting your monitor
Connect your monitor to a computer or other equipment.
1
Remove the back cover.
2
Connect your monitor to a computer.
Connecting a Macintosh computer
Connect the supplied video signal cable to a video output connector
on the computer. If necessary, use an adapter (not supplied). Connect
the adapter to the computer before connecting the video signal cable.
3
Connect the supplied power cord to the monitor’s
AC IN connector.
4
Connect the power cord to a power outlet.
To connect Universal Serial Bus (USB) compliant
devices
If required, connect USB compliant devices to the USB
connectors on the monitor (This monitor does not support
USB 2.0). Connect USB compliant computers to the USB
upstream connectors on the monitor using the supplied USB
upstream cord. Connect USB peripheral devices to the USB
downstream connectors. (For details, refer to the Operating
Instructions on the CD-ROM.)
Notes
• When the monitor is in the power saving mode, USB peripheral devices
will not function. To resume the use of USB peripheral devices, cancel
the mode by pressing the
1
(power) switch.
• If the peripheral devices do not function properly, the upstream input
setting may not be appropriate. Using “USB Select” on the OPTION
menu of the menu system on this monitor, select the appropriate setting
from among “Auto,” “Input1,” and “Input2,” according to the USB
upstream connection you have made (For details, refer to the Operating
Instructions on the supplied CD-ROM).
• For details on securing the cords, refer to the Operating Instructions on
the CD-ROM.
Turning on the monitor and
computer
Turn on your monitor first, then a computer.
1
Press the MAIN POWER switch on the right side of
the monitor in the direction of the
[
.
The
1
(power) indicator lights up in red.
2
Press the
1
(power) switch on the front right of the
monitor.
The
1
(power) indicator lights up in green.
3
Turn on the computer.
• Turn off the monitor, computer, and any other
equipment before connecting them.
• Do not touch the pins of the video signal cable plug.
back cover
1
to the DVI-D input
connector (digital
RGB) for INPUT2
to the HD15 input connector
(analog RGB) for INPUT1 or
INPUT2
2
HD15-HD15
video signal
cable (analog
RGB)
(supplied)
DVI-D video signal
cable (digital RGB)
(supplied)
4
power cord
(supplied)
3
to AC IN
to power
outlet
USB
upstream
connectors
USB
downstream
connectors
MAIN POWER
2
1