Data bank, Alarms, Operation guide 2804 – Casio 2804 User Manual
Page 2
Operation Guide 2804
2
To view the time in another zone
While in the World Time Mode, press D to scroll forward through the city
codes (time zones) and B to scroll back.
To set the World Time
1. In the World Time Mode, use B and D to
scroll through the city codes (time zones)
and find the one you want.
2. Hold down A until the DST On/Off setting
starts to flash, which indicates the setting
screen.
3. Press C to move the flashing in the sequence shown below to select
other settings.
Minutes
DST
Hour
l l l l ll
lll
ll
ll
lll
l l l
•
While the hour or minutes setting is selected (flashing), use D (+)
and B (–) to change it.
•
While DST On/Off setting is selected (flashing), press D to toggle
between Daylight Saving Time (
ON
) and Standard Time (
OFF
).
4. Press A to exit the setting screen.
To toggle a time zone between Standard Time and Daylight Saving
Time
1. In the World Time Mode, use B and D to display the city code (time
zone) whose Standard Time/Daylight Saving Time setting you want to
change.
•
Note that you cannot switch between Standard Time and Daylight
Saving Time while
GMT
is selected as the city code.
2. Hold down A until the DST On/Off setting starts to flash on the display.
3. Press D to toggle between Daylight Saving Time (
ON
) and Standard
Time (
OFF
).
4. Press A to exit the setting screen.
•
The DST indicator is on the display whenever you display a city code
for which Daylight Saving Time is turned on.
•
Note that the DST/Standard Time setting affects only the currently
displayed city code. Other city codes are not affected.
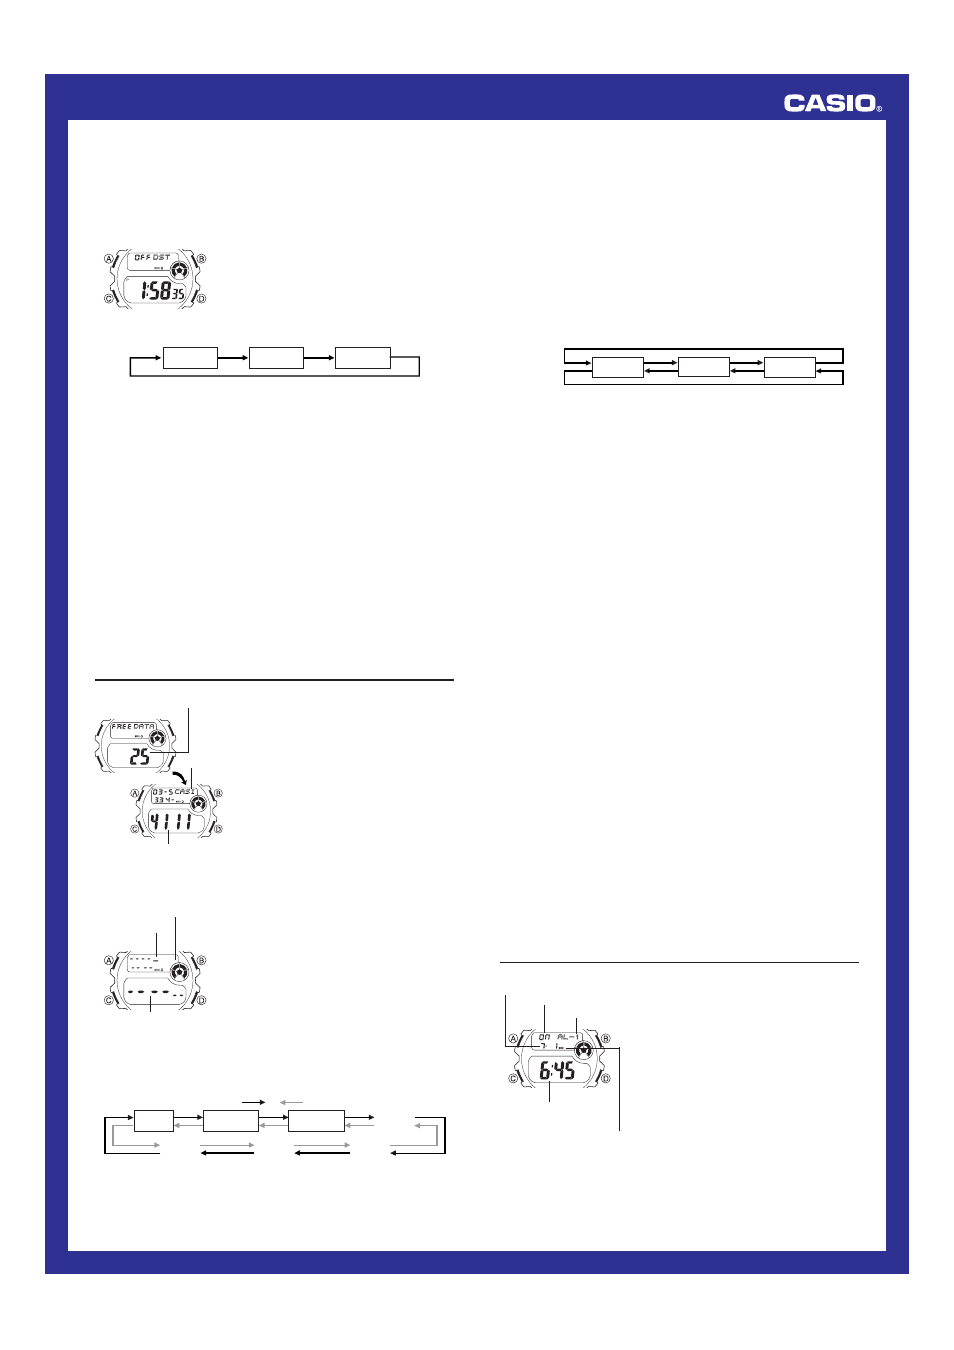
Data Bank
The Data Bank Mode lets you store up to 30
records, each containing name and
telephone number data. Records are
automatically sorted based on the characters
of the name. You can recall records by
scrolling through them on the display.
•
See “Character List” for details on how the
watch sorts records.
•
If there is no data stored in the Data Bank
Mode, the message
NO-DATA
appears following the remaining memory
screen.
•
Data Bank functions are available in the
Data Bank Mode, which you can enter
using C.
Remaining memory
Telephone number
Name
To create a new Data Bank record
1. In the Data Bank Mode, press B and D
at the same time to display the new data
screen.
•
The new data screen is the one that is
blank (contains no name and telephone
number).
•
If the message
FULL
appears on the
display, it means that memory is full. To
store another record, you will first have to
delete some of the records stored in
memory.
2. Hold down A until the flashing cursor
appears in the text area of the display.
3. Use B and D to change the character at the cursor position in the
text area. The character changes in the following sequence.
l l l ll
lll
lll
ll
l l
Cursor
Text area
Number area
New Data Screen
-
Press D.
Press B.
(space)
0
to
9
A
to
Z
:
/
.
5. Repeat the steps 3 and 4 until your text is complete.
•
You can input up to eight characters for the name.
6. After you input a name, use C to move the cursor to the number area.
•
The text area can hold up to eight characters. When the cursor is
located at the eighth space of the text area, moving the cursor to
the right causes it to jump to the first digit of the number area. When
the cursor is at the 14th digit of the number area, moving it to the
right (by pressing C) causes it to jump to the first character in the
text area.
7. Use B and D to change the character (hyphen, number, or space)
at the cursor position in the number area. The character changes in
the following sequence.
x
(space)
0
to
9
Press D.
Press B.
8. When the character you want is at the cursor position, press C to
move the cursor to the right.
9. Repeat steps 7 and 8 until you complete number input.
•
You can input up to 14 digits for the number.
After inputting your data, press A to store it.
•
When you press A to store data, the message
SORT
appears on
the display for a while. After the sort operation is complete, the
cursor appears in the text area, ready for input a new Data Bank
record.
10.
•
Pressing A to store data after you input the 30th record causes the
message
FULL
to appear after the
SORT
message. At this time,
the watch returns to the Data Bank record screen (without the
cursor).
Input more data (starting from step 3) or press A again to return to
the Data Bank record screen (without the cursor).
•
The text area of the display can show only four characters at a time, so
longer text scrolls continuously from right to left .
To recall Data Bank records
In the Data Bank Mode, press D to scroll forward through records or B
to scroll in reverse.
To edit a Data Bank record
1. In the Data Bank Mode, scroll through the records and display the one
you want to edit.
2. Hold down A until the flashing cursor appears in the text area of the
display.
11.
3. Use C to move the flashing to the character you want to change.
4. Use B and D to change the character.
•
For details on inputting characters, see “To create a new Data Bank
record” (step 3 for name input and 7 for number input).
5. After making the changes that you want, press A to store them and
return to the Data Bank record screen.
To delete a Data Bank record
1. In the Data Bank Mode, scroll through the records and display the one
you want to delete.
2. Hold down A until the flashing cursor appears in the text area of the
display.
3. Press B and D at the same time to delete the record.
•
At this time the cursor appears in the text area, ready for input.
4. Input data or press A to return to the new data screen.
Alarms
You can set up to five independent alarms
with hour, minutes, month, and day. When the
alarm is turned on, the alarm tone sounds
when the time is reached. You can also turn
on an Hourly Time Signal that causes the
watch to beep twice every hour on the hour.
•
The alarm number (
AL-1
though
AL-5
)
indicates an alarm screen.
SIG
appears in
place of the alarm number when the Hourly
Time Signal screen is shown.
•
Alarm settings (and Hourly Time Signal
settings) are available in the Alarm Mode,
which you can enter using C.
Alarm No.
Alarm date (Month – Day)
Alarm time
(Hour : Minutes)
Alarm on indicator
On/Off status
4. When the character you want is at the cursor position, press C to
move the cursor to the right.