Time recorder, Alarms, Stopwatch – Casio 2639 User Manual
Page 3: Backlight
Operation Guide 2639 2819
3
To toggle a city code time between Standard Time and Daylight Saving Time
1. In the World Time Mode, use B and D to display the
city code (time zone) whose Standard Time/Daylight
Saving Time setting you want to change.
2. Hold down A to toggle between Daylight Saving Time
(DST indicator displayed) and Standard Time (DST
indicator not displayed).
• The DST indicator is on the display whenever you
display a city code for which Daylight Saving Time is
turned on.
• Note that the DST/Standard Time setting affects only the
currently displayed city code. Other city codes are not
affected.
DST indicator
• Daylight Saving Time (DST) advances the time setting by one hour from Standard
Time. Remember that not all countries or even local areas use Daylight Saving Time.
• The watch will perform a signal receive operation even if it is in the World Time Mode
when a calibration time is reached. If this happens, the World Time Mode time
settings will be adjusted in accordance with the Home City time.
Time Recorder
The Time Recorder lets you store up to 30 records of the
current time (month, day, hour, minutes, seconds, and
DST on/off setting) with the touch of a button. One way
you can use the Time Recorder is to record the start time
and the end time of a particular event.
To record a Time Recorder time
In the Timekeeping Mode, hold down B to record the
current Home City time (month, day, hour, minutes,
seconds, and DST on/off setting).
• The recorded time flashes for about two seconds, and
then it is assigned a record number. After that, the
Timekeeping Mode screen appears.
• Records are assigned numbers sequentially from
#01
through
#30
.
Time record number
Recorded time
(Hour : Minutes Seconds)
Recorded date
(Month – Day)
• Storing a new time record when there are already 30 records stored in memory
automatically deletes record
#01
, shifts the remaining records upwards by 1, and
stores the new record as
#30
.
To recall Time Recorder times
In the Time Recorder Mode, use B (+) and D (–) to scroll through times stored in
memory.
• If you recorded a new Time Recorder time since you last entered the Time Recorder
Mode, the newest record appears first. If you have not recorded a new time, the
record you were viewing when you last exited the Time Recorder Mode appears first.
To delete all Time Recorder times
In the Time Recorder Mode, hold down A to delete all Time Recorder times.
Alarms
The Alarm Mode gives you a choice of four one-time
alarms and one snooze alarm.
Also use the Alarm Mode to turn the Hourly Time Signal
(
SIG
) on and off.
• There are five alarms numbered
AL1
through
AL4
,
and
SNZ
. You can configure
SNZ
as a snooze alarm
only. Alarms
AL1
through
AL4
can be used as one-
time alarms only.
• Alarm settings (and Hourly Time Signal settings) are
available in the Alarm Mode, which you enter by
pressing C.
Alarm time (Hour : Minutes)
Alarm number
Home city time
To set an alarm time
1. In the Alarm Mode, use D to scroll through the alarm
screens until the one whose time you want to set is
displayed.
2. After you select an alarm, hold down A until the hour
setting of the alarm time starts to flash, which indicates
the setting screen.
• This operation automatically turns on the alarm.
3. Use C to move the flashing between the hour and
minute settings.
AL1
AL2
AL3
SIG
SNZ
AL4
||
|
|
|
|
|
|
| | | | |
|
|
|
|
||
4. While a setting is flashing, use D (+) and B (–) to change it.
5. Press A to exit the setting screen.
• When setting the alarm time using the 12-hour format, take care to set the time
correctly as a.m. or p.m.
Alarm Operation
The alarm tone sounds at the preset time for 10 seconds, regardless of the mode the
watch is in. In the case of the snooze alarm, the alarm operation is performed a total
of seven times, every five minutes, or until you turn the alarm off.
• Pressing any button stops the alarm tone operation.
• Performing any one of the following operations during a 5-minute interval between
snooze alarms cancels the current snooze alarm operation.
Displaying the Timekeeping Mode setting screen
Displaying the snooze alarm setting screen
To test the alarm
In the Alarm Mode, hold down B to sound the alarm.
To turn an alarm on and off
1. In the Alarm Mode, use D to select an alarm.
2. Press B to toggle it on and off.
• Turning on a one-time alarm (
AL1
,
AL2
,
AL3
,
AL4
) displays the alarm on indicator on its Alarm
Mode screen, and in all modes. Turning on the snooze
alarm (
SNZ
) displays the alarm on indicator and
snooze alarm indicator on its Alarm Mode screen, and in
all modes.
• The alarm on indicator flashes while the alarm is
sounding.
• The snooze alarm indicator flashes during the 5-minute
intervals between alarms.
Snooze alarm indicator
Alarm on indicator
Module 2819
Module 2639
To turn the Hourly Time Signal on and off
1. In the Alarm Mode, use D to select the Hourly Time
Signal (
SIG
).
2. Press B to toggle it on (Hourly Time Signal on
indicator displayed) and off (Hourly Time Signal on
indicator not displayed).
• The Hourly Time Signal on indicator is displayed in all
modes when the Hourly Time Signal is turned on.
Hourly time signal
on indicator
Stopwatch
The stopwatch lets you measure elapsed time, split times,
and two finishes.
• The display range of the stopwatch is 23 hours, 59
minutes, 59.99 seconds.
• The stopwatch continues to run, restarting from zero
after it reaches its limit, until you stop it.
• Exiting the Stopwatch Mode while a split time is frozen
on the display clears the split time and returns to
elapsed time measurement.
• The stopwatch measurement operation continues even
if you exit the Stopwatch Mode.
• All of the operations in this section are performed in the
Stopwatch Mode, which you enter by pressing C.
1/100 second
Hours
Home city time
Seconds
Minutes
D
Start
Stop
Elapsed Time
➤
Re-start
Clear
D
➤
Stop
D
➤D
➤B
Split Time
D
Start
Split
➤
Split release
Clear
B
➤
Stop
B
➤D
➤B
Two Finishes
D
Start
Split
➤
Stop
Clear
B
➤
Split release
D
➤B
➤B
First runner
finishes.
Display time of
first runner.
Second runner
finishes.
Display time of
second runner.
To measure times with the stopwatch
(SPL displayed)
Backlight
The backlight uses an EL (electro-luminescent) panel that
causes the entire display to glow for easy reading in the
dark. The watch’s auto light switch automatically turns on
the backlight when you angle the watch towards your face
in the dark.
• The auto light switch must be turned on (indicated by
auto light switch on indicator) for it to operate.
• See “Backlight Precautions” for other important
information about using the backlight.
To turn on the backlight manually
In any mode, press L to illuminate the display for about
one second.
• The above operation turns on the backlight regardless of
the current auto light switch setting.
Auto light switch on indicator
Module 2819
Module 2639
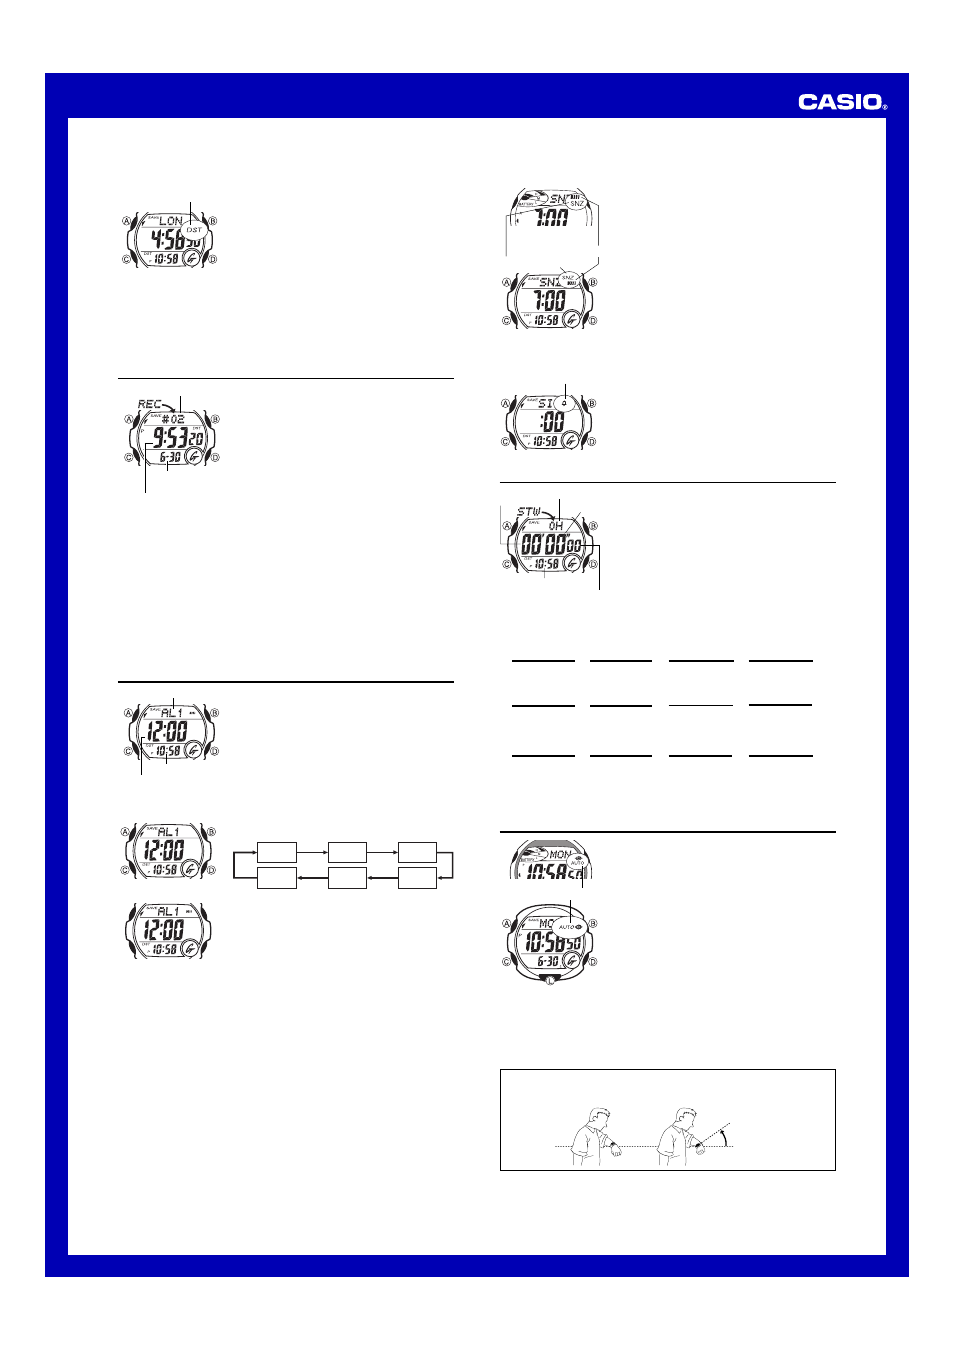
About the Auto Light Switch
Turning on the auto light switch causes the backlight to turn on for about one second,
whenever you position your wrist as described below in any mode. Note that this
watch features a “Full Auto EL Light,” so the auto light switch operates only when
available light is below a certain level. It does not turn on the backlight under bright
light.
Moving the watch to a position that is parallel to the ground and then tilting it
towards you at more than 40 degrees causes the backlight to turn on.
• Wear the watch on the outside of your wrist.
More than
40°
Parallel to
ground