TAMKO TAM-RAIL User Manual
Page 4
10. Determine the
location of the top
rail metal brackets
(marked “T”). Insert
balusters in the first
and last holes of the
bottom rail. (Fig. 7)
Align top rail over the
balusters and install.
Ensure the top rail is
fully nested and level
with the bottom rail.
Position the top rail
metal brackets on
the rail and mark the
bracket locations on
each post.
11. Remove the top rail.
Position the top rail metal brackets on the posts and install using four of
the screws provided. Use the 2" screws for mounting to a wood post, or
the 1" screws included in TAM‑RAIL Post Mount kit when mounting to
the TAM‑RAIL Post Mount System.
12. Insert balusters into the pre‑routed bottom rail holes.
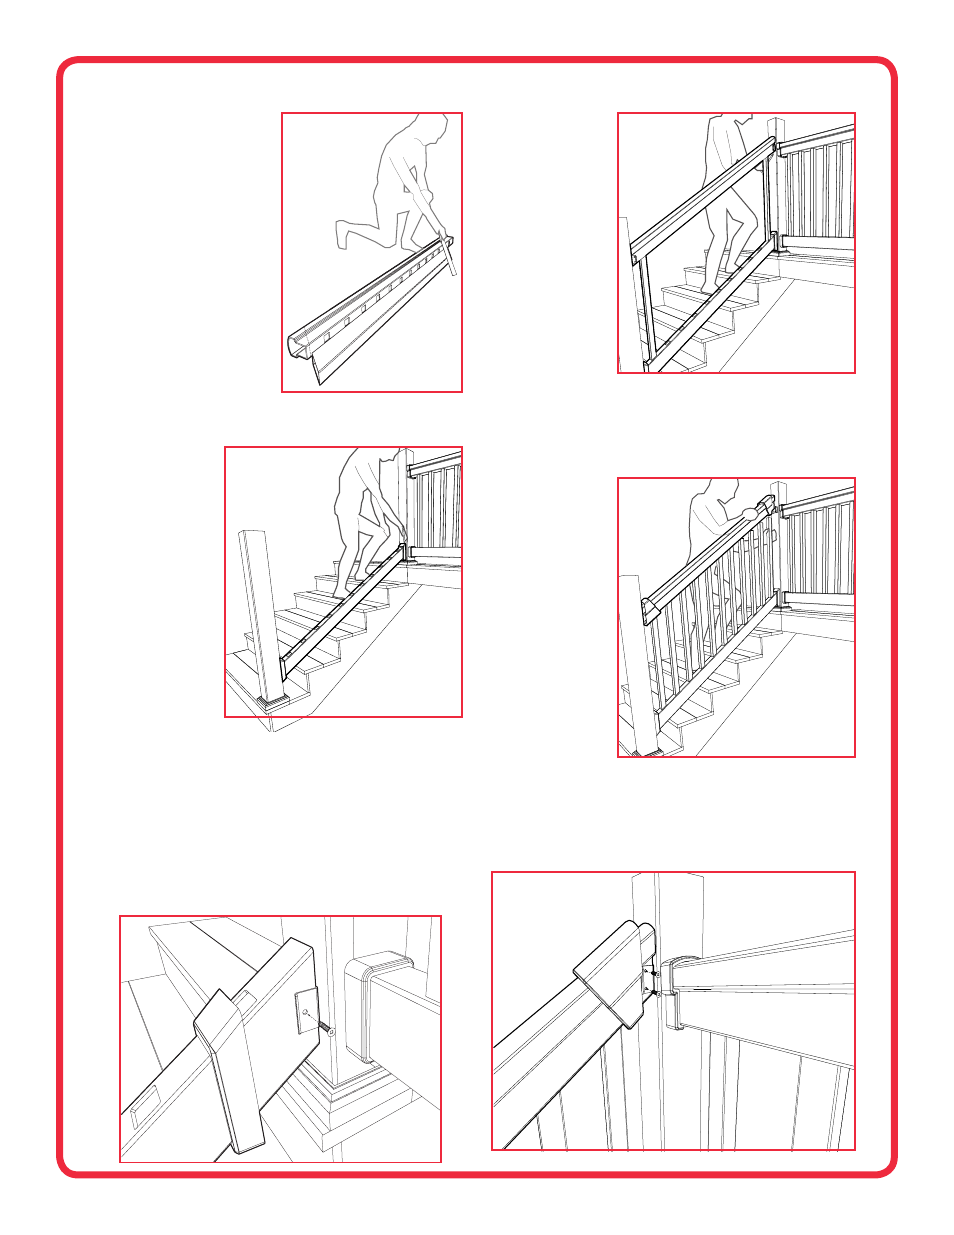
13. Slide bracket covers
over both ends of the
top rail. Align top rail
over the balusters
and insert balusters
one at a time until
the top rail is fully
installed.
(Fig. 8)
14. Secure top rail in
place by installing
two 1" screws on
both sides of the
metal brackets.
(Fig. 9) Snap bracket
covers over the
metal brackets.
NOTE: When
installing the bracket
covers over the metal brackets, it may be necessary to use a flat‑tipped
screwdriver or putty knife to assist the cover over the metal bracket.
FIG. 7
5. Lay the top rail beside the bottom
rail with baluster holes facing and
aligned. (Fig. 4) Using a straight
edge mark the continuation of
the bottom rail angle onto the
top rail. Ensure that the end
spacing from end of rail to first
baluster on each end of the top
rail matches the bottom rail end
spacing below. Cut the top rail.
6. Slide the bracket covers over
both ends of the bottom rail and
position the bottom rail between
posts at the desired height and
angle. Mark the location on the
posts. (Fig. 5)
SkIp STEp 7 If yOU arE
INSTallINg a 6' STaIr SECTION
7. Trim the crush block to accommodate the desired bottom rail clearance
and insert into the pre‑cut hole on the underside of the bottom rail.
Be sure to
check with your
local building
code officials
for any bottom
rail clearance
or rail height
requirements.
Improper clearance
or rail height could
cause a safety
hazard.
8. Position the bottom
rail metal brackets
(marked “B”) so that
they are centered
on both the post
and bottom rail and
install using two of
the screws provided.
Use the 2" screws for mounting to a wood post, or the 1" screws
included in TAM‑RAIL Post Mount kit when mounting to the TAM‑RAIL
Post Mount System.
9. Position the rail between the bottom rail metal brackets. (Fig. 6) Level the
rail at the desired angle and secure in place on both sides of the metal
brackets using two of the 1" screws provided. Snap the bracket covers
over the metal brackets.
NOTE: When installing the bracket covers over the metal brackets, it may
be necessary to use a flat‑tipped screwdriver or putty knife to assist the
cover over the metal bracket.
FIG. 4
FIG. 5
FIG. 8
FIG. 6
FIG. 9
4