Diaphragm and spring replacement – Nexen J 841600 User Manual
Page 10
10
FORM NO. L-20012-L-1209
''K'' DIAPHRAGM BRAKE
FIGURE 7
16
17
4
10
9
7
6
8
3
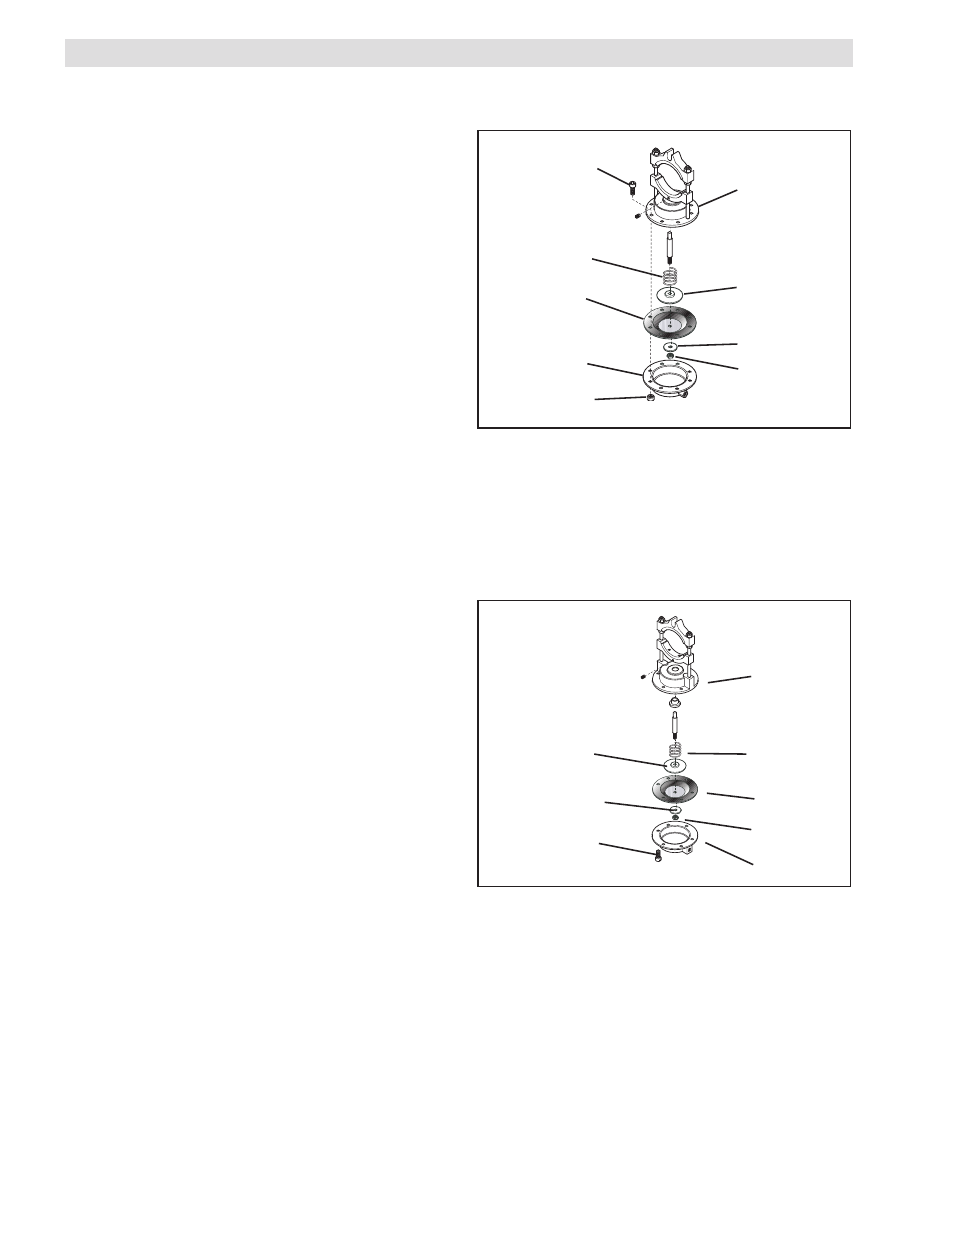
FIGURE 8
4
8
9
12
5
7
10
18
NOTE: Refer to Figure 7.
1. Remove the Cap Screws (Item 16) and Hex. Nuts
(Item 17).
2. Remove the Top Diaphragm Housing (Item 4).
3. Remove the Jam Nut (Item 10) and Washer (Item 9).
4. Remove the Diaphragm (Item 7), Push Plate (Item 6), and
Compression Spring (Item 8).
5. Inspect the Compression Spring (Item 8) for signs of
damage, and install a new Compression Spring if the old
Compression Spring is damaged.
6. Reinstall the Push Plate (Item 6).
7. Install a new Diaphragm (Item 7); then, reinstall the
Washer (Item 9) and Jam Nut (Item 10).
8. Using the Cap Screws (Item 16) and Hex. Nuts
(Item 17), secure the Bottom Diaphragm Housing
(Item 4) to the Housing Rod Assembly (Item 3).
DIAPHRAGM AND SPRING REPLACEMENT
''J'' DIAPHRAGM BRAKE
NOTE: Refer to Figure 8.
1. Remove the Socket Head Cap Screws (Item 18).
2. Remove the Bottom Diaphragm Housing (Item 5).
3. Remove the Jam Nut (Item 12) and Washer (Item 10).
4. Remove the Diaphragm (Item 9), Push Plate (Item 7), and
Compression Spring (Item 8).
5. Inspect the Compression Spring (Item 8) for signs of
damage. If the Compression Spring is damaged, install a
new Compression Spring.
6. Reinstall the Push Plate (Item 7).
7. Install a new Diaphragm (Item 9); then, reinstall the
Washer (Item 10) and Jam Nut (Item 12).
8. Use the Socket Head Cap Screws (Item 18) to secure
the Bottom Diaphragm Housing (Item 5) to the Top
Diaphragm Housing (Item 4).