Alto Professional STAGEDRIVE+ User Manual
Page 4
3
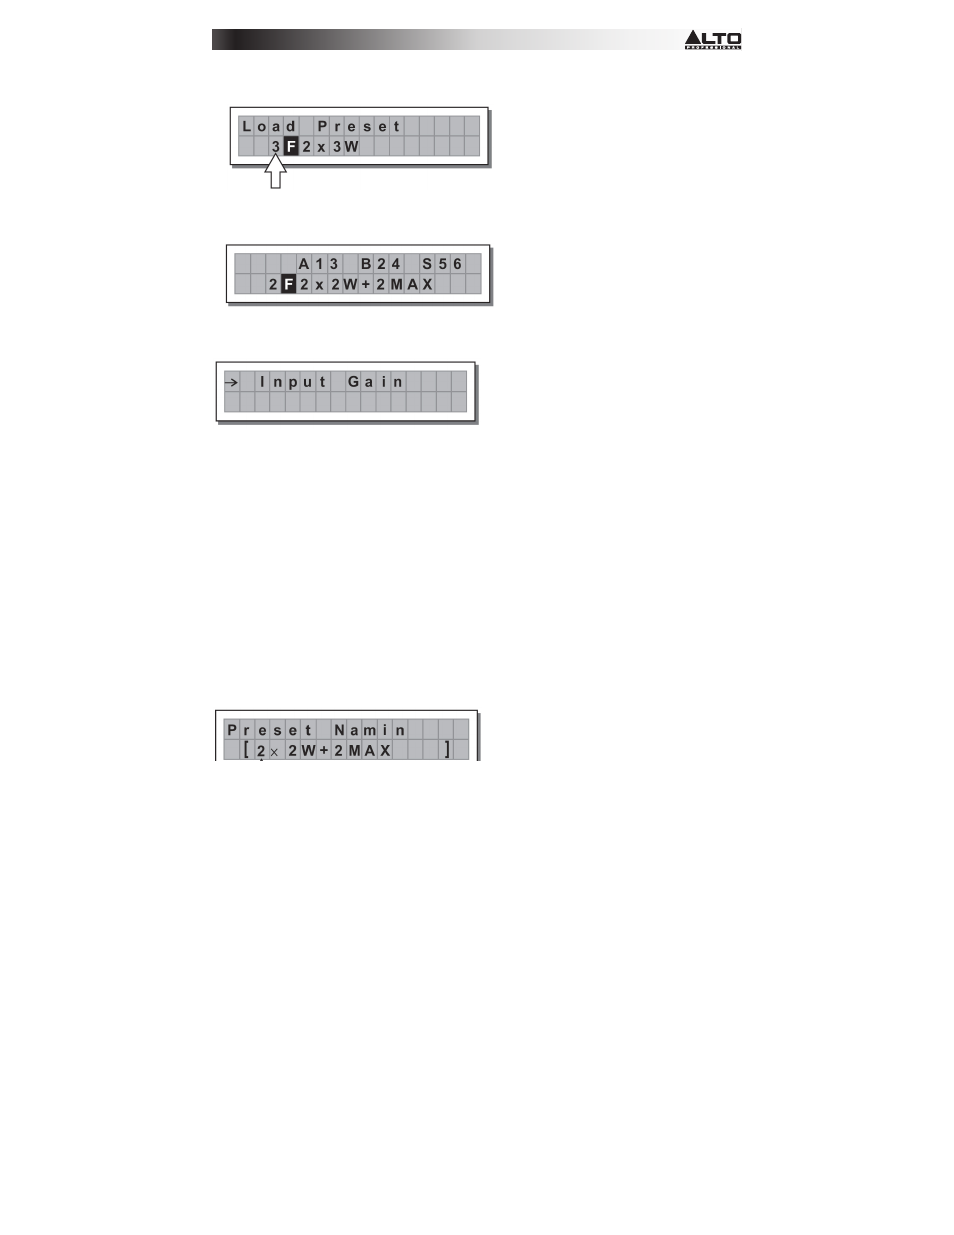
To Load a PRESET:
•
Use the DIAL to select a Factory PRESET (indicated by the letter F) and press ENTER to load the preset
into memory.
Adjusting the input gain
1.
Keep the STAGEDRIVE+ outputs in MUTE status (LEDs light on).
2.
Feed a signal in on the STAGEDRIVE+'s input and watch the LED meter.
3.
To obtain a good signal level, make certain the red INPUT LEVEL A-B CLIP LED does not light up
continually.
4.
Find out the output level setting for your mixer (or other unit) and connect it to the input of the
STAGEDRIVE+.
5.
Adjust the STAGEDRIVE+ input gain by pressing the MODE key until the EDIT menu LED lights up.
6.
Use the PREV and NEXT keys to go to the Input Gain page:
7.
Press ENTER.
The display will show the IN A Gain or IN A&B Gain page (according to the
configuration and other utilities
loaded in the memory):
8.
Use the DIAL to change the gain value and watch the level of the signal on the LED meter until ideal
values are reached. Then use the PREV and NEXT keys to access the IN B Gain page (if there is one,
which will depend on the configuration and the other utilities loaded in the memory).
To save a PRESET:
1.
Use the DIAL to select an area in which the PRESET is to be saved and press ENTER.
2.
Use the
and
keys to position the cursor on a character and use the DIAL to enter the
alphanumeric value.
3.
Edit the PRESET name if desired and press ENTER to save the changes or press ESC to abort.
COMM. SETUP SUBMENU
-
This submenu allows access to the setting of communication with other units
via the USB port.
Note: The ‘Dump Out Preset’ and ‘Incoming Dump’ functions are an exception, as they're
controlled directly in the PRESET menu.
Transmit PRESETS
-
Use this menu page to transmit PRESETS via the RS485 ports to copy PRESETS to
another STAGEDRIVE+.