Dsp (digital signal processor), Rear panel – Alto Professional RMX508DFX User Manual
Page 6
6
DSP (DIGITAL SIGNAL PROCESSOR)
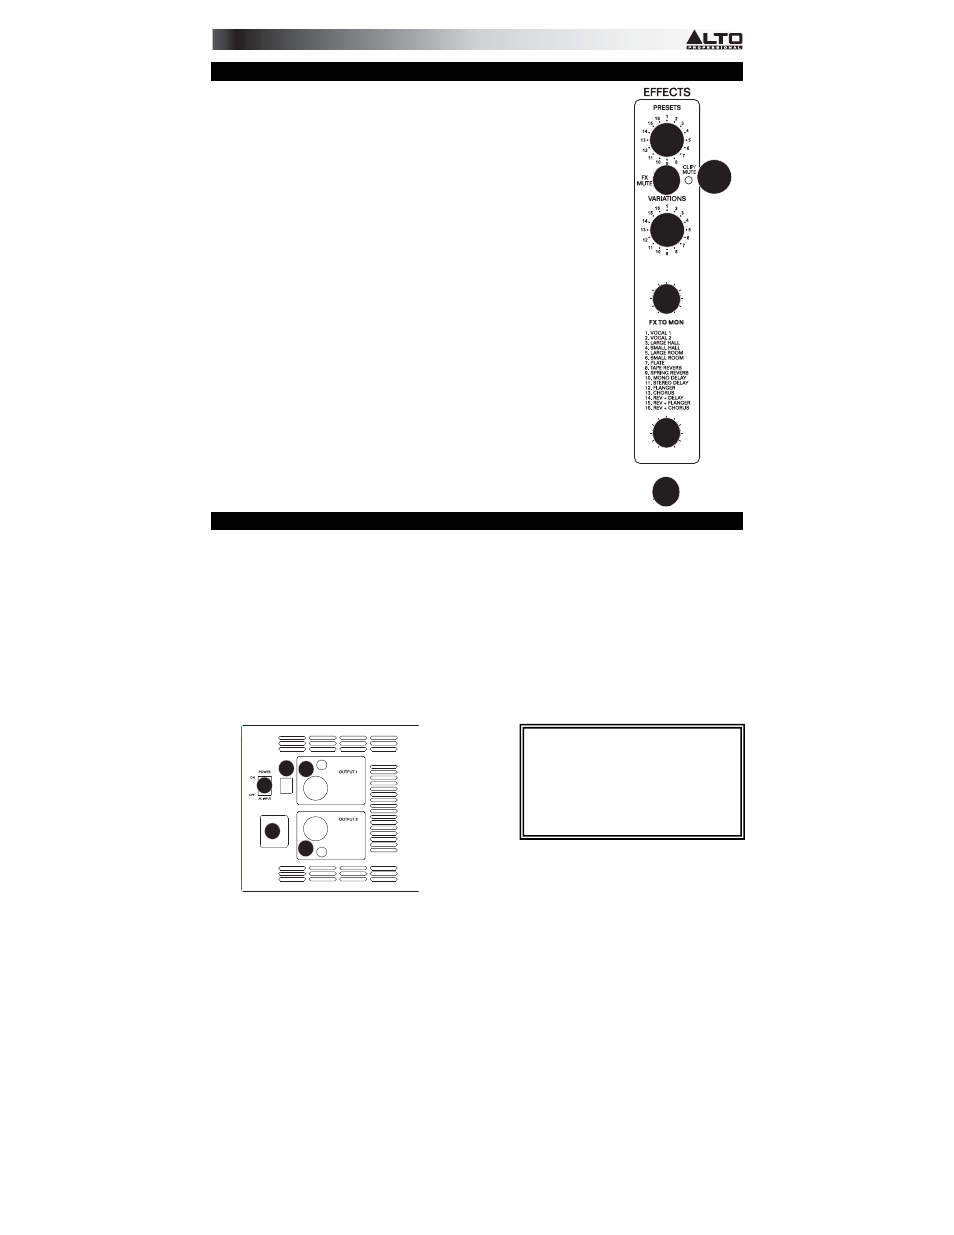
28.
EFFECTS SELECTOR – Selects the effect that the mixer's internal effects
processor will apply to the various channels. Each channel can send different levels
of audio to the processor by adjusting their Aux 2/FX Post knobs.
29.
FX MUTE – Press this button to mute/unmute the effects.
30.
VARIATIONS SELECTOR – Selects the amount of the effect applied to the various
channels.
31. Clip/Mute
LED-
This LED flashes when the signal input into the
digital multi-effect is
too strong. When the digital
effect module is muted by the (30) button the LED
also
lights up.
32.
FX TO MON-
This is used to control the volume of the
processed signal sent to
Monitor mix, which can
be varied from - to +10dB.
33.
FX TO MAIN-
This is used to control the volume of the
processed signal sent to
Main mix bus, which can
be varied from - to+10dB.
34. FOOTSWITCH
– When a latching-style footswitch is connected to this jack with a
1/4" TRS cable, it can be pressed to allow all channels to bypass the mixer's internal
effects processor.
REAR PANEL
35. POWER
SWITCH
– Turns the mixer on and off. Turn on the mixer after all input devices have been connected
and before you turn on amplifiers. Turn off amplifiers before you turn off the mixer.
36.
POWER IN – Use the included IEC power cable to connect the mixer to a power outlet. While the power is
switched off, plug the power supply into the mixer first, then plug the power supply into a power outlet.
37. SPEAKER
JACKS-
These jacks are used to connect speakers. They are configured with 4-way
Speakon
connectors and 1/4" phone jacks. You can determine the signal that is
output to these jacks according to the
setting of the AMPLIFIER MODE select
switch.
Note: In order to avoid damage to the built-in amplifier, please pay attention to the allowed impedance
of the speaker. Very low load impedances may damage
the amplifier. Look at this plate on your unit for
reference.
38. AC
Select
Switch-
Set this to the correct voltage for your location standard. The Voltage selector will be
secured with a cover. If you remove this, only remove one screw at a time to ‘catch’ the switch from falling in
the unit.
* WARNING: Units bought in the US are
pre-set to US voltage. Units purchased in
EU/UK are preset to 220/240 voltage.
Action should not have to be taken unless
you’re traveling to other companies or are
in a country with varying voltage.
Selecting the improper voltage can
damage the unit.
37
37
38
35
36
FOOTSWITCH
FOOTSWITCH
10
0
FX TO MAIN
FX TO MAIN
10
0
28
31
29
30
32
33
34