Installing a sata hard drive for nise 2400 – NEXCOM NISE 2400 User Manual
Page 59
Advertising
Copyright © 2015 NEXCOM International Co., Ltd. All Rights Reserved.
45
NISE 2400 Series User Manual
Chapter 3: System Setup
1. Remove the bottom cover before installing a SATA HDD.
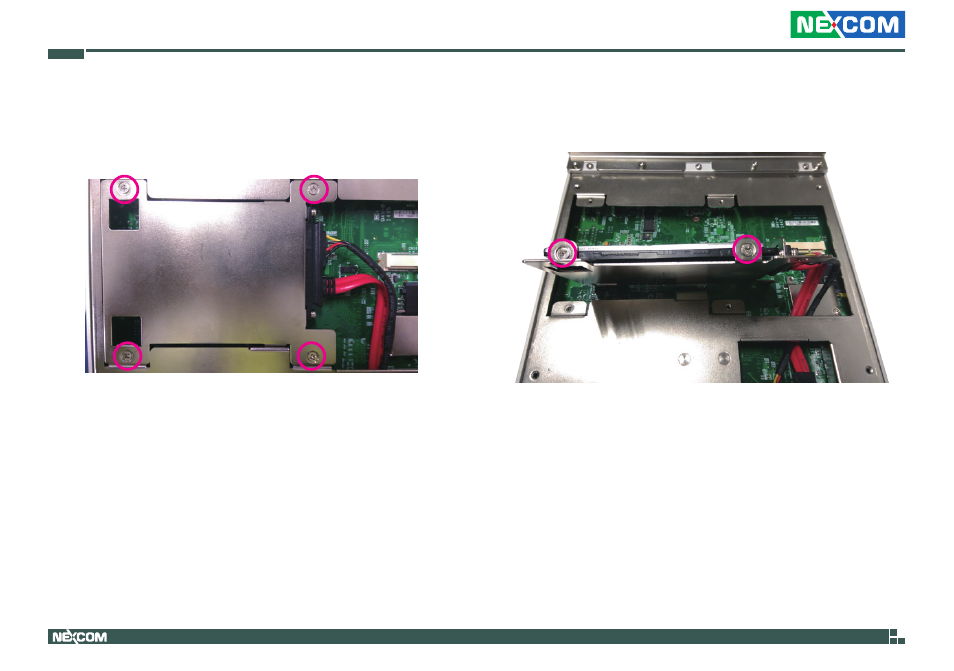
2. Remove the 4 screws around the empty HDD bracket.
Installing a SATA Hard drive for NISE 2400
3. Use the screws to secure the 2.5” HDD drive in place.
Advertising
This manual is related to the following products: