NEXCOM PDSP 0811 User Manual
Page 19
Advertising
Chapter 3: Player web management console
Copyright © 2012 NEXCOM International Co., Ltd. All Rights Reserved.
16
PowerDigis V2 Player User Manual
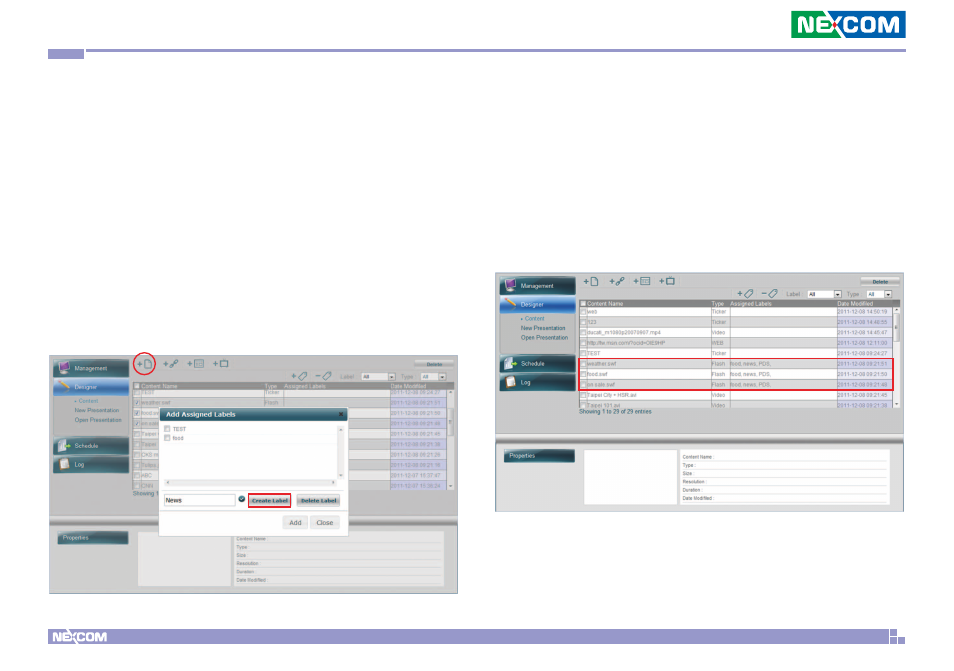
After all the content files are created, you can see them listed in the
content table. Follow the below steps to further label the content files if
necessary:
Add Labels
Step 1. From the content table, select the files to be labeled.
Step 2. Click “Add Labels” icon at the right top of the content table
Step 3. In the pop-up window, enter a new label name and click Create
Label button
Step 4. Repeat Step 3 to create more labels
Step 5. From the label list, select one more labels to be assigned to
previously selected content files. Click Add. You can see the assigned
labels listed in the content table.
Advertising