Oklahoma Sound #LSS User Manual
Page 6
6
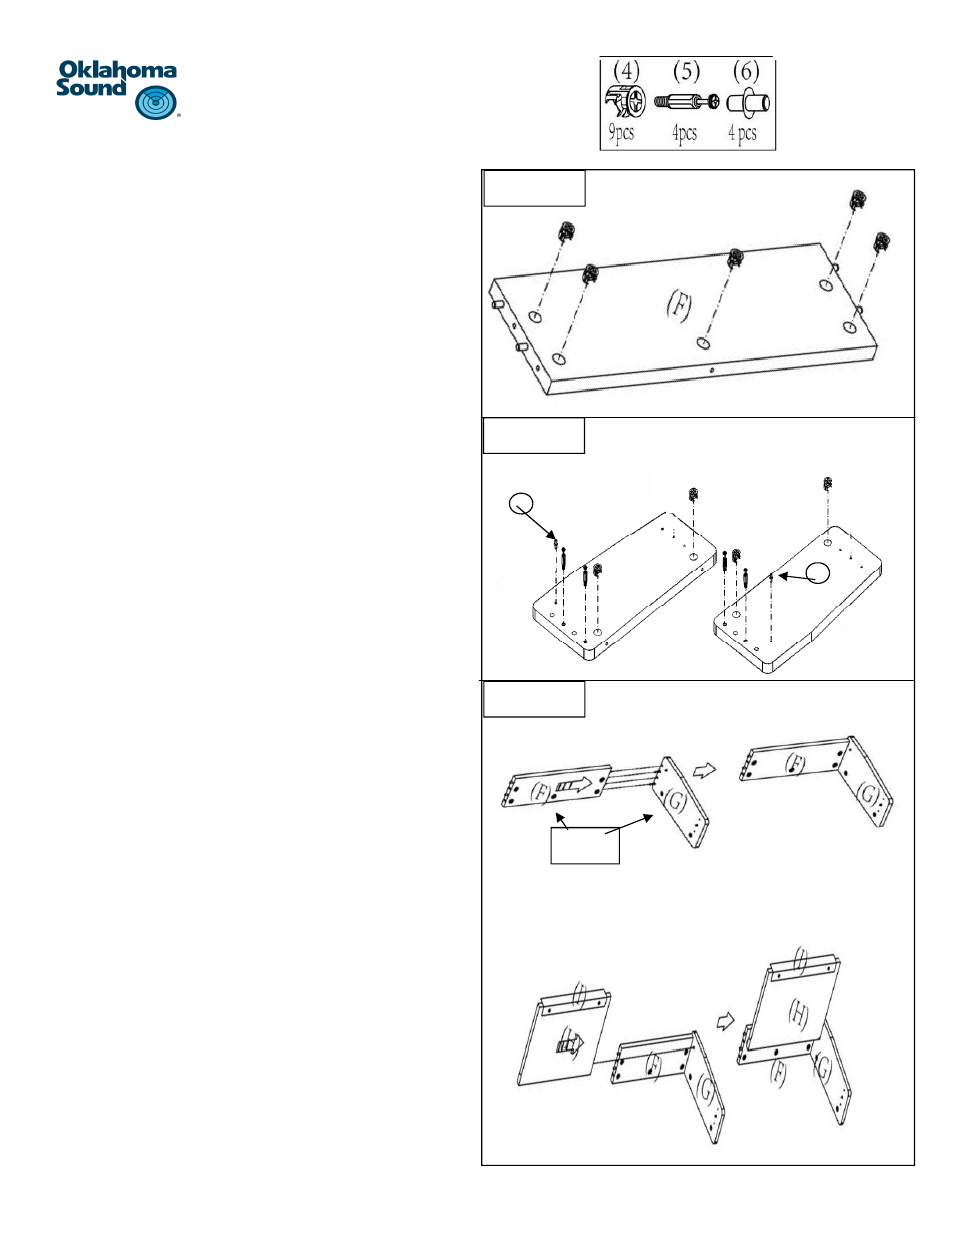
Step 8:
a) Locate panels # F and lay it down on a clean, soŌ sur-
face with the predrilled holes facing up as shown.
b) Insert five cam locks part # 4 into the five holes on the
panel.
c) Be sure to always insert the cam locks with the
arrow +/- facing the edge of the panel so the
cam bolt can be inserted with ease.
Step 9:
a) Locate panel #E and #G and lay them down on a
clean, soŌ surface with the holes facing upwards.
b) Insert two cam locks #4 as shown in each panel.
c) Install two cam bolts # 5 as shown into the pre-
installed plasƟc inserts using a Phillips screw driv-
er.
d) Insert one metal pin part #6 in the pre drilled
holes on both panels #E and #G as shown.
Step 10:
a) AƩach rear panel #F with right panel #G by align-
ing the cam bolts on panel #G with cam lock holes
at the edge of panel #F. Be sure to align the
boƩom of panel #F with the boƩom of panel #G.
The boƩom side of panel #F has three cam locks.
b) The dowels at the edge of panel #F should also
align with holes of panel #G.
c) Once aligned proceed to insert the cam bolts into
the cam locks unƟl the two panels are completely
flush.
d) Proceed by turning the cam locks using a Phillips
screwdriver to lock the two panels together.
e) Proceed by aligning the predrilled hole on the
side of panel #H with the pin #6 on panel #G as
shown.
#6
#6
STEP 9
STEP 8
STEP 10
BoƩom
(H)