Rcm-4 applications (continued), Page 7 – Oxmoor RCM-4 User Manual
Page 9
RCM-4 APPLICATIONS (CONTINUED)
Page 7
control lines to each RCM-4. The linking function
allowed by Control Line 3 and its RCM-4 makes
still more combinations available.
Note that multiple combined zones may be
operated concurrently. For example, the systems
described by Figures 6.1-I, 6.2-A and 6.2-C may be
selected to function simultaneously as three
separate systems.
If it is desired that zones 1-6 be combined, then all
control lines used to achieve Figures 6.1-I and
Figure 6.3-G must be taken to common. Similarly,
if all zones (1-8) are to be combined, all the
switching used to achieve Figures 6.1-I, 6.2-I and
6.3-G must be employed (all control lines to
common).
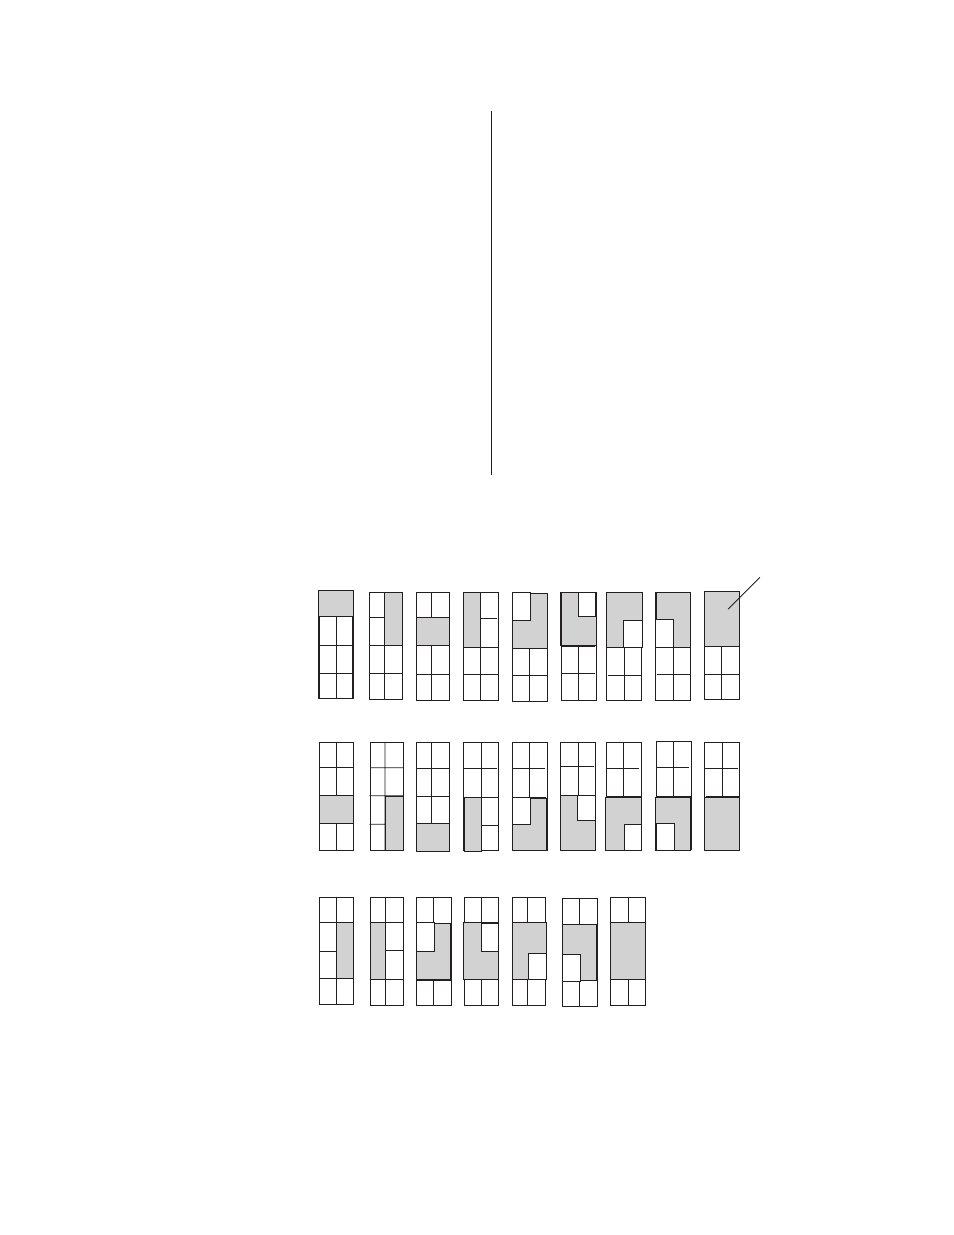
Figure 6.0 illustrates the switching flexibility that
may be realized by using multiple RCM-4 Room
Combining Modules. In this example, up to eight
Oxmoor RC-16 Remote Controls can be combined.
Control line #1 provides linkage between two,
three or all four of the zones designated 1 through
4. Control line # 2 and its RCM-4, offers identical
room combination possibilities within zones 5-8.
Control line # 3 goes to a third RCM-4 which
allows the same kind of combining within zones 3-
6. This RCM-4 adds the significant advantage of
allowing zones 3 and 6 and zones 4 and 5 to be
linked. This makes it possible to combine any of the
first four zones with any of the last four.
Figures 6.1, 6.2 and 6.3 show the combinations
available from system closures connected by
5
6
8
7
1
2
4
3
5
6
8
7
1
2
4
3
4
3
5
6
8
7
4
3
5
6
8
7
2
3
2
1
4
5
6
8
7
1
4
3
5
6
8
7
2
2
1
4
5
6
8
7
3
4
2
3
5
6
8
7
1
2
3
5
6
8
7
4
A
B
C
D
E
F
G
H
I
Figure 6.1:
Room Combinations
Using Control Line # 1
Combined rooms are
shown by shaded area.
5
6
8
7
1
2
4
3
5
6
8
7
1
2
4
3
4
3
5
6
8
7
4
3
5
6
8
7
2
3
2
1
4
5
6
8
7
1
2
1
1
4
3
5
8
7
2
2
1
4
5
6
8
3
4
2
3
6
8
7
1
5
6
7
2
3
5
6
7
4
1
8
B
C
D
E
F
G
A
H
I
Figure 6.2:
Room Combinations
Using Control Line # 2
4
1
5
6
8
7
1
2
4
3
4
3
5
6
8
7
4
5
6
8
7
2
4
3
8
7
2
2
3
6
8
7
1
1
2
1
6
3
5
2
3
5
6
7
1
8
4
5
8
7
1
2
4
3
6
A
B
C
D
E
F
G
Figure 6.3:
Room Combinations
Using Control Line # 3
NOTE: Additional combinations are possible using all three control lines together.