Running aw screen frame cutter, Quick install and setup – Analog Way AW SCREEN FRAME CUTTER - Ref. AWSFC User Manual
Page 2
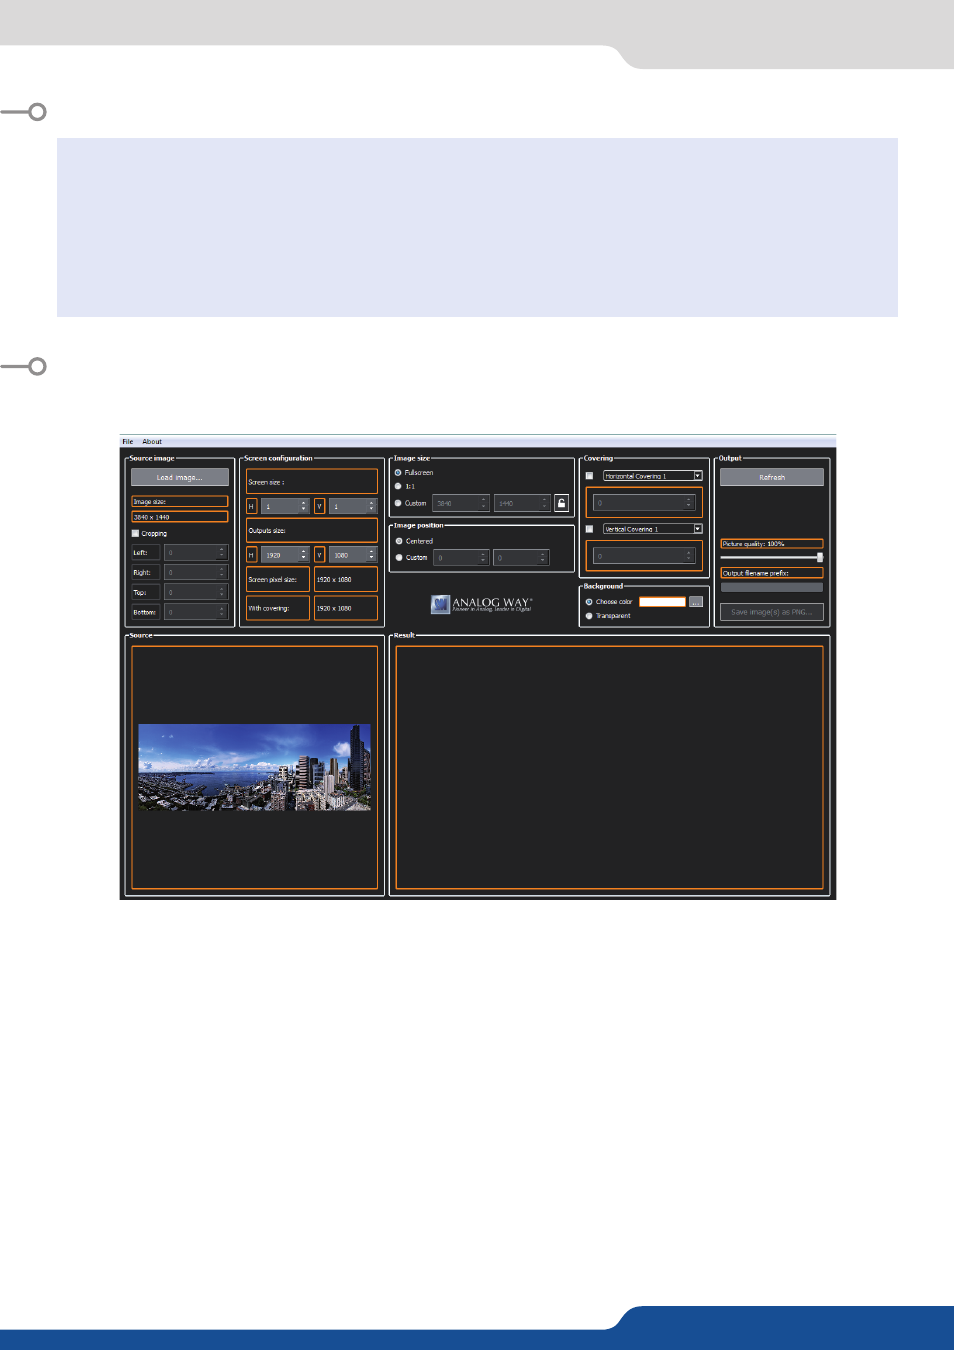
RUNNING AW SCREEN FRAME CUTTER
1. Load the original image
Click the Load image button and select the picture you want to load. The image appears on the bottom left
area. If necessary you can also enable the Cropping option and change the crop settings to suit your needs.
2. Configure your destination screen
In the Screen configuration panel, adjust the size of your destination screen, i.e. the number of projectors
blended vertically and horizontally. Then configure the projector resolution. Click the Refresh button to
update the preview.
3. Configure the image size and position
In the Image size panel, select the transformation that needs to be applied to the destination image: If you
select the Fullscreen option, the original image will be stretched to fit the destination screen. In this case, it
is recommended that the source image resolution matches the exact resolution of the total number of pixels
used in all projectors. If you select the 1:1 option, the original image will not be resized. If you choose the
Custom option, the original image will be resized to the desired dimensions.
QUICK INSTALL AND SETUP
• Installing AW Screen Frame Cutter on Windows
• Installing AW Screen Frame Cutter on Mac OS X
Download the latest version of the AW Screen
Frame Cutter installer for Windows (the file name
is SetupAWScreenFrameCutter_<version>.exe).
Double-clicking this file launches the installer that
will install AW Screen Frame Cutter on your system.
Download the latest version of the AW Screen
Frame Cutter installer for Mac OS X (the file name
is SetupAWScreenFrameCutter_<version>.pkg).
Double-clicking this file launches the installer that
will install AW Screen Frame Cutter on your system.