Running aw screen frame cutter – Analog Way AW SCREEN FRAME CUTTER - Ref. AWSFC User Manual
Page 3
Whether you have selected the 1:1 or the Custom option, you can also adjust the image position inside the
destination screen: Select the Center option if the image needs to appear centered, or select the Custom
option to adjust the position precisely inside the screen. Click the Refresh button to update the preview.
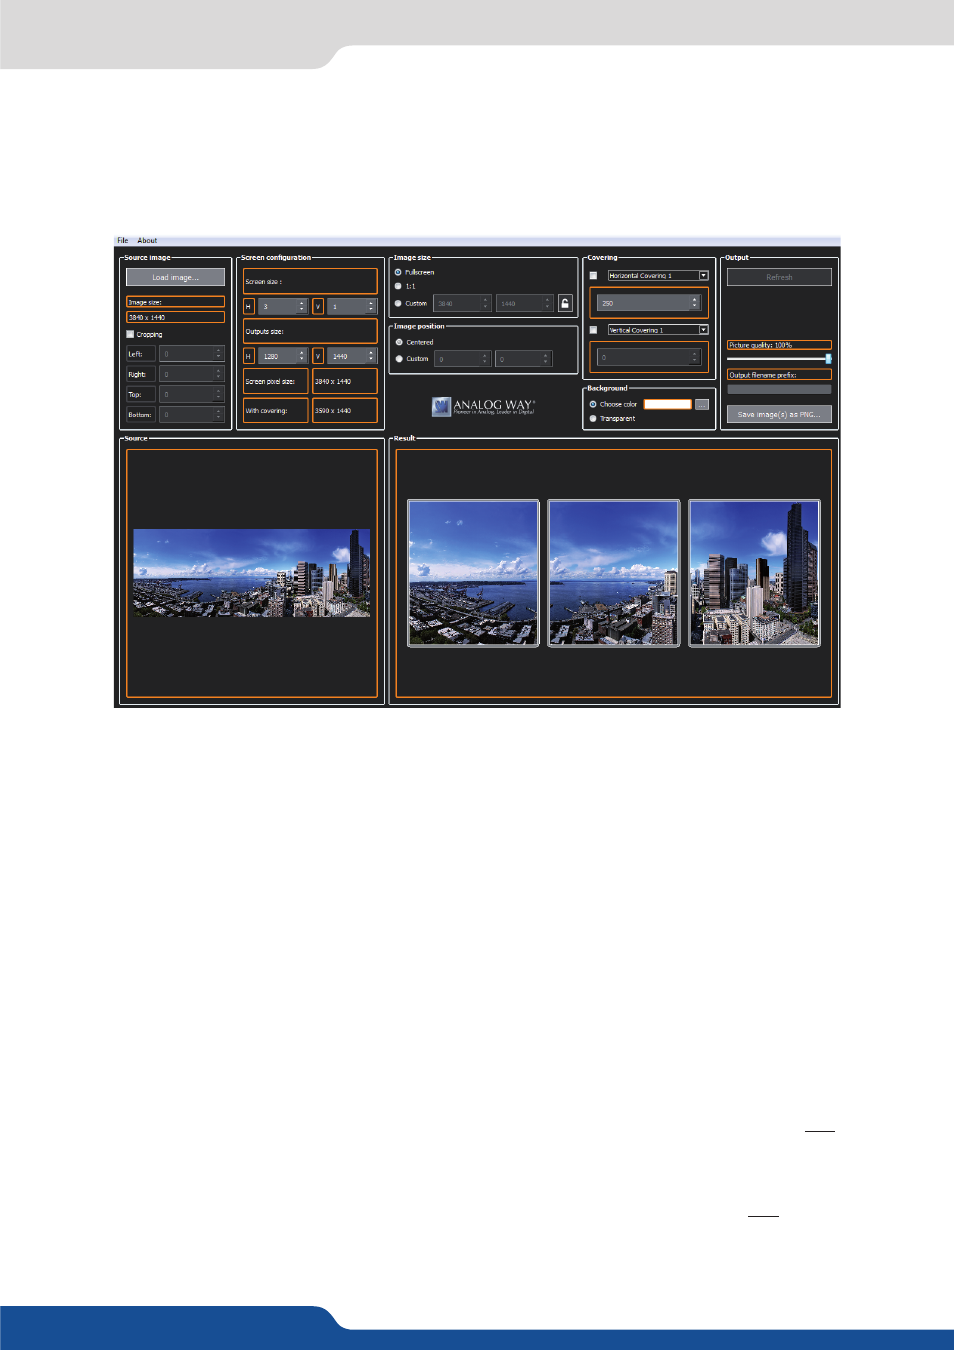
4. Configure the overlapping areas (covering)
To create a seamless blend between two or more projected images, the projectors must be overlapped
(usually by 15%–25%). This means the background pictures must also include accurate overlapping areas.
To adjust each overlap area, select the corresponding item in the Covering panel horizontal or vertical drop-
down list control then set the covering to the desired value. If you want to harmonize all vertical or horizontal
areas, make sure to check the box in front of the corresponding drop-down list control.
Click the Refresh button to update the preview.
5. Create and save the image(s) for your blend
Set the quality level you want to use when exporting images (100% being the highest quality, 50% the lowest).
Click the Save image(s) as PNG button and select the destination folder to export the background images
(output format is PNG). The default naming convention for exported images is originalname_x_y.png (where
x is horizontal index and y is the vertical index). If you would prefer to use another prefix for these files, simply
enter your text in the field Output filename prefix before pressing the Save image(s) as PNG button.
6. Save the current configuration
Choose Save configuration from the File menu to save the current settings to configuration file (.dat).
7. load a saved configuration
Choose Load configuration from the File menu to load settings from a configuration file (.dat).
RUNNING AW SCREEN FRAME CUTTER