Beurer UB 90 User Manual
Page 15
15
Additional information UB 100
The area intended for the head cannot
be heated.
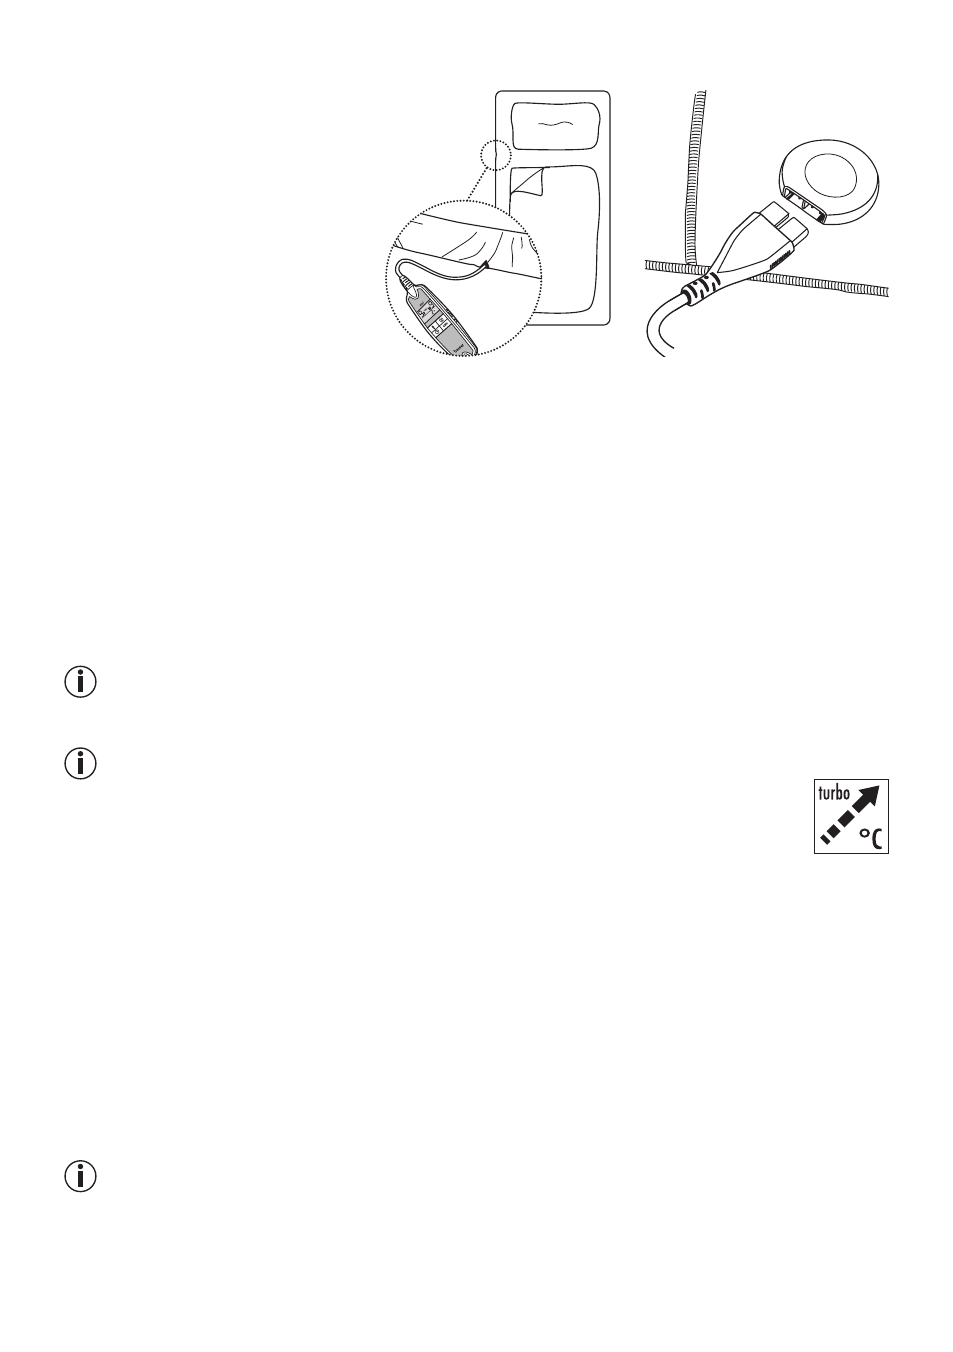
Guide the plug-in coupling plug through
the slot on the side section [9] and then
connect the switch to the electric under-
blanket by plugging together the plug-in
coupling [8] (see figure).
Then pull the side section over the sides
of your mattress like a fitted sheet. The electric underblanket is designed to fit 90 x 200 cm as well as 100 x 200
cm mattresses. If the cable length is insufficient, you can order a longer power supply cord with the material
number 108.424 from our specified Customer Service. Then fit your fitted sheet as usual with the electric
underblanket positioned between your mattress and the fitted sheet.
4.3 switching on
Slide the ON/OFF switch [6] sideways [1] to the ON ( I ) position to switch on the electric underblanket.
When switched on, the display [2] lights up and at first displays all the segments for approx. 2 seconds. After
that, the following basic settings are displayed:
Temperature setting for body area: 0
Temperature setting for foot area: 0
Automatic switch-off time: 1 h (= 1 hour)
NOte:
The illuminance level drops after approx. 5 seconds so that your sleep is not disturbed during the night.
NOte:
This electric underblanket has a rapid heating function, allowing for faster warming in the
first 15 minutes. During this time, “Turbo” flashes on the display.
If the underblanket is rapidly switched off and then on again during the first 15 minutes,
the fast heating function is deactivated for safety reasons.
In this case the word “Turbo” does not appear on the display. However the electric underblanket is
heated as normal.
To reactivate the fast heating function the electric underblanket must be completely switched off for
20 minutes.
4.4 selecting the temperature setting
Press the button [3] to select the temperature setting for the body area.
Press the button [5] to select the temperature setting for the foot area.
Level 0:
off
Level 1:
minimum heat
Level 2 – 8: individual heat
Level 9:
minimum heat
NOte:
Switching sequence of the temperature settings: 0 – 9 – 8 – 7 – 6 – 5 – 4 – 3 – 2 – 1 – 0 – 9 ...