Gebrauchsanleitung 1. inbetriebnahme – Beurer GS 320 User Manual
Page 2
2
G
Operating Instructions
F
Mode d’emploi
E
Modo de empleo
I
Istruzioni per l’uso
O
Gebruikershandleiding
P
Instruções de utilização
T
Kullanma Talimatı
K
Οδηγίες χρήσης
c
Betjeningsvejledning
S
Bruksanvisning
N
Bruksveiledning
t
Käyttöohje
r
Инструкция по
применению
Q
Instrukcja obsługi
z
Návod k použití
n
Navodila za uporabo
H
Használati utasítás
R
Instrucţiuni de utilizare
Gebrauchsanleitung
1. Inbetriebnahme
G
Getting started
F
Mise en service
E
Puesta en marcha
I
Messa in funzione
O
Ingebruikname
P
Colocação em
funcionamento
T
İlk çalıştırma
K
Έναρξη λειτουργίας
c
Ibrugtagning
S
Börja använda vågen
N
Bruk
t
Käyttöönotto
r
Ввод в эксплуатацию
Q
Uruchomienie
z
Uvedení do provozu
n
Prvi vklop
H
Üzembe helyezés
R
Punerea în funcţiune
ليغشتلا
D
Uhrzeit einstellen
Drücken Sie SET für
mindes tens 3 Sekunden,
bis die Stun den anzei ge
im Display zu blinken
beginnt.
Mit ▲ und ▼ können Sie
nun die Stunden richtig
einstellen. Um Ihre Ein-
gabe zu bestätigen,
drücken Sie SET.
Nun blinken die Minuten-
ziffern, die Sie mit ▲ und
▼
einstellen können. Be-
stätigen Sie Ihre Eingabe
mit SET.
G
Setting the time
Press SET for at least
3 seconds until the hour
setting in the display be-
gins to flash.
You can now set the cor-
rect hour using ▲ and
▼
. To confirm your entry,
press SET.
Now the minute digits
will flash. You can set
them using ▲ and ▼.
Confirm the entry by
pressing SET.
F
Régler l’horloge
Appuyez sur SET pen-
dant au moins 3 se-
condes jusqu’à ce que
l’affichage de l’heure
commence à clignoter à
l’écran.
Utiliser ▲ et ▼ pour ré-
gler précisément les
heures. Pour confirmer
votre saisie, appuyez
sur SET.
Désormais, les chiffres
des minutes clignotent,
que vous pouvez régler
avec ▲ et ▼. Confirmez
votre saisie avec SET.
E
Ajuste de la hora
Pulse SET durante 3 se-
gundos como mínimo
hasta que comience a
parpadear la indicación
de la hora en la pantalla.
Ahora puede ajustar las
horas correctamente con
▲
y ▼. Para confirmar su
entrada pulse SET.
Ahora parpadean las
cifras de minutos, que
puede ajustar con ▲ y ▼.
Confirme su entrada
con SET.
I
Impostare l’ora
Premere SET per almeno
3 secondi, fino a quando
l’indicatore dell’ora nel
display comincia a lam-
peggiare.
Impostare l’orario cor-
retto utilizzando ▲ e ▼.
Premere SET per confer-
mare l’inserimento.
Ora lampeggiano le cifre
dei minuti che possono
essere impostate con ▲
e ▼. Confermare l’inseri-
mento con SET.
O
De tijd instellen
Druk ten minste 3 se-
conden op de toets SET
totdat de urenweergave
in de display begint te
knipperen.
U kunt nu de juiste tijd
instellen met behulp van
de toetsen ▲ en ▼. Druk
op de toets SET om de
invoer te bevestigen.
Nu knipperen de cijfers
voor de minuten die u
met ▲ en ▼ kunt instel-
len. Bevestig de invoer
met de toets SET.
P
Acertar a hora
Prima o botão SET du-
rante, pelo menos, 3 se-
gundos até a indicação
das horas começar a
piscar no visor.
Agora, use os botões ▲
e ▼ para acertar a hora
correcta. Para confirmar
a sua entrada, prima o
botão SET.
Agora, começam a pis-
car os algarismos dos
minutos que também
poderá acertar com ▲ e
▼
. Confirme, premindo o
botão SET.
T
Saati ayarlayın
Saat göstergesi yanıp
sönmeye başlayana ka-
dar SET düğmesine en
az 3 saniye basın.
▲
ve ▼ ile saati doğru
şekilde ayarlayabilirsiniz.
Girişinizi onaylamak için
SET düğmesine basın.
Şimdi ▲ ve ▼ ile ayarla-
D
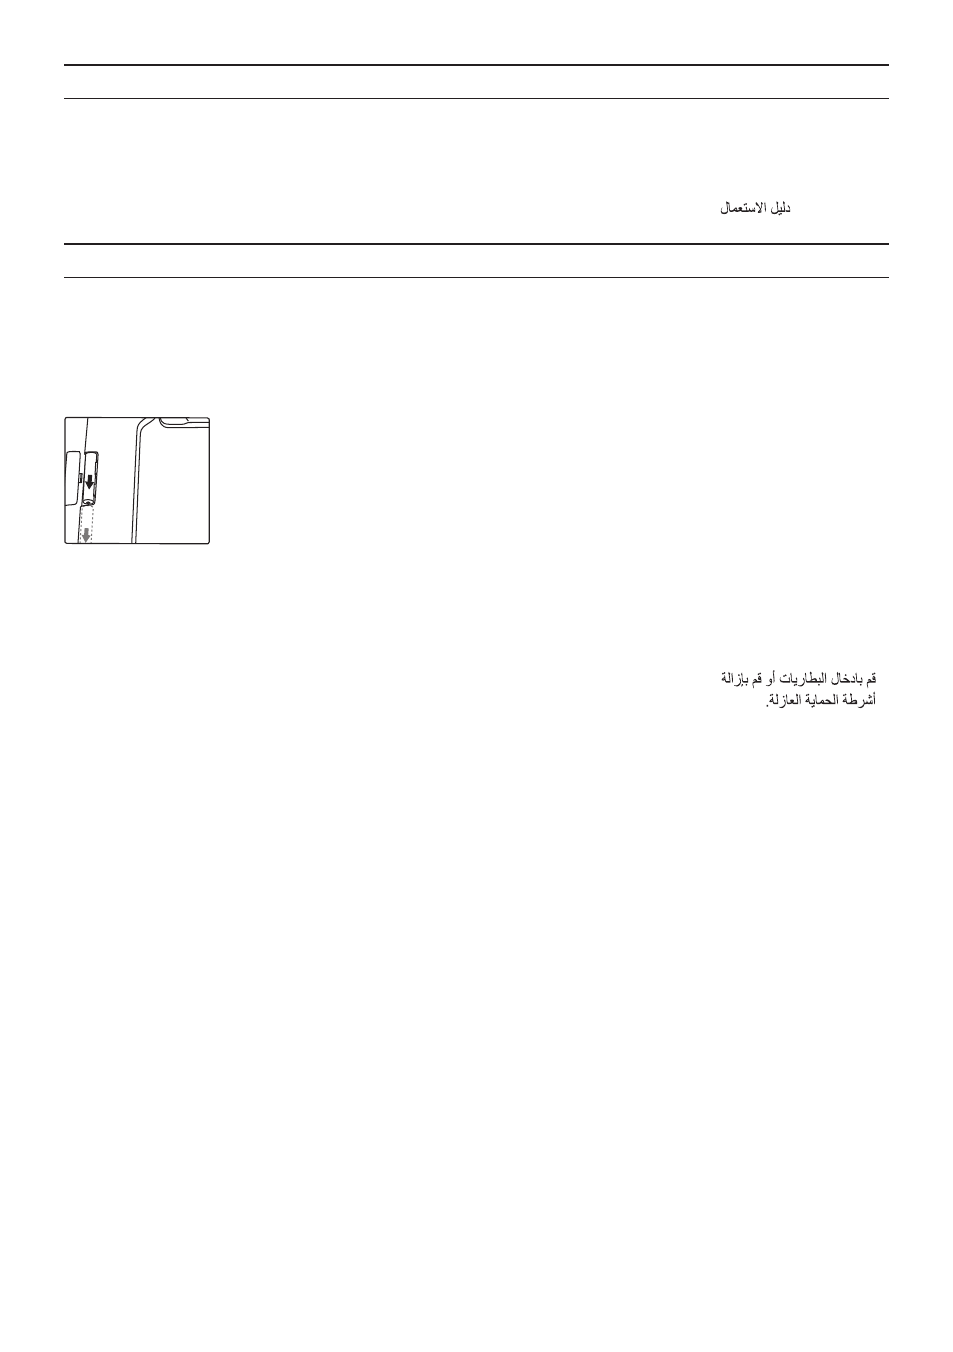
Batterie einlegen oder
Isolierschutzstreifen
entfernen.
G
Insert batteries or
remove insulating strip.
F
Insérez les piles ou
retirez la bande de
protection isolante.
E
Colocar las pilas o quitar
las tiras de protección de
aislamiento.
I
Inserire le batterie o
rimuovere la linguetta di
protezione.
O
Plaats de batterij of ver-
wijder de isolatieband.
P
Colocar a pilha ou retirar
a fita de isolamento.
T
Pili takın veya izole
koruma bandını çıkartın.
K
Τοποθετήστε τη μπαταρία
ή αφαιρέστε την προστα-
τευτική ταινία μόνωσης.
c
Indsæt batteri eller fjern
isoleringsstrimmel.
S
Lägg in batteriet eller ta
bort skyddsrem-sorna.
N
Sett inn batteri eller fjern
isoleringsstripene.
t
Aseta paristo paikalleen
ja poista eristyssuoja-
nauha.
r
Вставьте батарейку
или удалите защитную
изоляционную полоску.
Q
Włożyć baterię lub
usunąć ochronny pasek
izolacyjny.
z
Vložte baterii nebo
odstraňte izolační
proužek.
n
Vstavite baterijo ali
odstranite izolirni zaščitni
trak.
H
Helyezze be az elemet,
vagy távolítsa el
a szigetelőcsíkot.
R
Introducerea bateriilor
sau scoaterea benzilor
de protecţie pentru
izolare.
4 x AAA
1,5 V