Installation for countertop basins – Blu Bathworks SA0102 User Manual
Page 3
2
1 866 907 0122 blubathworks.com
2014-05
®
Installation for Countertop Basins
NOTE: There is no template supplied with these basins
PREPARATION
1. Use the basin as a template.
2. Position the basin in the correct desired location and using a non-permanent marker draw an outline of the basin and
drain hole.
3. Note: Allow adequate clearance between the backsplash and the lavatory. If the basin is being combined with either
a deck mounted or wall faucet, mark the desired faucet location, making sure the chosen faucet has adequate
clearance and reach.
INSTALLATION
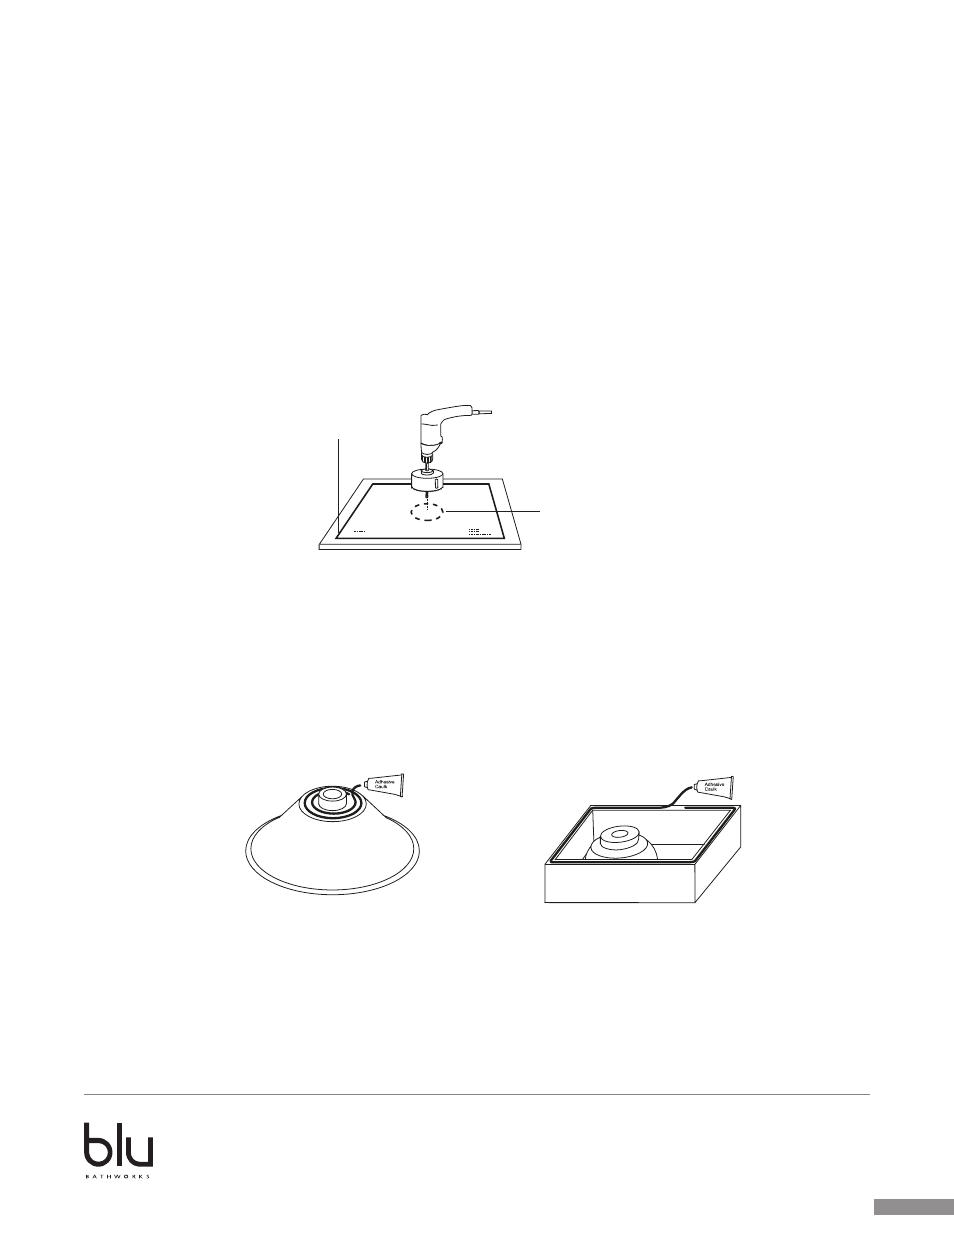
4. Cut or drill out the drain opening on the counter top using the appropriate drill by following the drain opening cut line
as illustrated.
5. Temporarily set the lavatory on the counter top to check for fit.
6. Install the faucet and drain fittings (not included) per the manufacturer’s instructions.
7. Apply 2 beads of adhesive caulk (not provided) on the bottom surface of the lavatory. Apply the first bead approx. 1/4”
(6.35 mm) from the outside edge. Apply the second bead about 5/8” (15.875 mm) from the first bead.
On basins with a narrow rim: Apply a bead of adhesive caulk on the bottom surface of the lavatory. See illustration.
FINISHING
8. Finish up the faucet and drain connections.
9. Run water into the lavatory and check for leaks.
Outline of basin
Outline of drain hole
Outline of basin
Outline of drain hole
Outline of basin
Outline of drain hole