Under-counter basin, Installation – Blu Bathworks SA0102 User Manual
Page 4
3
1 866 907 0122 blubathworks.com
2014-05
®
4
Under-Counter Basin
NOTE: There is no template supplied with these basins
PREPARATION
1. Install the basic plumbing components: water inlet and drain
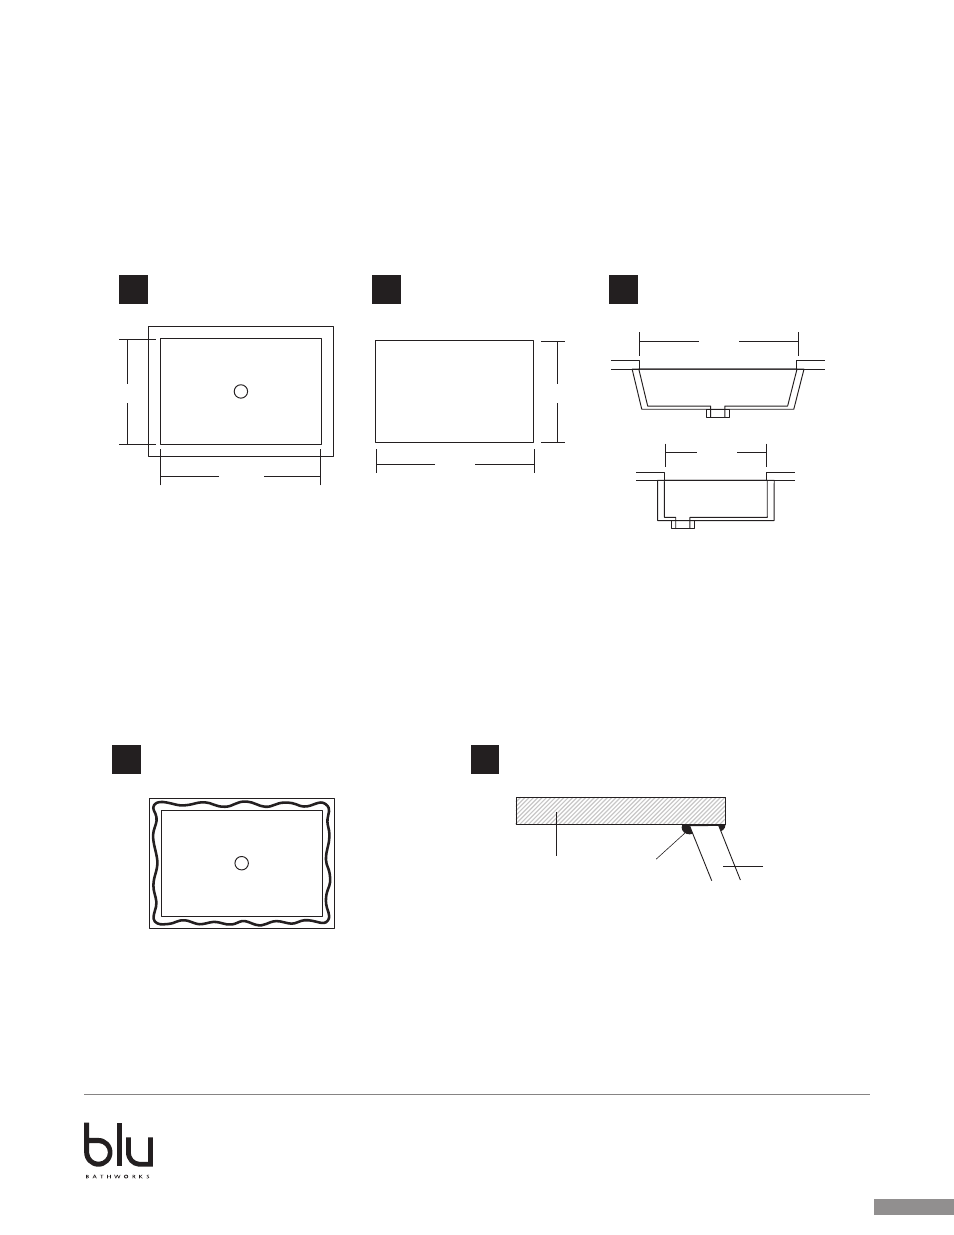
2. Determine the size of your opening based on the basin chosen. For example a basin with inside dimensions of
19-3⁄4” x 13” (Fig 1), will require a counter opening of 19-1⁄2” x 12-3⁄4” (Fig 2 & 3), ie 1⁄4” less in both depth and
length.
3. Install the basin drain. Read the manufacturer’s instructions to ensure you are installing the equipment as you
should. Before the final installation phases, check that all connections are waterproof.
INSTALLATION
To fix the basin under the counter:
4. Cover the flat rim of the basin with a silicon sealer. Fig 4.
5. Place the basin undernerath the counter and press up to ensure there is a good adhesion between the two
surfaces that are touching. Fig 5.
6. Prop the basin with a stick to maintain pressure until such time as the silicon sealer has set.
FINISHING
8. Remove the excess sealer.
9. Connect all of the final plumbing. Hook up the water to the valving.
Basin inner dimensions
Size of the opening
Sectional views
Silicone
Counter
Vessel Basin
19 ¾"
19 ½"
19 ½"
12 ¾"
12 ½"
13"
Silicone
Counter
Vessel Basin
19 ¾"
19 ½"
19 ½"
12 ¾"
12 ½"
13"
Silicone
Counter
Vessel Basin
19 ¾"
19 ½"
19 ½"
12 ¾"
12 ½"
13"
Silicone
Counter
Vessel Basin
19 ¾"
19 ½"
19 ½"
12 ¾"
12 ½"
13"
Silicone
Counter
Vessel Basin
19 ¾"
19 ½"
19 ½"
12 ¾"
12 ½"
13"
1
5
2
3
4
Installation