Blu Bathworks TSP131 User Manual
Page 7
2013-07
1 866 907 0122 blubathworks.com
®
6
GUARANTEE
The mixer is guaranteed for a period of 5 years against any defects of materials and
workmanship from date of purchase, subject to correct installation, maintenance
and use in accordance with this instruction leaflet. Please retain proof of purchase.
During the guarantee period parts will be replaced or repaired at our option.
This guarantee is offered as an extra benefit and does not affect your statutory rights
as a consumer in any way whatsoever.
TECHNICAL SUPPORT ASSISTANCE
If further assistance is required, please contact:
Product Support at 1.866.907.0122 (09:00 – 17:00hrs PST) or email
[email protected]
North America
Blu Bathworks Inc.
3614 East 1st Ave,Vancouver, BC, Canada, V5M 1C3
T +1.604.299.0122 F +1.604.299.0125
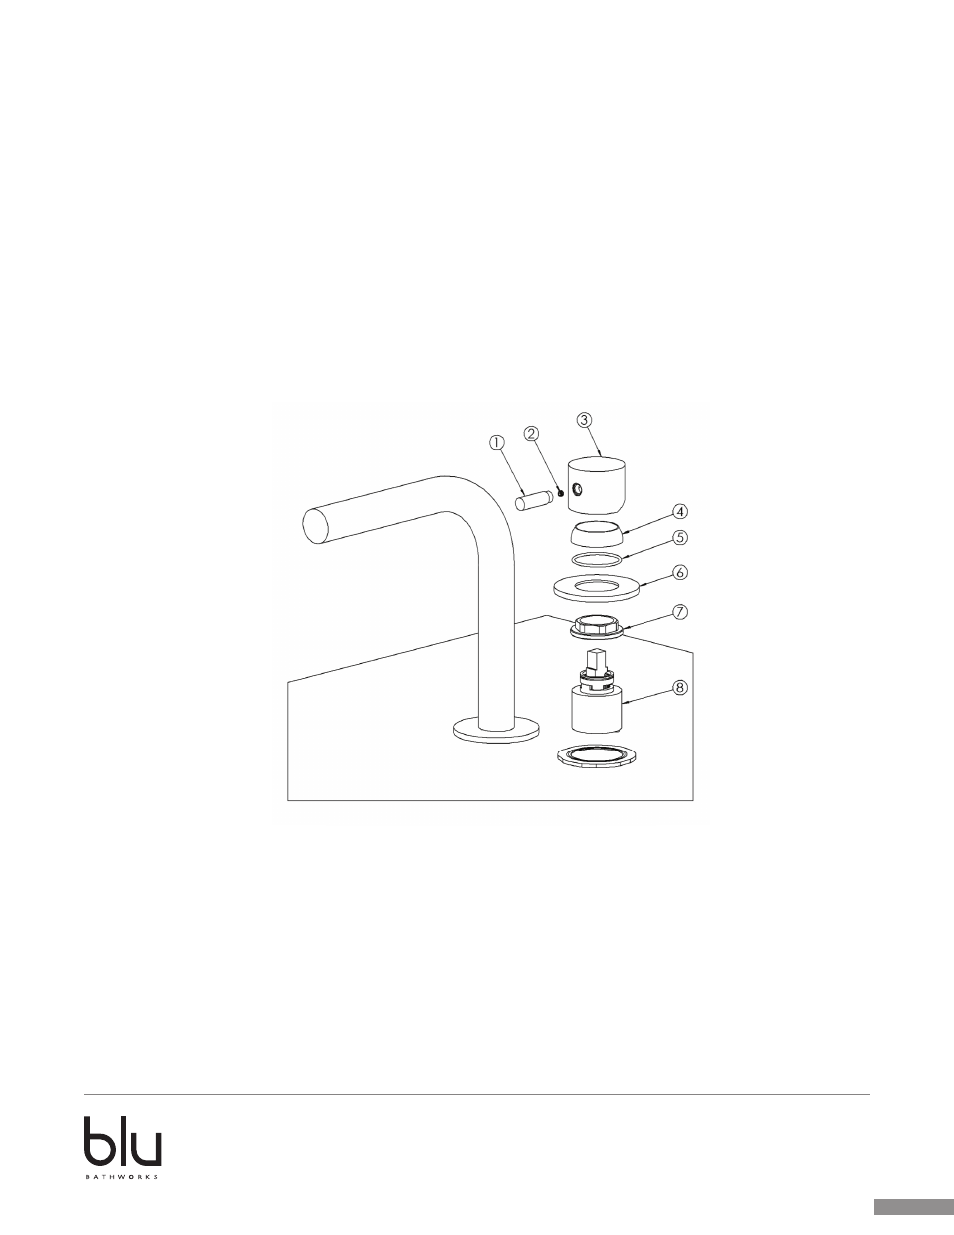
CARTRIDGE CHANGE
To replace it follow the instruction hereunder.
Shut off water supply to both inlets
•
Remove the control lever (1), remove the grub screw (2), take off the
control handle (3) and unscrew the cap (4).
•
Pay attention not to lose the O-ring (5) and pull out the plate (6).
•
Unscrew the flange (7) using mm28/in1,10 spanner. Remove the
cartridge (8).
•
Before re-assembling cartridge (8) clean its housing with wet cloth.
•
Re-assembling the flange (7) and the plate (6), place the O-ring (5) and
screw the cap (4).
•
Re-fit the control knob (3) and fix it with the grub screw (2).
•
Re-fit the lever (1).
IMPORTANT
In case of reduction of flow rate, dismantle the aerator and clean the filter
inside or change it.
CARTRIDGE CHANGE
To replace the cartridge, follow the instructions below:
•
Shut off water supply to both inlets
•
Remove the control lever (1), remove the grub screw (2), take off the control handle (3) and
unscrew the cap (4).
•
Pay attention not to lose the O-ring (5) and pull out the plate (6).
•
Unscrew the fl ange (7) using 28mm/ 1
1
/
9
” spanner. Remove the cartridge (8).
•
Before re-assembling cartridge (8) clean its housing with wet cloth.
•
Re-assembling the fl ange (7) and the plate (6), place the O-ring (5) and screw the cap (4).
•
Re-fi t the control knob (3) and fi x it with the grub screw (2).
•
Re-fi t the lever (1).