How to use the cooker top – Caple C762GSS User Manual
Page 6
22
N.B. If your local gas supply makes it dif-
ficult to light the burner with the knob set
to maximum, set the knob to minimum
and repeat the operation.
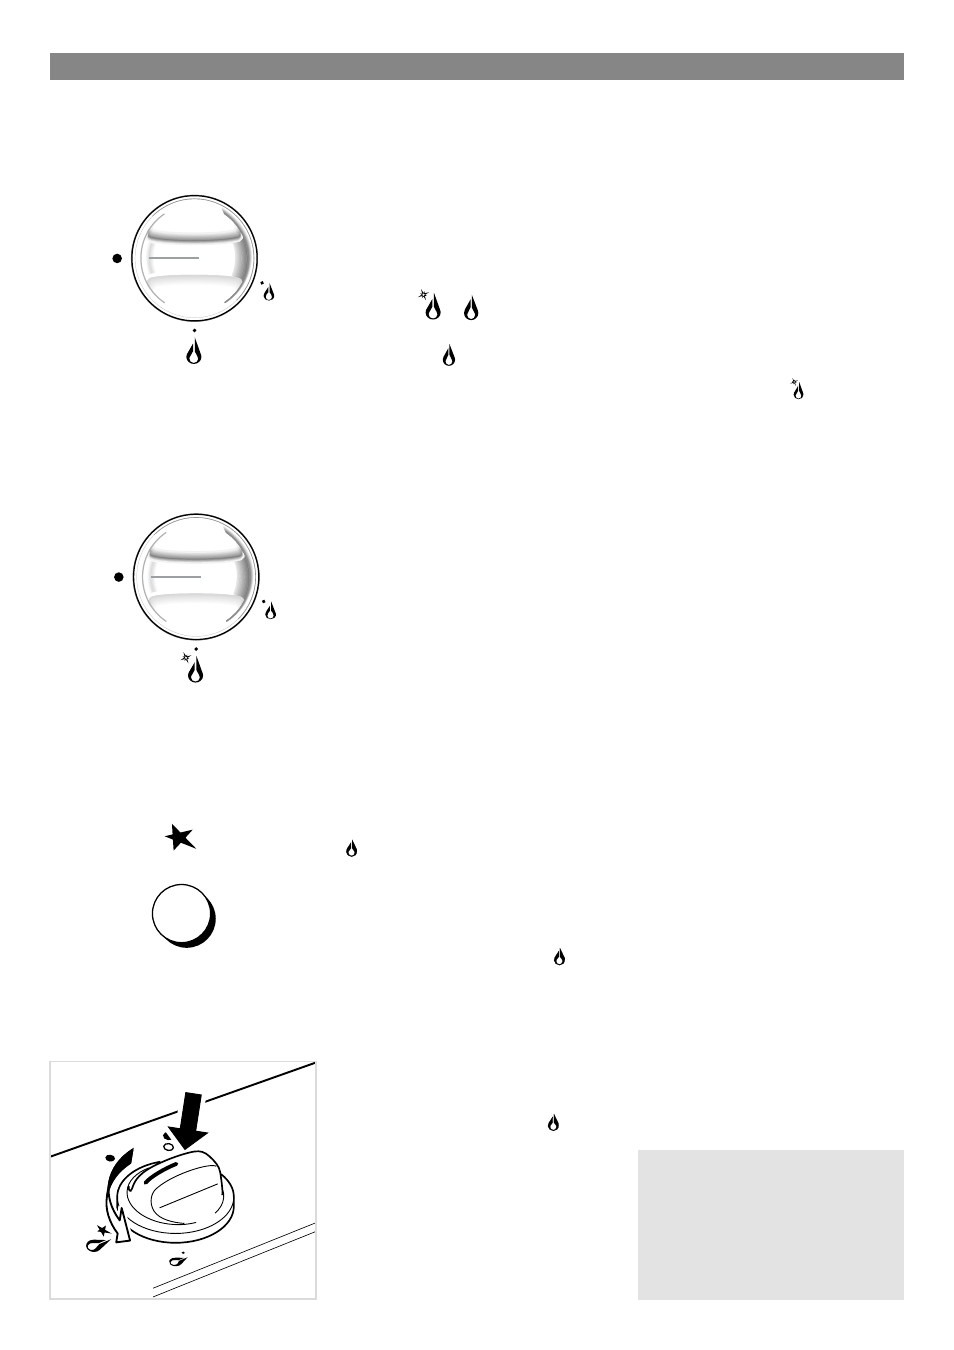
Fig. 2.2
Fig. 2.3
HOW TO USE THE COOKER TOP
2
2
Fig. 2.1a
Fig. 2.1b
GAS BURNERS
Gas flow to the burners is adjusted by tur-
ning the knobs (illustrated in figs. 2.1a -
2.1b) which control the safety valves.
Turning the knob so that the indicator line
points to the symbols printed on the panel
achieves the following functions:
– full circle
●
= closed valve
– symbol
or
= maximum
aperture or flow
– symbol
= minimum
aperture or flow
✓
To reduce the gas flow to minimum,
rotate the knob further anti-clockwise
to point the indicator towards the small
flame symbol.
✓
The maximum aperture position per-
mits rapid boiling of liquids, whereas
the minimum aperture position allows
slower warming of food or maintaining
boiling conditions of liquids.
✓
Other intermediate operating adjust-
ments can be achieved by positioning
the indicator between the maximum
and minimum aperture positions, and
never between the maximum aperture
and closed positions.
N.B. When the cooker top is not
being used, set the gas knobs to
their closed positions and also
close the cock valve on the gas
bottle or the main gas supply line.
LIGHTING GAS BURNERS FIT-
TED WITH SAFETY VALVE
DEVICE
In order to light the burner, you must:
1 – Turn the knob fig. 2.1b in anti-clock-
wise direction up to the maximum
aperture (symbol
), push in and
hold the knob; this will light the gas.
In case of black-out, bring a lighted
match close to the burner.
2 – Wait about ten seconds after the
gaslights before releasing the knob
(starting time for the valve).
3 – Adjust the gas valve to the desired
position.
If the burner flame should go out for some
reason, the safety valve will automatical-
ly stop the gas flow.
To re-light the burner, return the knob to
the closed
●
position, wait for at least 1
minute and then repeat the lighting pro-
cedure.
LIGHTING GAS BURNERS
Models without electric ignition
To light one of the gas burners, hold a
flame (e.g. a match) close to the top part
of the burner, push in and turn the
relative knob in an anti-clockwise
direction (fig. 2.3), pointing the knob
indicator towards the large flame symbol
(i.e. max. gas flow).
Models fitted with electric spark
lighter button
On these cooker tops, to light one of the
burners you have to push in and turn the
relative knob to the maximum aperture
position (large flame symbol
) and
press the electric lighter button (fig. 2.2)
until the flame has been lit.
Adjust the gas valve to the desired position.
Models fitted with electric lighter
incorporated into the burner
knobs
The electric ignition is incorporated in the
knobs (
★
symbol beside flame
- max.
heat/max. gas flow fig. 2.1b).
To light one of the gas burners, push in
and turn the relative knob to the maxi-
mum aperture position (large flame
symbol) and hold the knob in until the
flame has been lit.
The sparks produced by the lighter situa-
ted inside the relative burner will light the
flame. Adjust the gas valve to the desi-
red position.