Cata HGR 110 AS WH User Manual
Page 36
DESCRIPTION OF OVEN OPERATION:
TIME ADJUSTMENT:
When the oven is turned on the first time, the time digits
will flash, indicating that the user can adjust the time. This
status can also be accessed by pressing and holding the
main switch for three seconds.
Once the time flashes, it can be adjusted using the “+” and
“-” buttons and the slider control. Once the time has been
adjusted, if no button is pressed for three seconds or if the
main switch is pressed, the time will be configured and the
digits will cease to flash.
SAFETY INTERLOCK:
By pressing the safety interlock, the symbol lights up in red,
and the control panel is blocked so that it prevents the oven
from being used accidentally by a child.
To un-block the oven, the interlock symbol has to be pres-
sed again, at which time it lights up in white and the rest of
the panel becomes active again.
BASIC OPERATION:
When the oven is turned on using the main switch, the enti-
re control panel becomes active and is ready to be used.
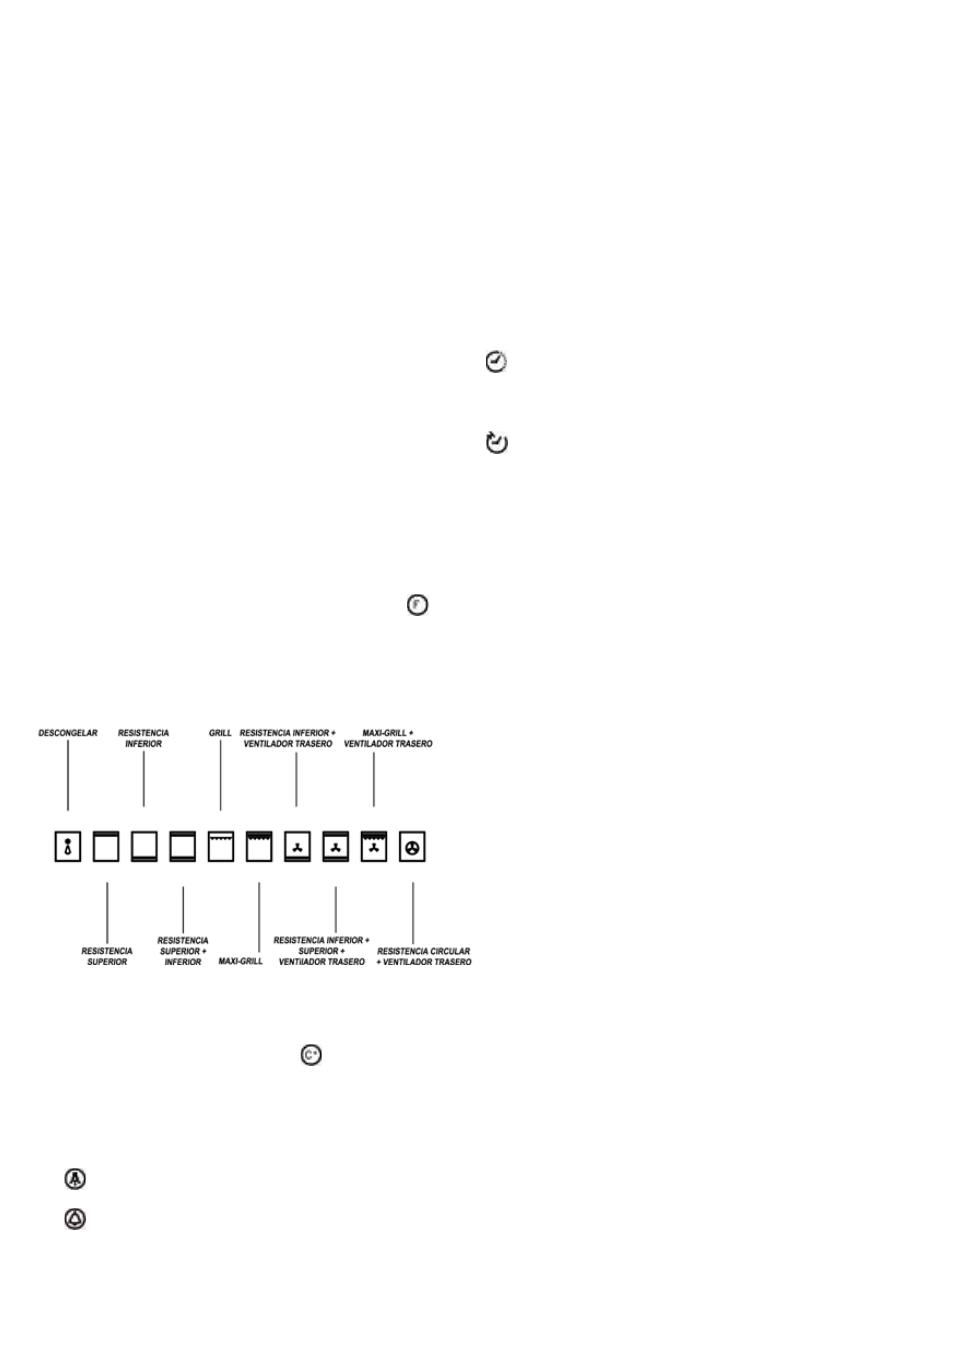
To start baking, just press the function symbol, a n d
the thaw function appears on the display. By pressing the
function symbol successively or by pressing the “+” and “-”
buttons, you can move between the functions in the atta-
ched table:
Three seconds after having selected a function or by
touching the temperature symbol,
the function will be
selected, and then the temperature can be adjusted using
the “+” and “-” buttons and the slider control.
After three seconds, the temperature remains selected, and
the oven starts operating according to the selected function
and temperature.
The light can be turned on and off at any time during
baking.
The alarm function is a clock that counts down, with a
buzzer at the end of the selected time. It can be turned on
and off independently from oven operation.
When the symbol is pressed, it turns red and can be ad-
justed using the “+” and “-” buttons and the slider control.
Three seconds after the alarm has been adjusted, it remains
selected and starts the countdown. When the set time ends,
an audible alarm is activated for 2 minutes. To turn off the
alarm, press the symbol. To delete the alarm from the visual
indications area, press the symbol for two seconds.
PROGRAMMING:
While the oven is operating according to a certain function
and temperature, you can activate three different progra-
mmes:
Baking cycle duration. When this symbol is pressed and
by using the “+” and “-” buttons and the slider control, you
can select the period of time after which the oven will stop
automatically.
Baking cycle end. When this symbol is pressed and by
using the “+” and “-” buttons and the slider control, you can
select a certain time when the oven will stop automatically.
- Combination of baking cycle duration and baking cycle
end. Select a function, a temperature and a duration, which
we’ll call “X”, for a certain baking cycle. Then select the
end of the cycle at a certain time “Y”. The oven will start
automatically at the Y-X time and will operate for X minutes
until it reaches time Y.
Example: If you want to cook a pizza for 20 minutes so that
it is ready when you get home from work at 19:00 h, select
the desired function, the temperature (say 200º), a cycle du-
ration of 20 minutes and the cycle end at 19:00 h. The oven
will then start automatically at 18:40 h and will stop automa-
tically at 19:00 h.
CLEANING THE APPLIANCE
IMPORTANT
As a safety precaution, before beginning to clean the oven
always unplug it from the power supply or remove the
appliance power lead.
Cleaning an oven that does not self-cleaning panels must
be done after use, when it is switched off but still warm,
not hot, so that the film of grease produced by the cooking
vapours on the walls is still easy to remove, as well as the
drips and splashes of fat that are not yet hard and dry.
Remove the chrome-plated wire side supports; pull the front
part upwards to unattach them from the wall and remove
them from the rear orifices. Clean the oven with a soft cloth
soaked in a diluted ammoniac solution; rinse and dry. If the-
re are still stains and splashes, place a damp cloth soaked
in ammoniac at the back, close the door and, after a few
hours, wash the oven with warm water and liquid detergent,
rinse and dry carefully. To clean the shiny metal outside do-
ors, use a soft cloth with soap and water; do not use any
powdered products that contain abrasive substances.
Also avoid the use of acid or alkaline substances (lemon
juice, vinegar, salt, tomatoes, etc.). Avoid using products
containing chlorine, acid or abrasive substances specially
for cleaning the varnished walls. Do not use thick steel wool