頁面 5 – CHIAYO SDR-8200 User Manual
Page 5
3
1 2
1.GND
2.
3.
+
-
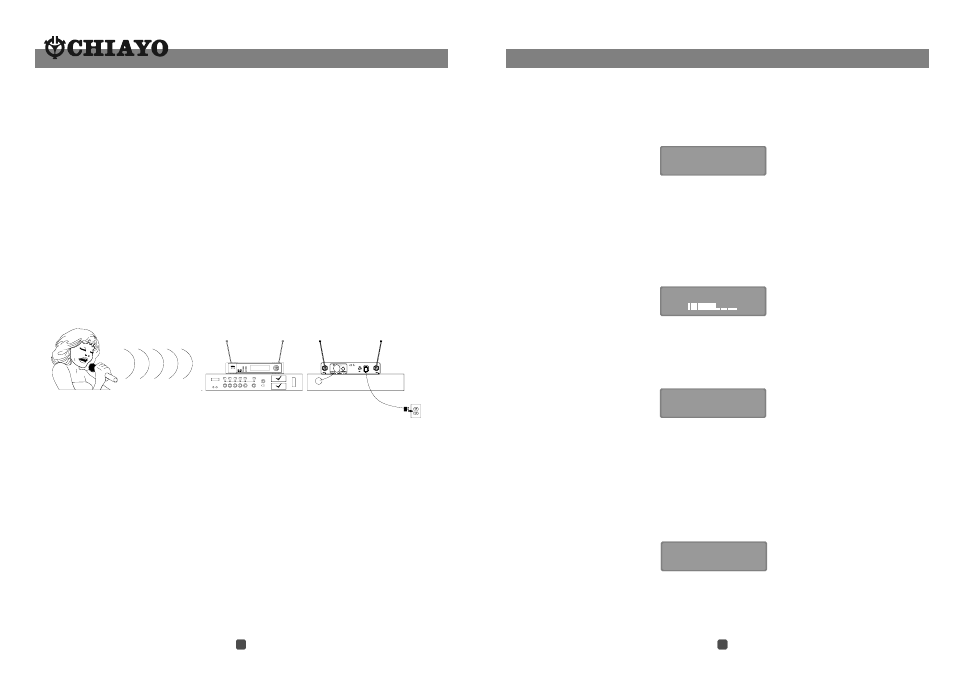
Operating the Handheld Microphone System.
1. Refer to Fig.3.below, connect the AC power adaptor to the DC IN connector on the back
of the receiver. Plug the adaptor into an AC wall socket. Push to switch on the receiver
power on / off switch. The display LCD on the receiver will glow.
2.Raise the antennas and point away from each other at a 45 angle from vertical to
achieve optimum reception.
3.Connect the receiver's Balanced or Unbalanced AUDIO OUT connector to the mixer
input using an XLR to XLR audio cable or 1/4" to 1/4" phone plug cable. Select the
receiver's output to match the sound system's input.
4.Press the transmitter's PWR ON / OFF to switch ON the transmitter. The transmitter's
red LED will give a flash to indicate the battery power is ok. If the Red LED stays constant
glow, it indicates battery is weak and a change of battery is necessary. The receiver's
Diversity A / B and RF indicator will glow to indicate RF signals have been received.
5. Talk or sing into the microphone. Normal operation is indicated by :
Steady glow of the receiver's DIVERSITY A / B lights and RF indicator.
Flickering of the receiver's AF indicator light when you speak into the mike.
6.When the performance is over, turn off the sound system and press the PWR switch to
OFF the handheld microphone.
°
Operating the Lavalier System
1.Refer to Fig.4.Below, connect the AC power adaptor to the DC IN connector on the back
of the receiver. Plug the adaptor into an AC wall socket. Push to switch on the receiver.
The LCD on the receiver will glow.
2.Raise the antennas and point away from each other at a 45 angle from vertical to
achieve optimum reception.
3.Connect the receiver's Balanced or Unbalanced AUDIO OUT connector to the mixer input
using an XLR to XLR audio cable or 1/4" to 1/4" phone plug cable.
Set the receiver's output to match the sound system's input.
4.Press the lavalier microphone into the mounting clip and attach it to your garment.
Do not cover the microphone with your clothing, and keep it approximately 8 to 12 inches
below your chin.
5.Plug the connector ( mini XLR or phone plug ) of the lavalier microphone into the
beltpack transmitter connector input. Press the power on / off switch to switch on the
transmitter. The transmitter's red LED will flash and the receiver's RF LED bar will glow to
indicate that signals have been received.
°
Fig.3
Making changes to various settings in SDR-7200 / SDR-8200
1. Make changes to CHANNEL / FREQUENCY
This can only be done at the Main page display.
Press SET for about 3 seconds, the cursor at channel number will flash to allow
a change. Press + ( UP ) to increase the channel number ( from 0 to 100 ) and
press - ( DOWN ) to decrease the channel number. As the channel changes, the
corresponding frequency will also be changed !
After selecting the desired channel ( frequency ), idle it for about 5 seconds and
the setting will be automatically saved into the memory.
CHANNEL: 001
FREQ: 700.000MHZ
4. AUTO SCAN function
Press MENU button until the AUTO SCANNING page appear.
Press SET for about 3 seconds to start the auto scan function. The receiver will scan
out the next cleaner channel. It takes a couple of minutes to perform the scan
function. After the next cleaner channel(frequency) has been selected, idle it for
about 5 seconds and the setting will be automatically saved into the memory.
AUTO SCANNING
CHANNEL : 001
SQUELCH SETUP
LEVEL:01
3. Make changes to SQUELCH LEVEL
Press MENU until this page appears.
Press SET for approx. 3 seconds to enter the set mode and the cursor will flash to
allow changes. Press UP to increase the Squelch level ( from 01 to 10 ) and press
DOWN to decrease the squelch level
After selecting the desired squelch level, idle it for about 5 seconds and the setting
will be automatically saved into the memory.
2. Make changes to VOLUME
Volume setting can be made at any page display by pressing the UP and DOWN
buttons. (The changes will not be saved and stored in memory!)
VOLUME : 14
MIN MAX
11
4