Remove and replace the webcam – Daktronics 4000 Series Digital Billboard User Manual
Page 25
R eplacing Dis play C omponents
19
Figure 30: Webcam Arm
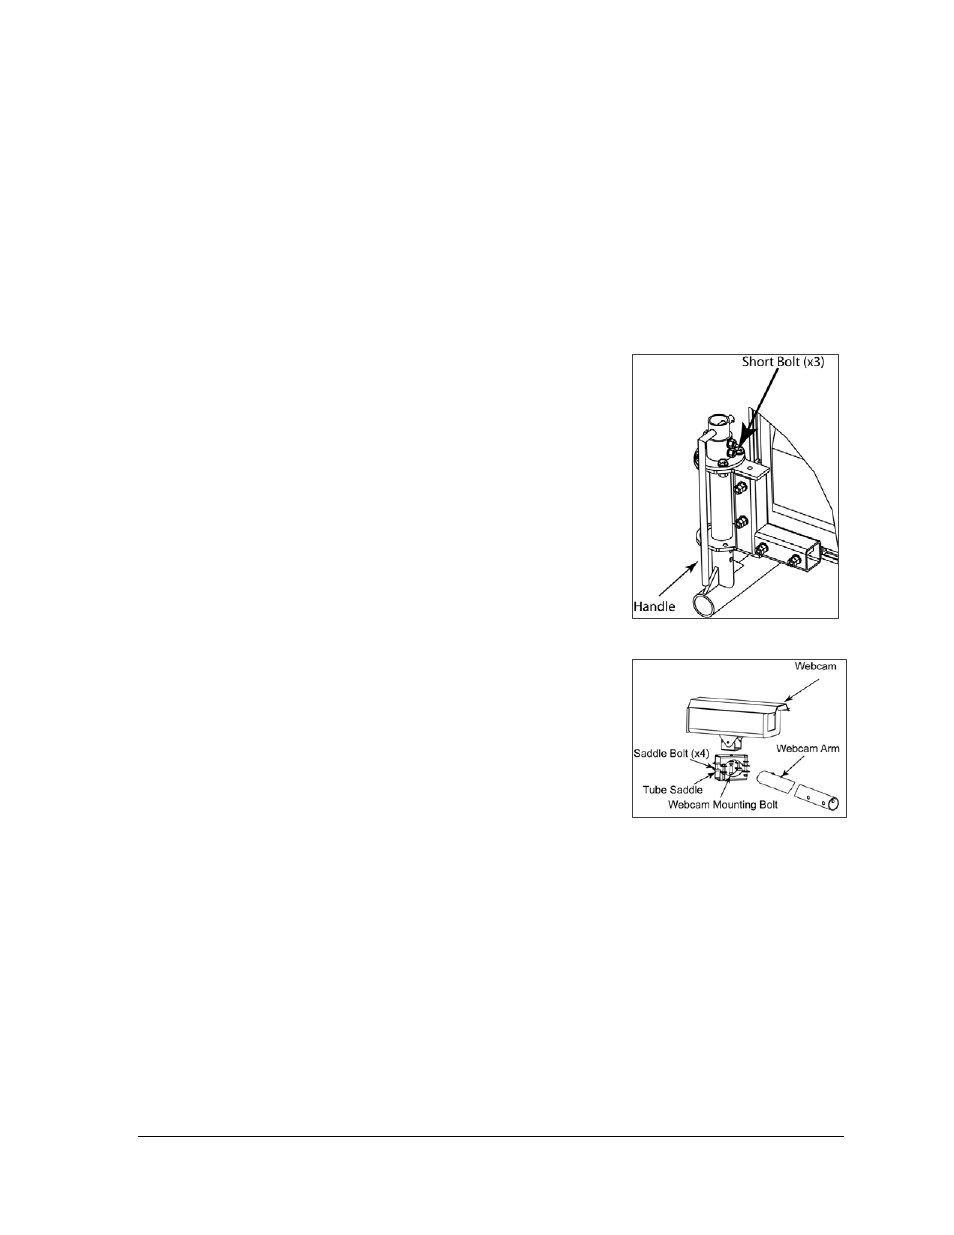
Figure 31: Webcam
2. Use a 1-
1
/
16
" socket wrench to remove the three short bolts from the top of the elbow
assembly. Refer to Figure 32.
Note: Do not remove the long bolts.
3. Use the handle to pivot the webcam arm to the catwalk.
Note: Ensure that the power and signal cables do not get pinched when pivoting the
webcam arm.
R emove and R eplace the Webcam
1. Loosen the four saddle bolts. Lift the webcam and tube
saddle from the arm. Refer to Figure 31.
2. Pull the cables through the webcam arm.
3. Route the new cables through the webcam arm.
Note: Ensure there is enough excess cable to allow the
webcam to pivot if needed.
4. Use the four saddle bolts to mount the new webcam
and tube saddle on the arm.
5. Return the webcam arm to the original position when
done servicing the webcam.
6. Reinsert and tighten the three short bolts on the elbow
assembly.
7. Work with the NOC to verify the webcam is
functioning and focused properly.