Installation checklist, Boot up sequence, Figure 16: master to master rs-422 connection – Daktronics KE-1010-7.6-RG User Manual
Page 19: Figure 16 ), 4 installation checklist, 5 boot up sequence
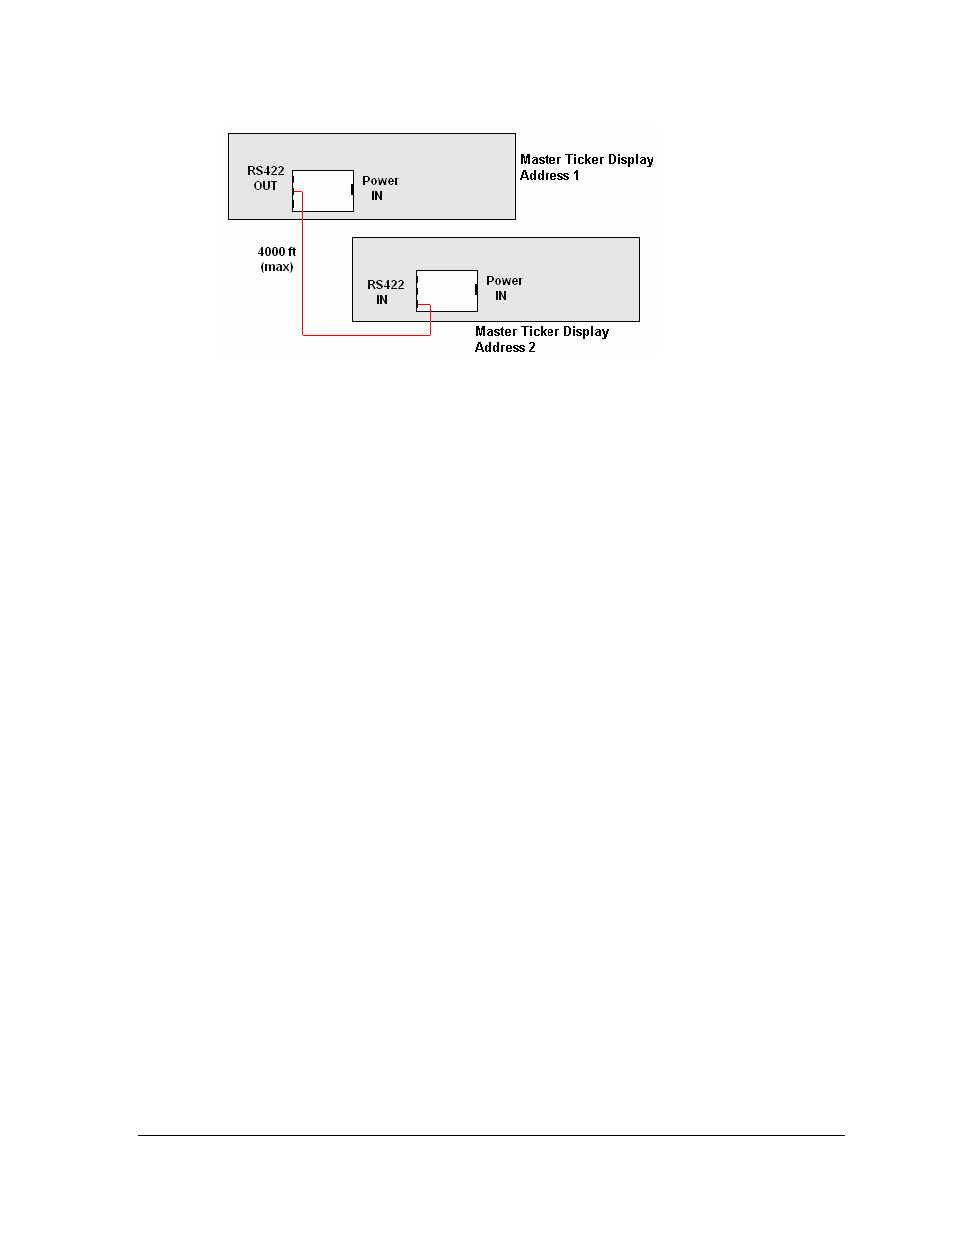
Figure 16: Master to Master RS-422 Connection
4.4 Installation
Checklist
After installation is complete, go over these steps to make sure that the display is properly
connected and ready to operate correctly.
1. Carefully check the voltage between the hot lines and neutral. Normal voltage range
is between 100 VAC and 240 VAC.
2. If problems arise with the voltage, check with a local electrician or power company.
3. Plug the power cord(s) from the ticker(s) into a grounded 100-240 VAC single-phase,
grounded outlet(s).
4. Turn power ON to the outlet(s).
4.5 Boot Up Sequence
Each time the KE-1010 is powered up, the following information is shown on the display
face. The Xs represent numbers that will change according to the specific installation.
•
DakTicker by Daktronics
•
ED10288
•
REV X
•
ADDRESS XX
•
IP Address
Signal Installation
13