DR Power Tow-Behind Deck Adapter (September 2014 - Present) User Manual
Page 2
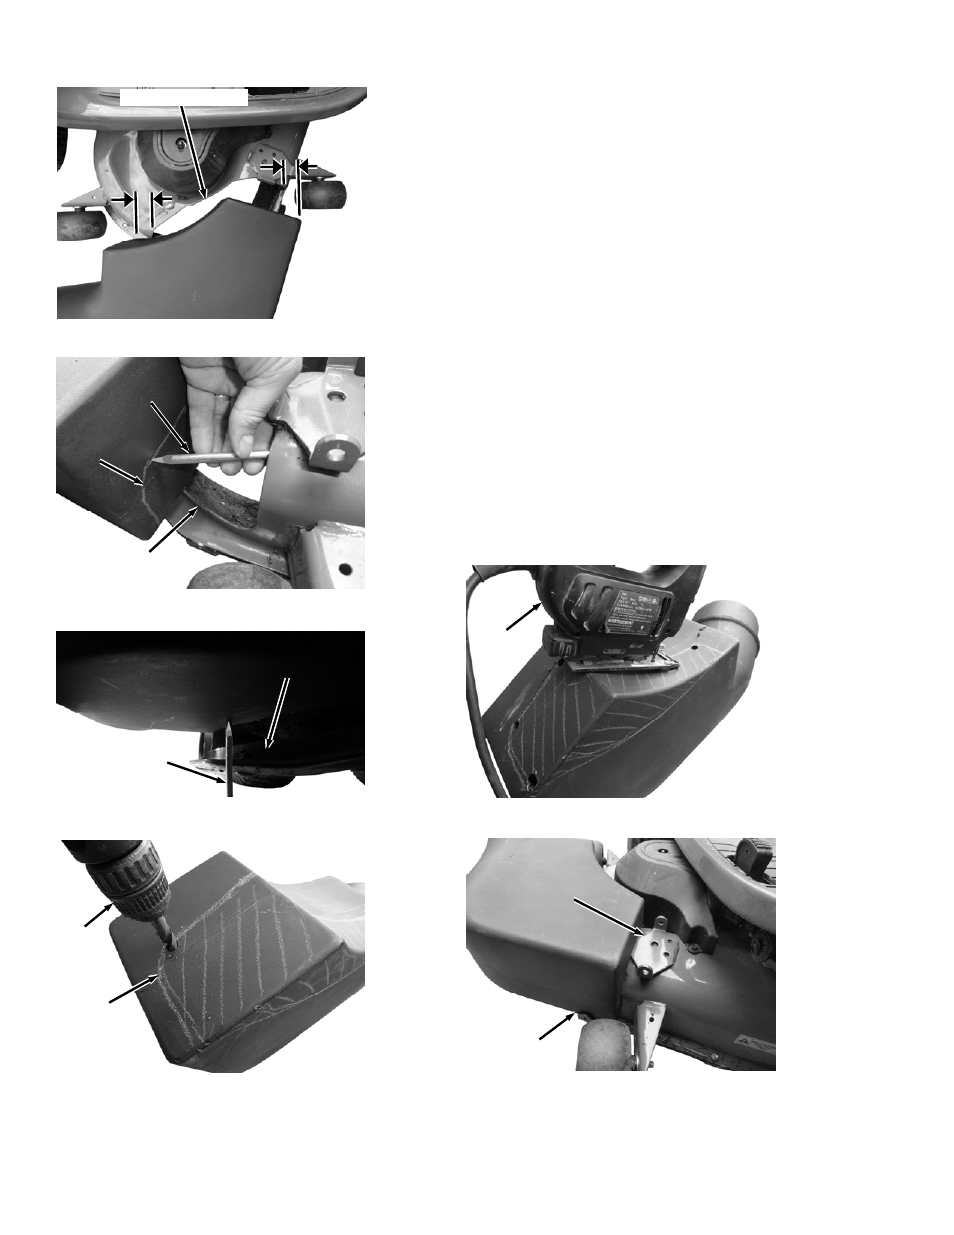
2. Position the Deck Adapter centered with the Deck opening and resting on
the Bottom Rail (Figure 4). There should be the about the same distance from
the corners of the Deck Adapter to the front and rear edges of the Deck
opening.
3. Use a Marker or Marking Pencil to slide along the inside of the Deck
opening to guide you as you mark the Deck Adapter (Figure 5). Make sure you
keep the Marker pointing straight out from the Deck.
4. Make a similar marker line at the portion of the cutout under the Deck
Adapter at the bottom rail of the Deck opening (Figure 6).
5. Drill holes at the sharp bends along the Marker line that would make it
difficult to turn the Jig Saw (Figure 7).
6. Start at one of the holes and cut along the Marker line with a Jig Saw until
the piece can be removed (Figure 8).
7. Continue positioning, checking, marking and cutting the Deck Adapter until
you can place it over the flange of the Hinge Bracket and the bottom rests on
the Deck opening Rail (Figure 9).
Note: Take your time to ensure you do not cut too much at a time but do not worry
if there are some gaps because the DR Leaf and Lawn Vacuum will still work
effectively.
Marker
Figure 5
Transferred
Pattern
Deck
Adapter
Bottom Rail of
Deck Opening
Marker
Figure 6
Bottom of
Deck Adapter
Bottom Rail of
Deck Opening
Cut Line
Figure 7
Area to be
Removed
Drill
Mower Deck Opening
Figure 4
Deck Adapter
Jig Saw
Figure 8
Deck
Bracket
Figure 9
Deck Adapter
Resting On
Bottom Rail