DR Power RapidFire 6 HP Subaru (Aug 2011 - Sept 2012) User Manual
Page 15
CONTACT US AT www.DRpower.com 15
1. Remove the Return Springs as described in step 1 of “Greasing The Rack
and Pinion” on page 13 (Figure 19).
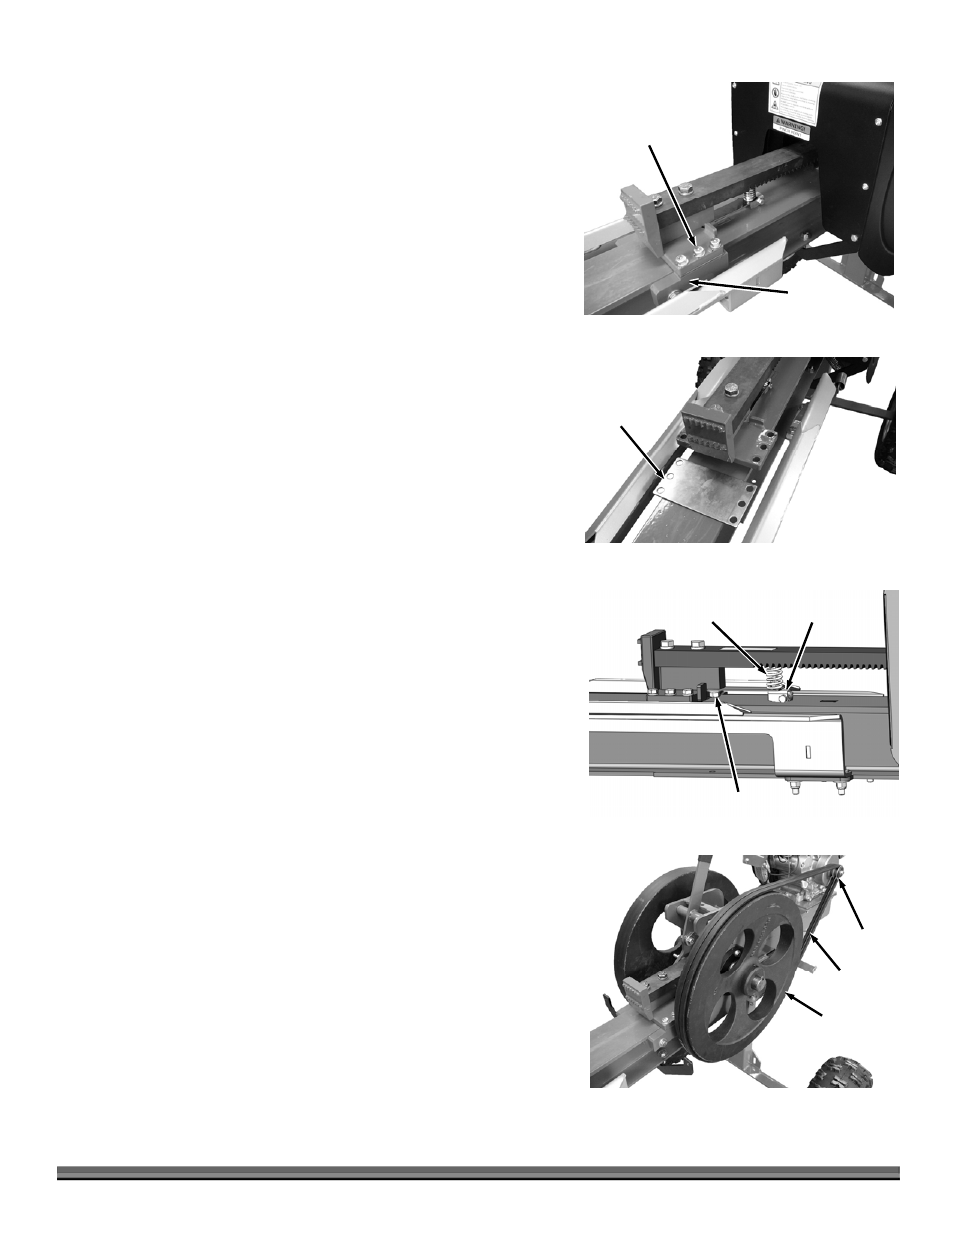
2. Pull the Carriage out approximately half way and remove the three Bolts and
Lock Washers on each side of the Carriage and Rack assembly as you
support and remove the Carriage Hold Downs (Figure 23). Note the
position of the Roller Bearings.
3. Pull the Wear Plate out from under the Carriage and check thickness. If
thickness is less than half worn turn Plate over and reinstall. If thickness is
more than half worn install a new one (Figure 24).
Note: After Wear Plate Replacement, perform “Carriage adjustment” on page 14
as you perform the next step.
4. Position the Carriage Hold Downs (Roller Bearings forward) and secure
with the three Bolts and Lock Washers on each side of the Carriage.
Retighten Bolts to 55 foot pounds with a Torque Wrench. The high torque
on these Bolts is important.
5. Pull the string to position the Spring ends near the Carriage assembly and
place the Springs onto the Roller Bearing Bolt threads. Cut the string off
the Springs.
Aligning the Carriage Spring Roller (When it noticeably pushed to
one side)
An adjustment of the Carriage Spring Roller is required if the measurement
from the center of the Roller to the edge of the Frame on both sides is not the
same.
Tools and Supplies needed:
9/16" Wrench
Tape Measure
1. Remove the Return Springs as described in step 1 of “Greasing The Rack
and Pinion” on page 13 (Figure 19).
2. Pull the Carriage out approximately half way and loosen the Roller Arm Bolt
with a 9/16" Wrench (Figure 25).
3. Align the Roller to be equal distance from each side of the Frame edge.
Note: Adjust the Compression Spring if needed so it is in the center of the Rack
Teeth.
4. Tighten the Roller arm Bolt.
5. Install Springs and remove string.
Replacing the Centrifugal Clutch (If slipping excessively)
Tools and Supplies needed:
1/2" Wrench
Dead Blow Hammer
1. Remove Belt Guard as described in “Changing and Adjusting Belts” (page
17).
2. Remove the Belts by rolling them off the Flywheels as you slowly rotate the
Flywheels (Figure 26).
Carriage
Spring Roller
Figure 25
Roller Arm Bolt
Compression
Spring
Wear
Plate
Figure 24
Flywheel
Figure 26
Belts
Clutch
Carriage
Hold Downs
Figure 23
Bolts and
Locknuts