DR Power 3-Point Hitch Top-Discharge User Manual
Page 9
Advertising
9
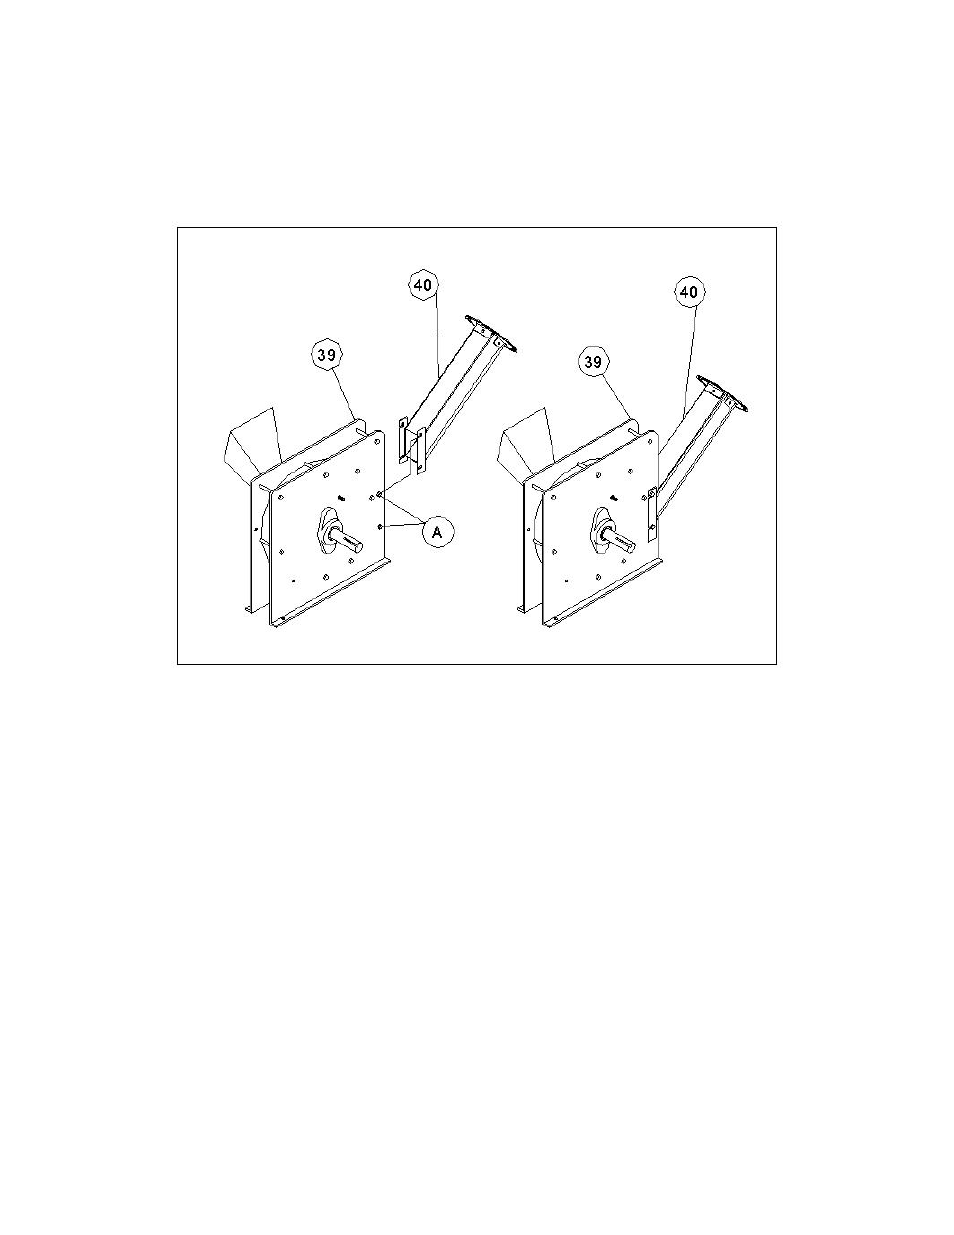
STEP III – ATTACHING THE DISCHARGE CHUTE
• Loosen the two 5/16-18 x 4” bolts (A) on the chipper basic (#39, pg 25) enough that the mounting plates on
the discharge chute (#40, pg. 25) will slide onto the bolts. You may have to slightly tap the nut side of the
bolt to center it before the discharge chute can easily slide into place.
• Slide the top L shaped slot on first, and then pivot the discharge chute down so that the lower slot slides
over the lower bolt as shown.
• Once the discharge chute is in place, tightly secure the two-nylock nuts.
Advertising
This manual is related to the following products: