DR Power 32130 Tray Kit User Manual
Page 2
7 5 M E I G S R O A D , P . O . B O X 2 5 , V E R G E N N E S , V E R M O N T 0 5 4 9 1
©2013 Country Home Products, Inc. All rights reserved
334541
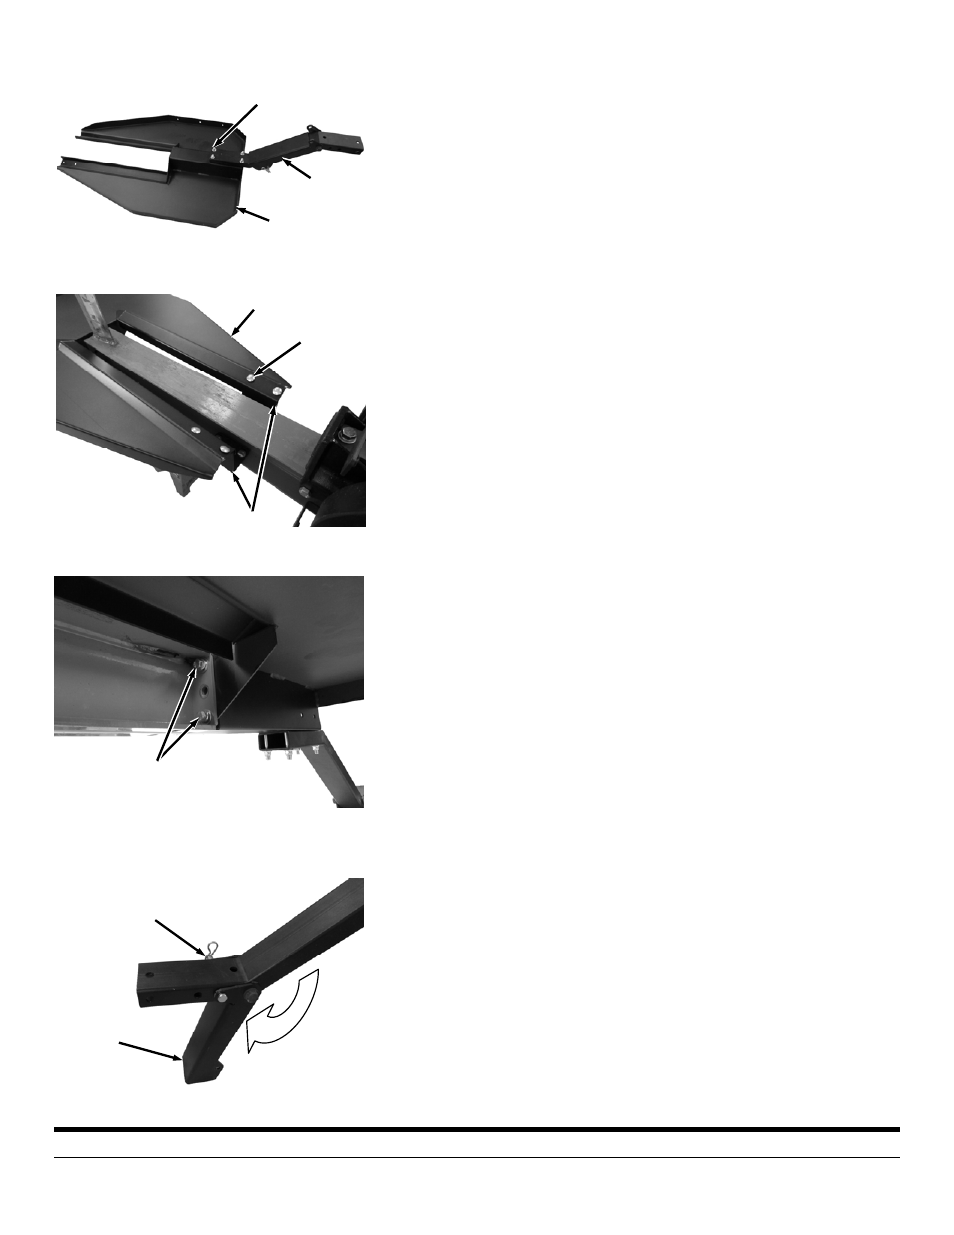
5. Install the Tow Bar to the end Tray with four Bolts and Lock Washers (from
product package) using two 9/16" Wrenches (Figure 5).
6. For easier alignment in the following step, slightly loosen the Side Bracket
Hardware using a 9/16" Wrench (Figure 6).
7. Position the Tray onto the Side Brackets and install the four Carriage Bolts
and Locknuts (from the tray kit) by hand.
8. Install the four Bolts, Lock Washers and Flat Washers (from the tray kit) to
secure the Tray to the end of the Beam using a 9/16" Wrench (Figure 7).
9. Tighten all remaining Tray hardware using a 9/16" Wrench.
10. The Leg may already be in the down position but if it is not then pull the
Hitch Clip and Clevis Pin from the Leg and fold it to the down position.
Align the holes and secure the Leg with the Clevis Pin and Hitch Clip (Figure
8).
11. Remove the Jack Stand and lower the Splitter onto the Support Leg.
If you have any questions please contact us at www.DRpower.com or call 1-800-
DR-OWNER (376-9637) for assistance.
Tray
Figure 5
Bolts and Locknuts
Support
Leg
Hitch Clip
and Clevis Pin
Figure 8
Support
Leg
Tray
Figure 6
Side Brackets
Bolts and
Locknuts
Bolt, Lock Washer
and Flat Washer
Figure 7
Tray
Beam