ESI Dr.DAC prime User Manual
Page 6
ESI Dr.
DAC
prime
6
3.1.1 Installation & Connection
Dr. DAC prime is simply connected to an available USB port of your computer. The supplied USB
cable connects to the USB connector on the back panel of Dr. DAC prime. The other end of the
cable is plugged it into your computer.
USB port of a computer
After the connection of Dr. DAC prime, the operating system automatically detects it as a new
hardware device. Modern operating systems like Windows XP, Vista/7 or Mac OS X usually detect
the hardware directly and are installing the correct USB audio drivers automatically. You can use
Dr. DAC prime instantly now.
3.1.2 Driver for Windows XP
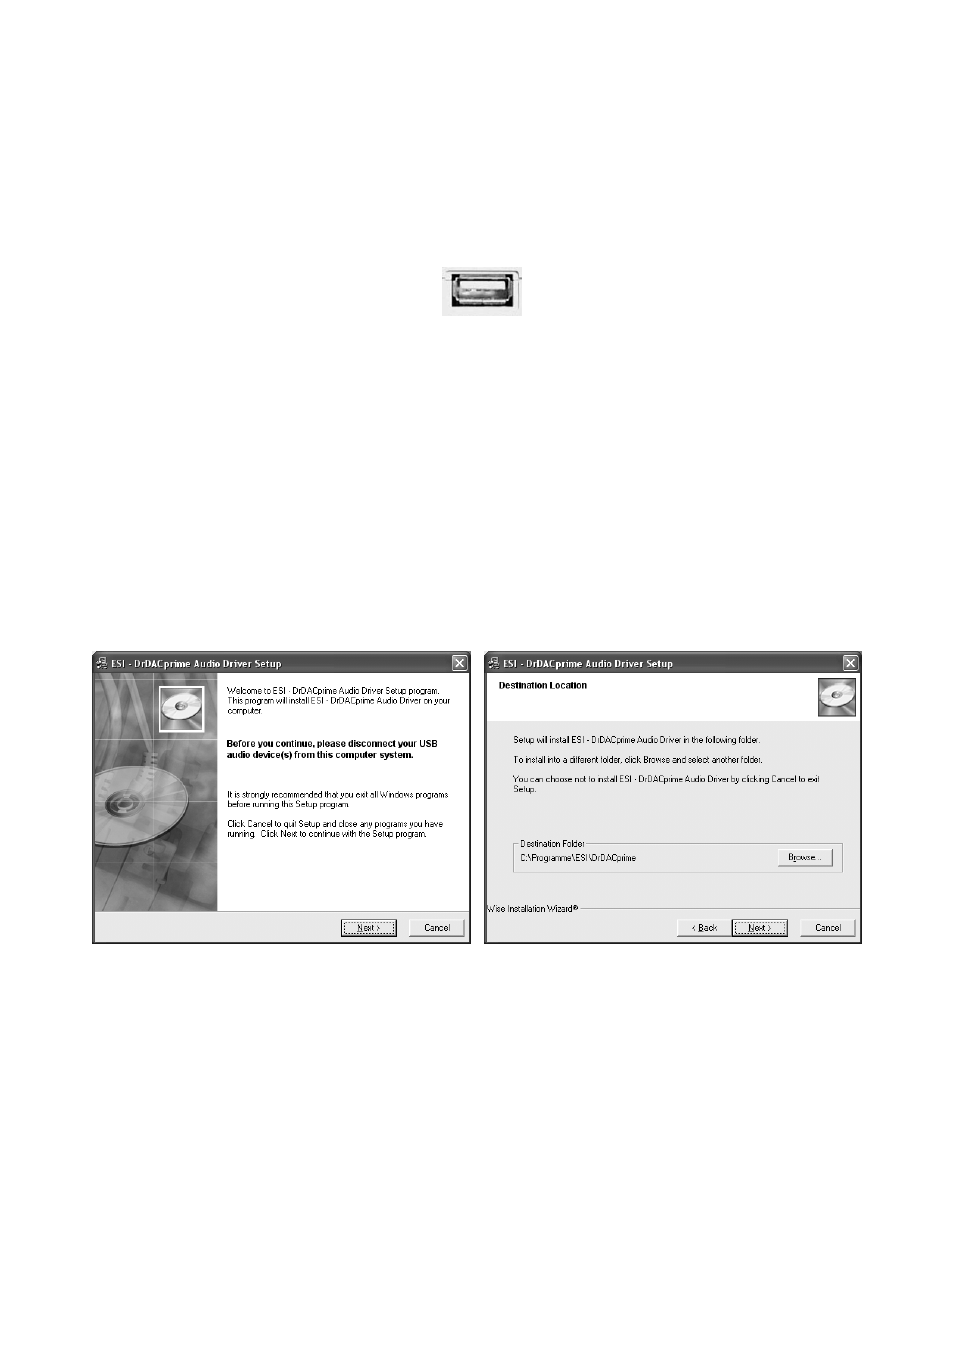
Disconnect Dr. DAC prime before you install the driver if it has been connected already. Then
launch setup.exe from the Windows folder of the included Installation CD or from a download of a
recent driver from our website.
You will now see a dialog as shown on the left picture below. Click Next. You can define the target
directory for the installation now. Confirm it with Next.
The installer now informs you that the driver installation will start as shown on the left picture
below. Confirm this with Next. During the following process you will see a dialog box once or
several times that informs you that the driver software has not passed Windows Logo testing. Please
be assured that our drivers have been tested in various different ways and are OK to be used.
Confirm any such dialog with Continue Anyway.