Introduction, Basics & installation, Unpacking / handling – ESI nEar04 User Manual
Page 4: Connection
ESI
nEar04
1. Introduction
Congratulations on your purchase of the ESI nEar04.
The nEar04 desktop near field monitors have been developed especially for high level home studios
and special project studios. nEar04 have been designed to overcome all the typical limitations of
conventional small sized monitoring speakers providing a special 4" polypropylene curved woofer
cone and a 1" natural silk dome tweeter. Despite the small size, nEar04 still provide reference level
sound quality and enough power for audio monitoring in a digital audio production environment.
2. Basics & Installation
For optimal performance of nEar04, read the instructions in this manual thoroughly and carefully
before you are using the speakers.
Unpacking / Handling
To remove the monitors from the carton its best to turn the package carefully upside down on the
floor or on a table and then lift the carton vertically up slowly to leave the monitors resting in the
packaging foam. Make sure that you don’t grab the speaker driver units on the front to avoid
damage. Now check the monitors for signs of damage that might have occurred in shipping. In the
unlikely event of this, please contact the reseller of the product immediately. Be careful when you
remove the packaging foam. Please keep all packing materials.
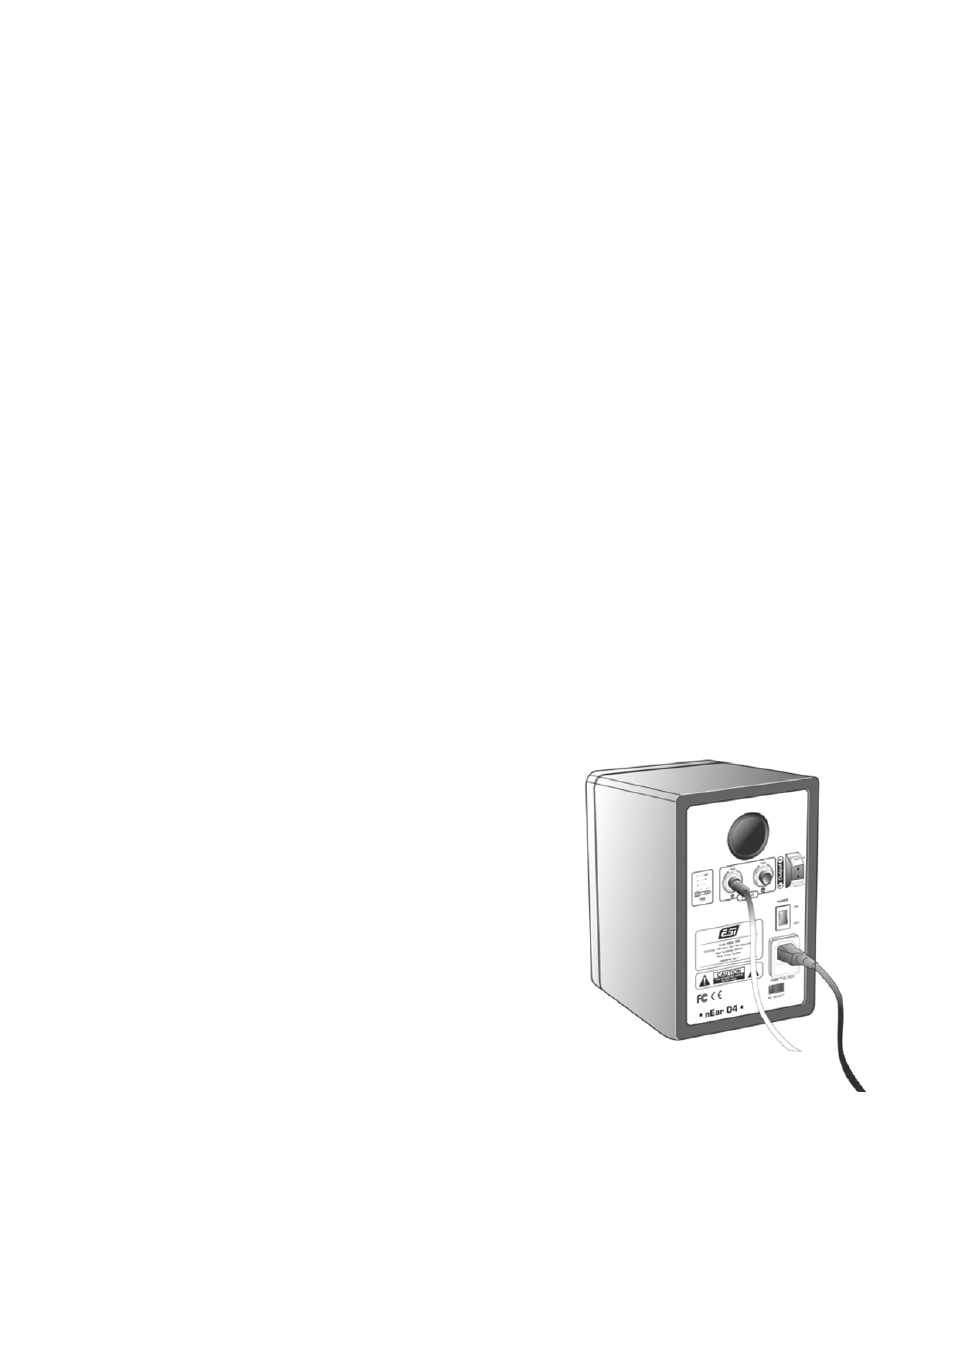
Connection
High quality balanced or unbalanced audio cables are
recommended for input connection. The monitors typically
connect to the line level output of a mixing console or to a
computer audio card. One monitor has to be connected to
power connection, the other monitor is connected via the
supplied speaker wire to the first monitor. Make sure the
power of the main monitor is switched off before you connect
any audio cables. Also turn down the volume initially.
TRS balanced / unbalanced connection
Connect male side of TRS balanced or unbalanced cable to
the TRS input of nEar04 – as show on the picture above (the
picture shows the left audio channel connection only). Do
this for both the left and right audio channels with separate
cables. Make sure the power cable is connected as well.
Second speaker connection
After that, connect the second speaker with the included speaker wire. Make sure the + / - (red /
black) connectors are not swapped with each other to avoid phase problems during playback. The
complete setup will then look like shown on the following picture:
4