Description and connection, Heating outside areas (anti-freezing protection), A) dimensioning – Fenix MADPSP 40 W/m User Manual
Page 6: B) installing into concrete
1. Description and connection
The heating cables should be connected to a 230V/400V, 50Hz
electricity network, depending on the value stated on the product label.
Degree of protection: IP67.
The cable jacket is resistant to UV radiation, jacket temperature
resistance is 90°C, and it is self-extinguishing.
The protective braiding is to be connected to the PE protective
conductor.
2. Heating outside areas (anti-freezing protection)
a) Dimensioning
Choose the size of the wattage per square metre – output can range from 300 to 400W/m
2
.
The size of the output depends on the composition and depth of placement; higher proximity to the
surface means a lower output is required within the range recommended above.
Starting up of the heating system is dependent on the layout of heating circuits/mats, control
settings and outside temperature. When placed in (on) concrete, the reaction is further delayed
due to heat accumulation and dissipation in the concrete. A visible reaction (defrosting) may take
several hours.
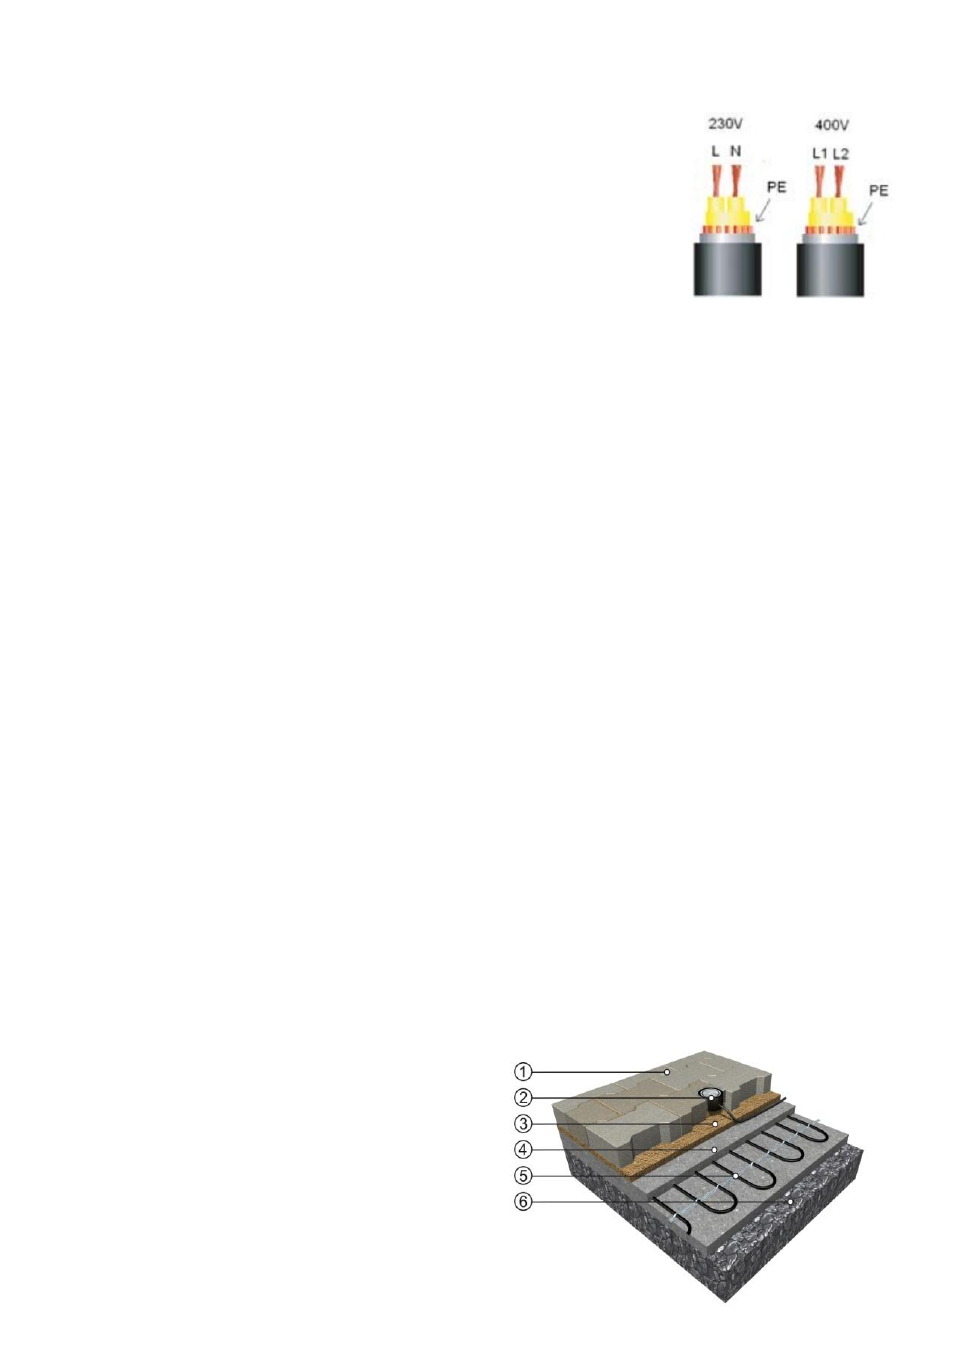
b) Installing into concrete
Procedure
Create a compact underlying layer of gravel 150–300 mm thick. This can be regarded as the thermal
insulation.
You can find information about the effect and importance of high quality thermal insulation (e.g. on
the basis of extruded polystyrene) on the FENIX internet pages – category ECOFLOOR/Outdoor
applications, or you can consult a technician regarding its use.
Place the heating cable in an open-looping pattern on the reinforcing grid and fix it with fastening
strips. The heating cable must not be too tightly affixed or it could be damaged due to the thermal
expansion of the concrete.
Place the reinforcing grid in the middle, and at maximum 2/3 down into the concrete layer.
Measure the resistance of the heating circuit and the insulation resistance and record the measured
values in the certificate of warranty.
Draw the scheme of the heating cable layout in the certificate of warranty.
Cover the cable with a concrete layer. The concrete layer must be monolithic so that individual layers
do not separate due to thermal stress.
Measure the resistance of the heating circuit and the insulation resistance again and record the
measured values in the certificate of warranty.
The concrete mixtures must contain ingredients protecting it against external effects.
Installing into concrete
1) Tiles (concrete)
2) Regulation EBERLE EM 524 89/90
3) Fine washed sand
4) Concrete layer
5) MADPSP heating cable
6) Base (gravel, 150-300mm)