Fire Magic Aurora Combined Stand-alone Post A430s User Manual
Page 19
19
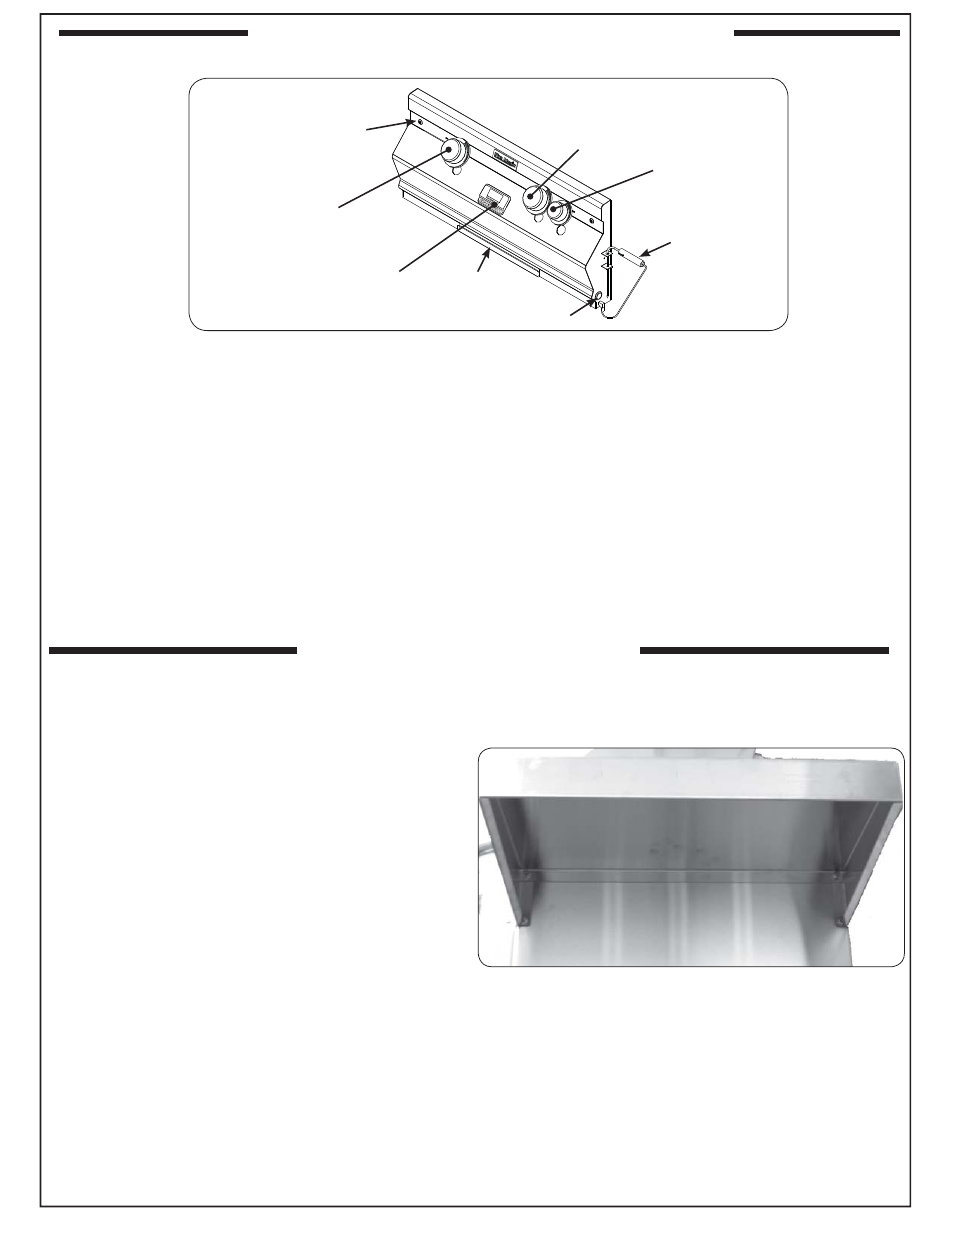
Fig. 19-1
Left
main burner
control knob
Right
main burner
control knob
Backburner
control knob
(if equipped)
Digital
thermometer
A430s controls
View from under right shelf
This grill comes with two (2) rigid shelves that must
be attached. These can be attached using the four
support screws provided and a Phillips-head screw
driver.
Important:
Take caution to not cross-thread
when tightening the screws.
1.
Hold the shelf inverted so that one of the corner
holes in the shelf lines up with the appropriate
upper screw hole in the grill.
2.
Insert the screw, but do not tighten all the way so
that the shelf can be easily rotated around the fi rst
screw.
3.
Line up the second corner hole in the shelf with
the remaining upper screw hole in the grill. Insert
a screw and tighten.
Note: You may lift the edge of the shelf upward
to gain better access during much of the
tightening of this screw.
4.
Finally, insert the bottom screws on the left and right
side of the shelf and securely tighten all screws.
To detach, reverse the process above.
RIGID SHELF INSTALLATION
Drip Tray
Control panel
screw(s)
Meat probe
Light switch
IDENTIFICATION OF GRILL CONTROLS