Sink installation (cont.) – Fire Magic 3587 Sink User Manual
Page 3
REV 4 - 1301300830
L-C2-270
3
SINK INSTALLATION (cont.)
INSTALL SINK
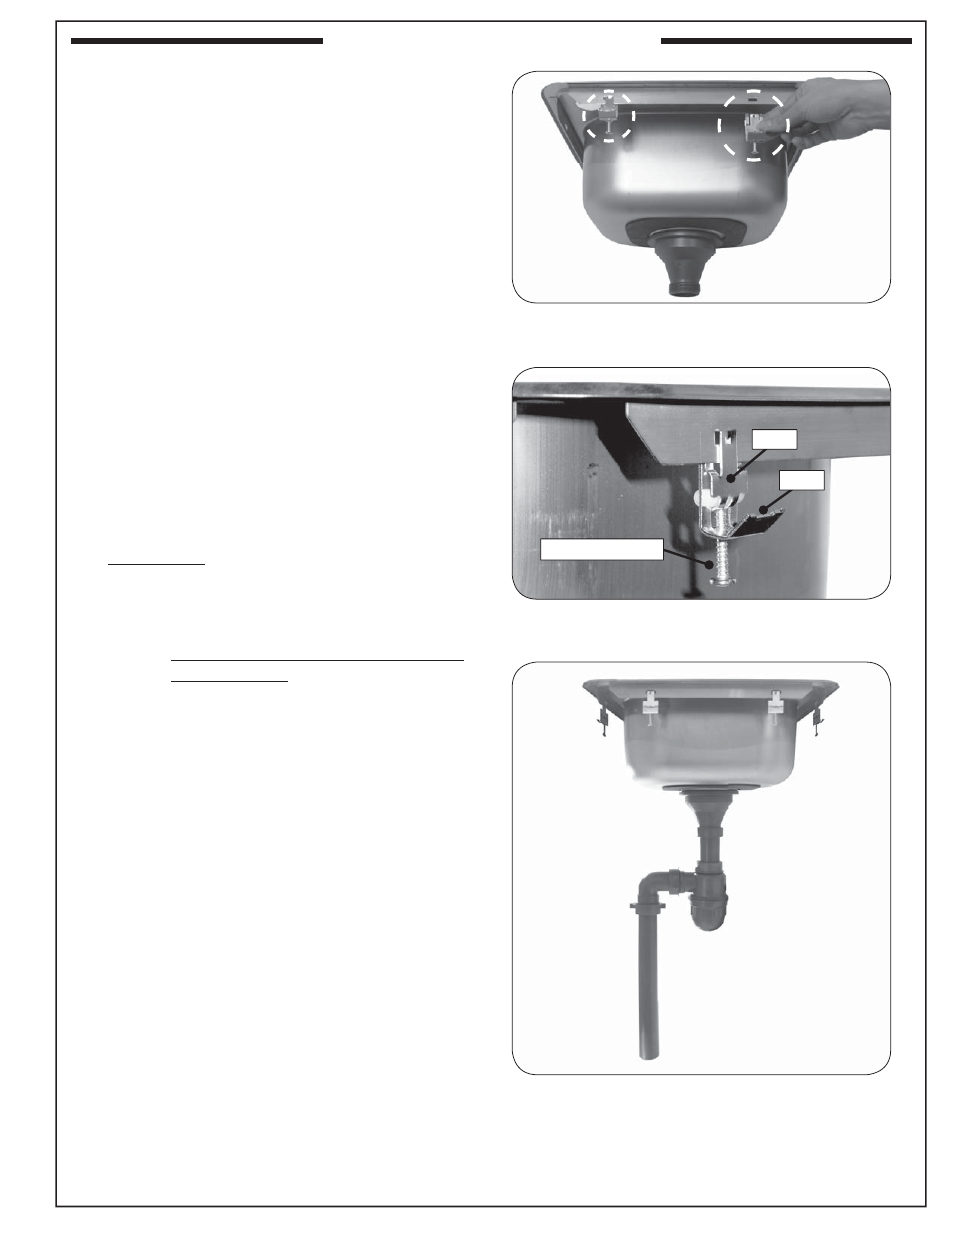
1. After application of any silicon sealant, lower the
sink into the counter cut-out with the Fire Magic
logo toward the back.
2. From underneath the counter, connect the eight
anchor clips to the punched tabs around the
outside of the sink by snapping them into place
as shown in Fig. 3-1.
3. Hook each clip claw under the inside bottom of
the counter and tighten the screw until enough
tension exists to hold the sink fi rmly down against
the counter (see Fig. 3-2).
4. Install a faucet or plug (not included) into the
opening in the top of the sink.
5. Insert the drain plug into the sink drain.
INSTALL SUPPLIED PIPING
1. Assemble the supplied piping and install to
the bottom of the drain assembly. (Various
confi gurations are available for the individual
setup. An example is shown in Fig. 3-3.)
Alternatively, the provided hose adapter may be
installed to the bottom of the drain assembly.
Important: U s e r u bb e r r i n g s t o s e a l d ra i n
compression fi ttings.
All plastic fi ttings must be hand
tightened only! DO NOT use wrenches
on plastic fi ttings.
2. Plumb out the system as appropriate for the
installation.
Fig. 3-1
Connect anchor clips to sink (below countertop)
Fig. 3-2 Anchor detail
Fig. 3-3 Drain assembly example
Clip
Claw
Tightening screw
View beneath
countertop
(countertop not
shown for clarity)