Installation (cont.) – Fire Magic 36-VH Vent Hood User Manual
Page 19
REV 2 - 1502191555
L-C2-387
19
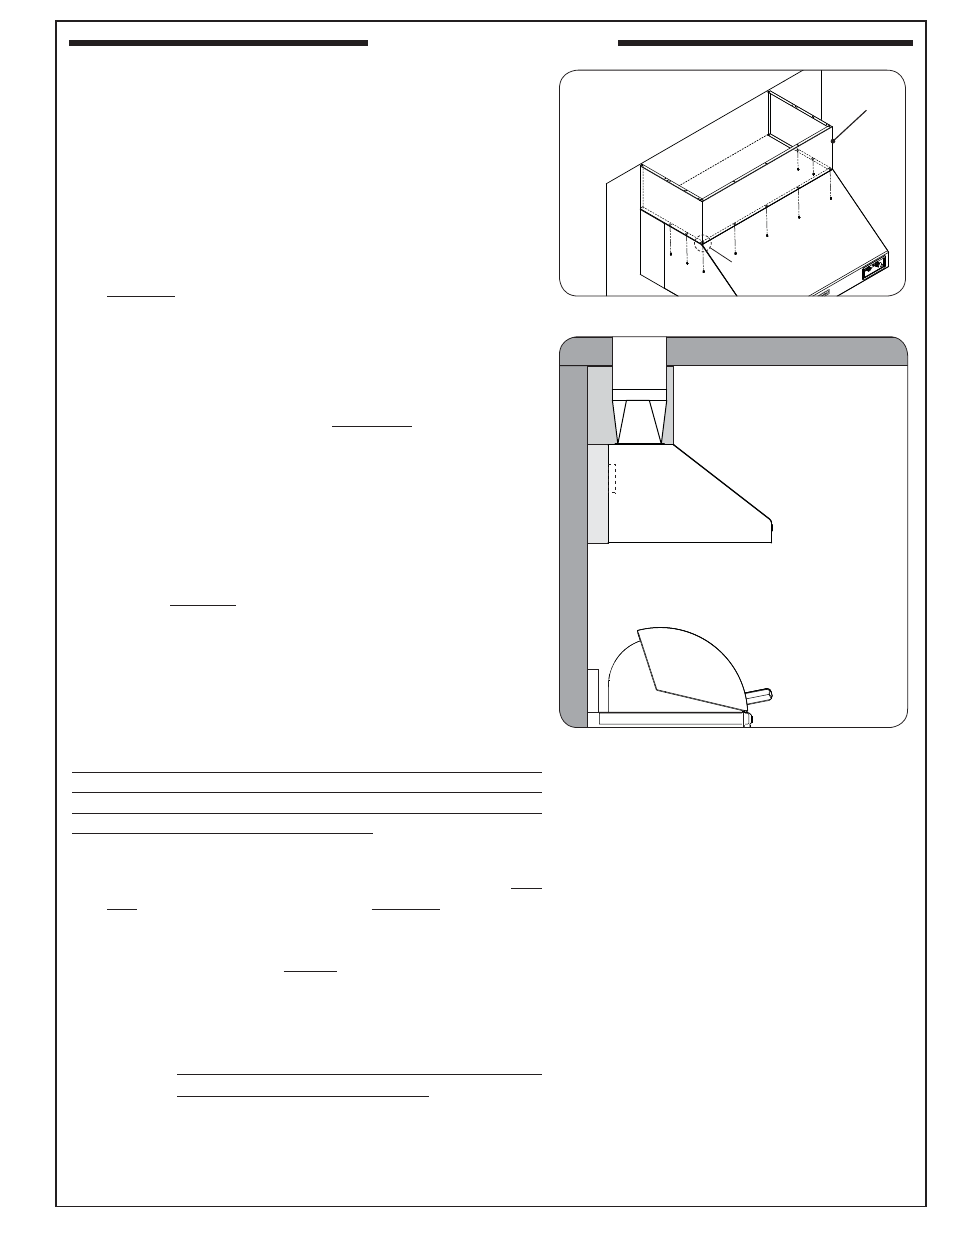
Fig. 19-1 Install Fire Magic Duct Cover
Duct cover
(Flush)
(transition, vent piping, &
electrical not shown for
clarity)
DUCT COVER / CUSTOM SOFFIT
Note: Some installs may not require a duct cover / soffi t, as
island height & roof height may vary.
Fire Magic offers a duct cover specifi cally designed for your vent
hood. Contact your dealer for ordering information. Alternatively,
a custom soffi t can be constructed for your setup. Follow the
appropriate section for your spacer type.
Fire Magic Duct Cover:
The Fire Magic duct cover comes ready to be installed.
1. Carefully slide the duct cover into the area above the
already installed spacer and vent hood. Ensure the bottom
perimeter of the duct cover rests fl ush with the spacer and
vent hood. See Fig. 19-1.
2. From beneath the vent hood, use a medium Phillips
screwdriver and the 8-32 x 3/8" screws
supplied with the
duct cover to secure it to the vent hood. (The screws are
to be fastened through the pilot holes found on top of the
vent hood and into the duct cover above.) See Fig. 19-1
Important: To prevent cross-threading the screws they should
be installed with a manual screwdriver and a small
amount of household grease.
Note: The rear of the duct cover does not need to be secured
to the rear wall.
Important: DO NOT apply sealant to the duct cover as it must
be removable for servicing and for access to the
electrical connection.
Custom Soffi t:
Construct the soffi t frame according to your individual install
preference, while following the guidelines found in the
INSTALLATION REQUIREMENTS section.
When designing the soffi t; account for the thickness of your
fi nishing substrate so that overall dimensions are fl ush with the
vent hood and spacer below. The soffi t must allow permanent
interior access (i.e. access panel/door).
1. Locate and mark the REAR WALL studs.
2. Using appropriate mounting hardware for the soffi t and rear
wall construction; secure it into the rear wall. The soffi t will
rest directly above the spacer and vent hood.
Important: THE SOFFIT MUST BE SECURED INTO
M U LT I P L E WA L L S T U D S, U S I N G T H E
APPROPRIATE HARDWARE, TO ENSURE
PROPER SUPPORT. METAL FRAMEWORK
WILL REQUIRE ADDITIONAL WALL STUDS
AND SCREWS FOR PROPER SUPPORT.
CONSULT A PROFESSIONAL CONTRACTOR
FOR YOUR INDIVIDUAL SETUP.
3. Install fi nishing substrate to left and right sides, and front
of soffi t as appropriate.
Important: The soffi t must allow permanent interior access
(i.e. access panel/door).
INSTALLATION (cont.)
Fig. 19-2 Custom soffi t orientation
• Soffi t must be properly
secured into REAR WALL
studs.
• Soffi t must have access
panel/door.
R O O F
R
E
A
R
W
A
L
L
(remove grill
if possible)
S
O
F
F
I
T