Flowserve ISC1EX User Manual
Page 6
6
4.9 Place the gland/mating
ring assembly face down
over the sleeve/rotary unit
assembly. Do not com -
press. (
Figure 9
)
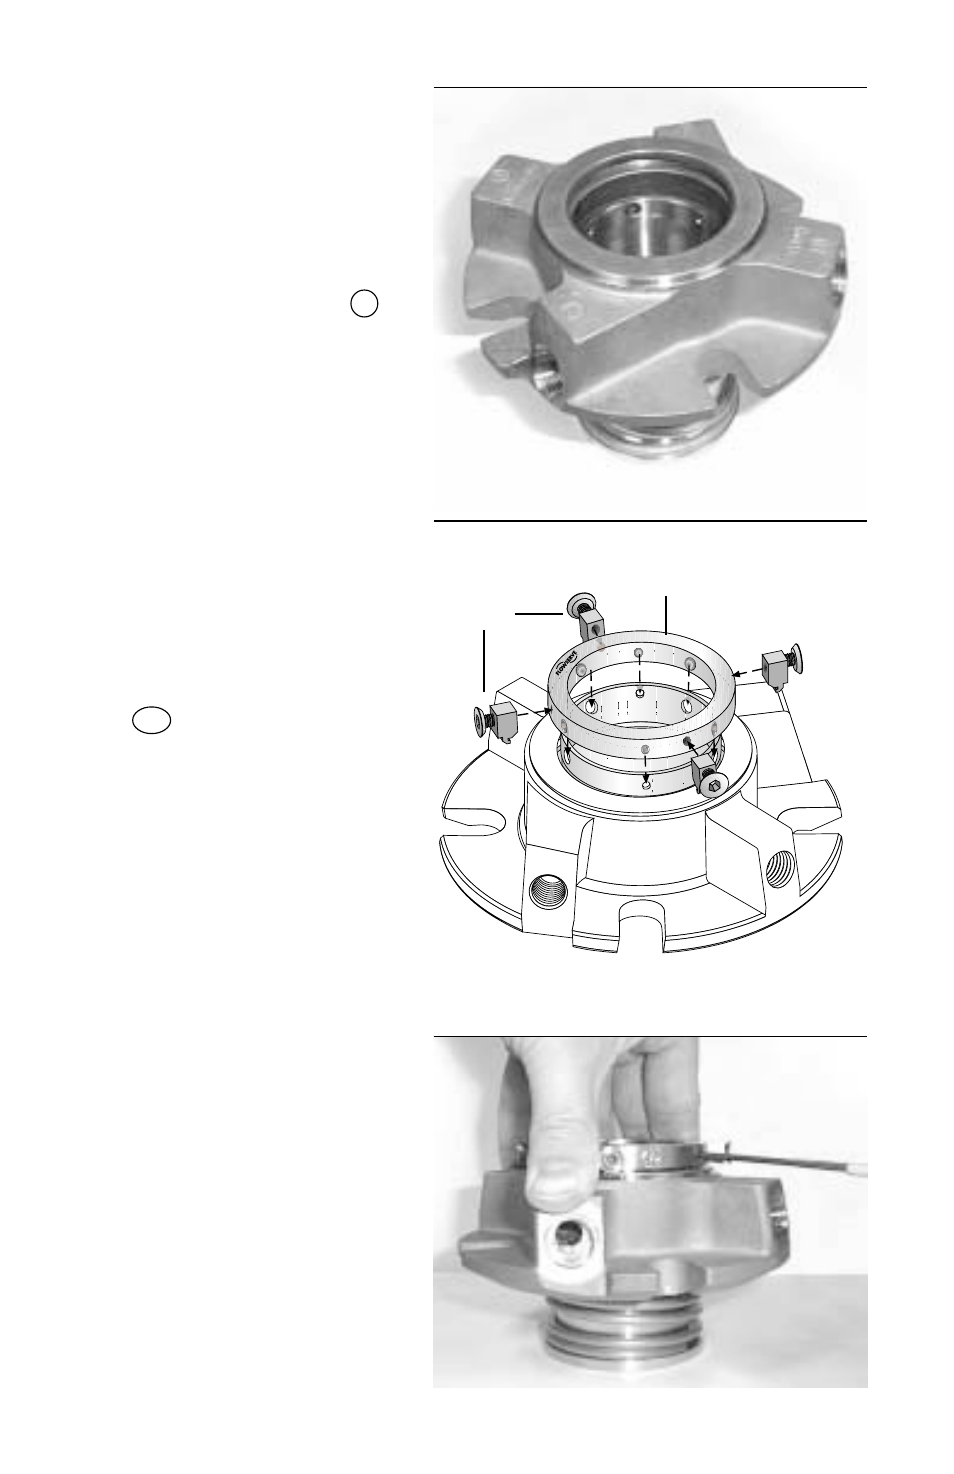
4.10 Place the sleeve collar
9
onto the gland assembly
with the "Flowserve" logo
facing up. Align the
quarter dog set screws
with the smaller holes in
the end of the sleeve. On
smaller seal sizes, one of
the quarter dog set screws
will be offset by 15 degrees.
Align this quarter dog set
screw with the correspond-
ing offset hole in the end of
the sleeve. Do not tighten
any set screw at this time.
Install the centering tabs
CT and flat head cap
screws into the collar while
engaged with the gland.
(
Figure 10
)
4.11 Using firm hand pressure
press down the gland
assembly/collar until the
elastomer boot is fully
seated on the step of the
sleeve. This will result in
the collar being pressed
slightly beyond the end of
the sleeve (approx.
1
/
16
").
Release the gland
assembly/collar until it is
even with the end of the
sleeve, and tighten the
quarter dog set screws
until they are snug. Be
careful not to distort the
sleeve by over tightening
the quarter dog set screws.
(
Figure 11
)
Figure 10
Figure 11
Figure 9
Centering
Tabs
Sleeve
Collar