Reassembly, Figure 2: piston check valve – Flowserve Valtek Tek-Check User Manual
Page 3
3
®
User Instructions Tek-Check Valve - VLENIM0019-05 06/09
GENERAL MAINTENANCE ON NON-SLAM PISTON
CHECK VALVES
Disassembly
To disassemble the non-slam piston check valve, refer to Figure 1
and proceed as follows:
WARNING: Drain all the fluids from the valve and depressurize the
line to atmospheric pressure. Failure to do so can cause serious
injury.
1. Remove bonnet flange nuts and lift the bonnet flange and bonnet
from the valve.
WARNING: Bonnets on valve size 8-inch and larger are heavy
and should be lifted with a hoist using a lifting ring attached
to the top of the bonnet. Failure to do so can cause injury.
2. Lift spring, piston, retainer, gaskets, and seat ring out of the body.
Check for signs of galling and scoring between the piston and
the retainer. If galling exists, call your Flowserve representative.
3. Check for dirt buildup in piston’s plug check seat. Remove plug
check seat using a screwdriver. A slot is provided in the top of
the seat for easy removal. Remove ball and spring. Check spring
for breakage and dirt. Replace broken or damaged parts.
4. With a hex key, remove the orifice, making sure the orifice bore
is free of dirt.
5. Check vent passages in the piston to make sure they are free of
dirt and other foreign material. Clean with appropriate solvent if
necessary.
6. Check seat ring and piston seating areas for damage. If seating
surfaces need re-machining, the angle on the seat ring is 33 degrees;
the angle on the plug is 30 degrees. Re-machine surfaces of both
parts if required.
Reassembly
To reassemble the non-slam piston check valve, refer to Figure 1 and
proceed as follows:
1. Replace seat ring gasket.
NOTE: Gaskets and piston seals should be replaced each time disas-
sembly takes place.
2. Insert the seat ring and the retainer. Ensure the seat ring is seated
properly by rotating it in place.
3. Reassemble piston: Insert the spring and ball into the piston. Apply
removable Loctite to the plug check seat threads then install into the
piston by screwing into place until firmly seated.
4. Apply Loctite to orifice threads, then, with a hex key, install the orifice
into the piston.
5. Place seals on the piston groove and lower the piston squarely into
the retainer. The piston should be able to move inside the retainer. If
strong resistance is felt, remove the piston and seals and reassemble.
6. Replace both bonnet and retainer gaskets.
7. Install the spring, bonnet and bonnet flange.
8. To properly align the seat ring and the piston, bring body bolting to
finger tightness. Tap the bonnet several times with a soft hammer.
This allows the piston to self-center the seat ring and ensure tight
shutoff.
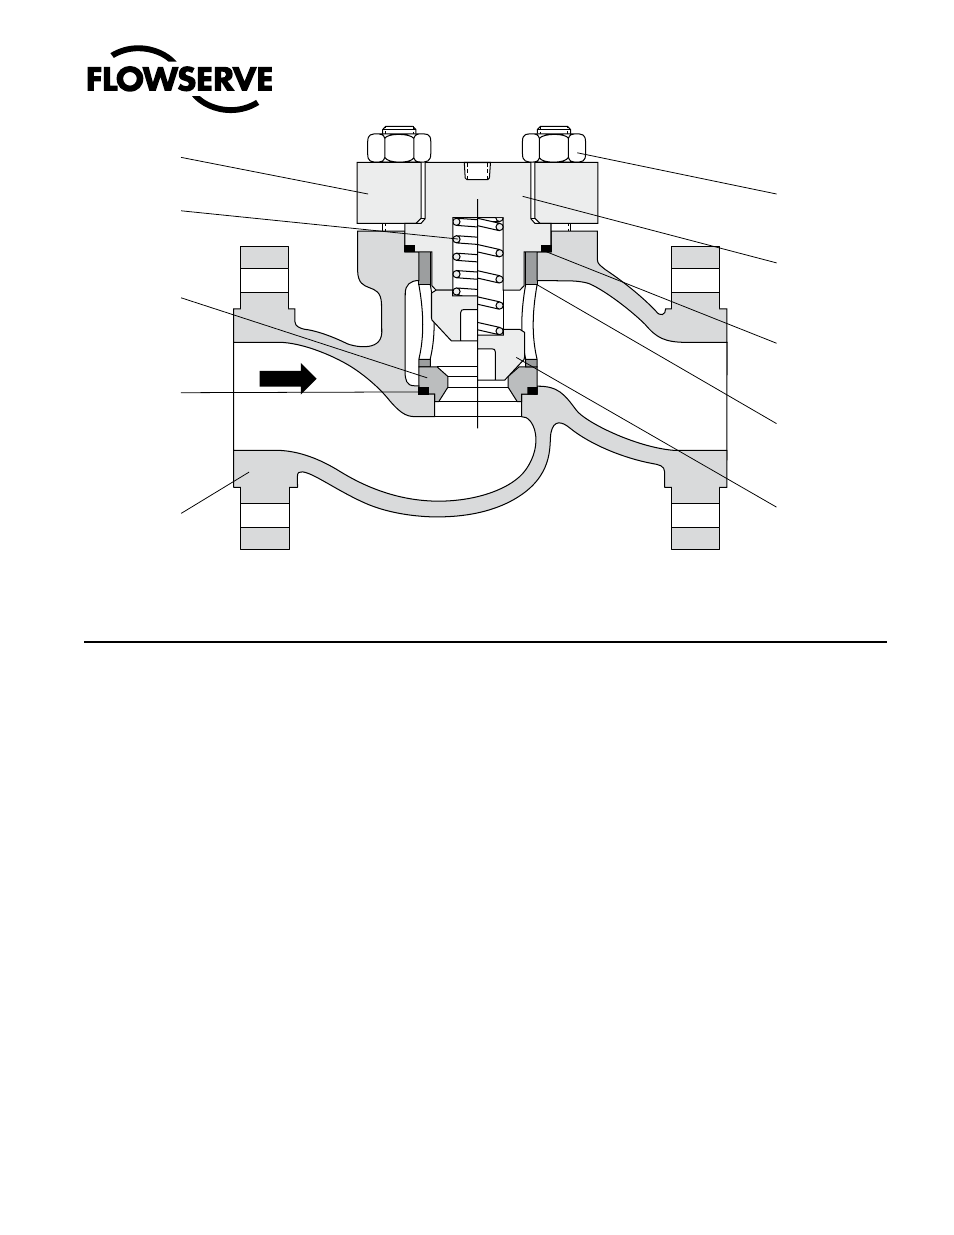
Figure 2: Piston Check Valve
NOTE: Item numbers correspond directly to valve‘s bill of material. Refer to it for specific part numbers.
FLOW
Bonnet Flange
(Item No. 70)
Spring
(Item No. 133)
Seat Ring
(Item No. 20)
Seat Ring
Gasket
(Item No. 55
)
Body
(Item No. 1)
(downstream)
(upstream)
Bonnet Flange
Bolting
(Item No. 108/111/114)
Bonnet
(Item No. 40)
Bonnet
Gasket
(Item No. 58)
Retainer
(Item No. 30)
Piston (Plug)
(Item No. 50)