Disassembly instructions for akh3, Disassembly instructions akh3, Technical manual – Flowserve AKH3 Atomac Lined Ball Valve IOM User Manual
Page 7
AKH3 -
atomac ball valve - reduced port
Ahaus GmbH
von-Braun-Straße 19a
D-48683 Ahaus
Postfach 1162 D-48661 Ahaus
Telefon: +49(0) 2561-686-100
Fax: +49(0) 2561-686-200
Register:
3
Page:
7
Date:
05.1996
Revision: 08.2010
Technical Manual
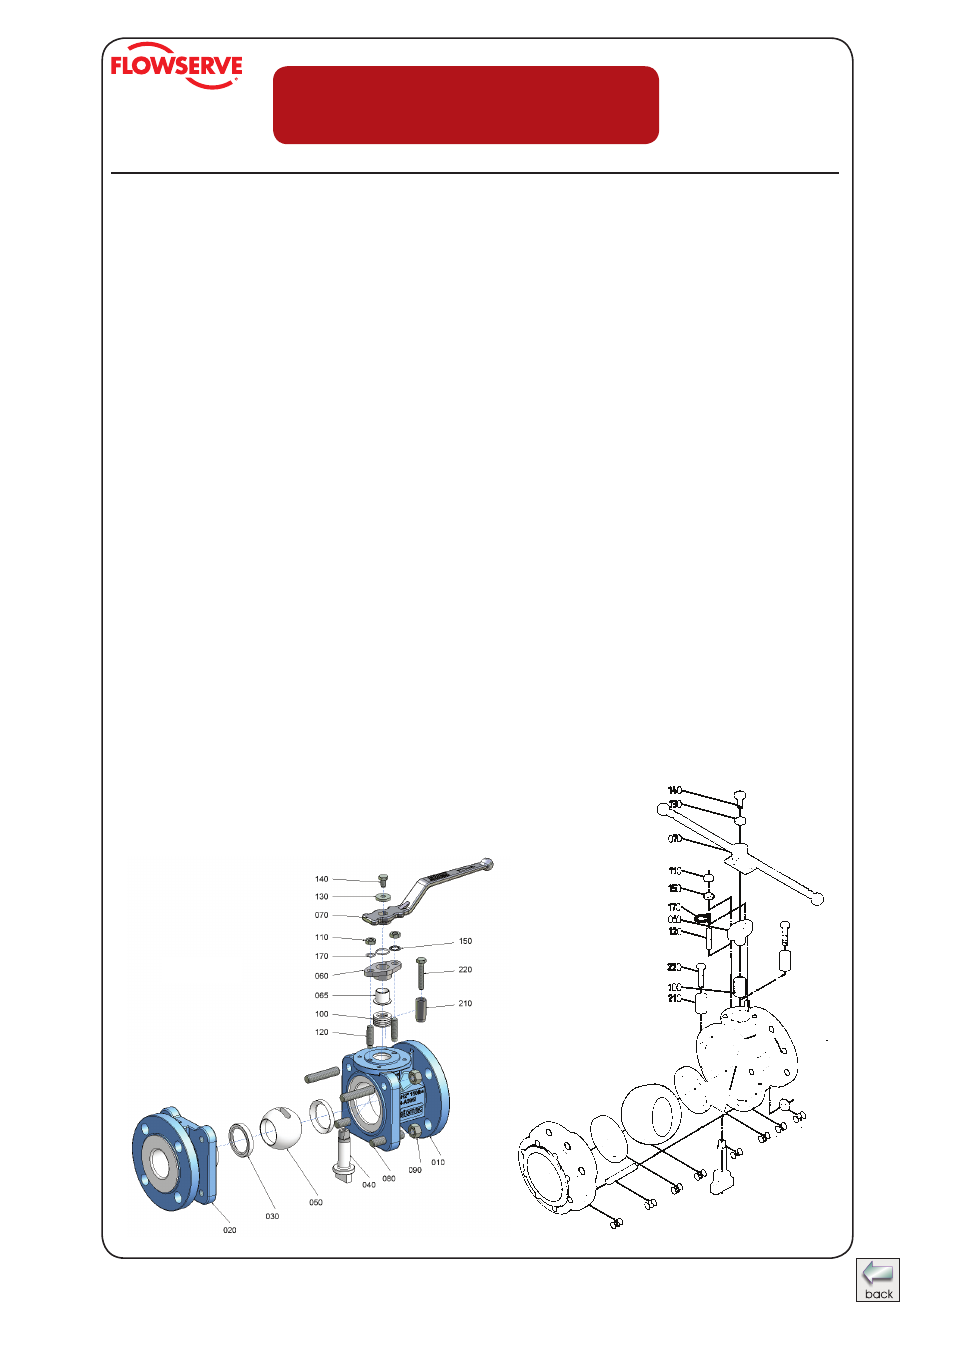
DN8“ and 10“
DN 1“ - 3“ = square flange
DN 4“ and 6“ = hexagonal flange
Disassembly Instructions for AKH3
For all jobs which are to be carried out on an installed valve, the works safety requirements and
the general accident prevention instructions must be observed. Moreover, the general installation
and maintenance instructions for atomac fluorcarbon resin lined valves must be considered.
1. Prior to disassembly, the valve must be cleared of all fluid according to the above-mentioned
instructions. Particular care must be taken that during rinsing and draining of the piping, the
valve is opened and closed repeatedly. These cycles (opening and closing) are to be repea-
ted during draining of the piping. Only when following this procedure, is it ensured that all
remaining pressure inside the body (stem guide and ball seats) is eliminated.
Make sure that the valve DN 10“ is in open position when it is removed of the piping system.
2.
For disassembly of the valve, put body on a work bench with a soft cover (rubber mat). Re-
move hexagon bolt
(110) and lock washer (150).
3. Open valve completely. Remove hand lever.
4. Disassemble grounding device
(170).
5. Disassemble gland follower
(060) and gland insert (065). If necessary, stud bolts (120) can
also be removed now.
6. Remove body bolts
(080) and separate side piece from body.
7. Remove first ball seat ring
(030).
8. Put ball in closed position and push ball out of the body. Remove hand lever
(070).
9. Remove stem
(040) by pushing it down through the body (010). Care must be taken not to
damage body liner.
10. Chevron packing
(100) can easily be removed.
11. If necessary, remove hand lever stop
(210) by releasing bolt (220).