Flowserve Spring Diaphragm Rotary Actuators User Manual
Page 7
7
Spring Diaphragm Rotary Actuators FCD VLAIM050-01 – 05/12
flowserve.com
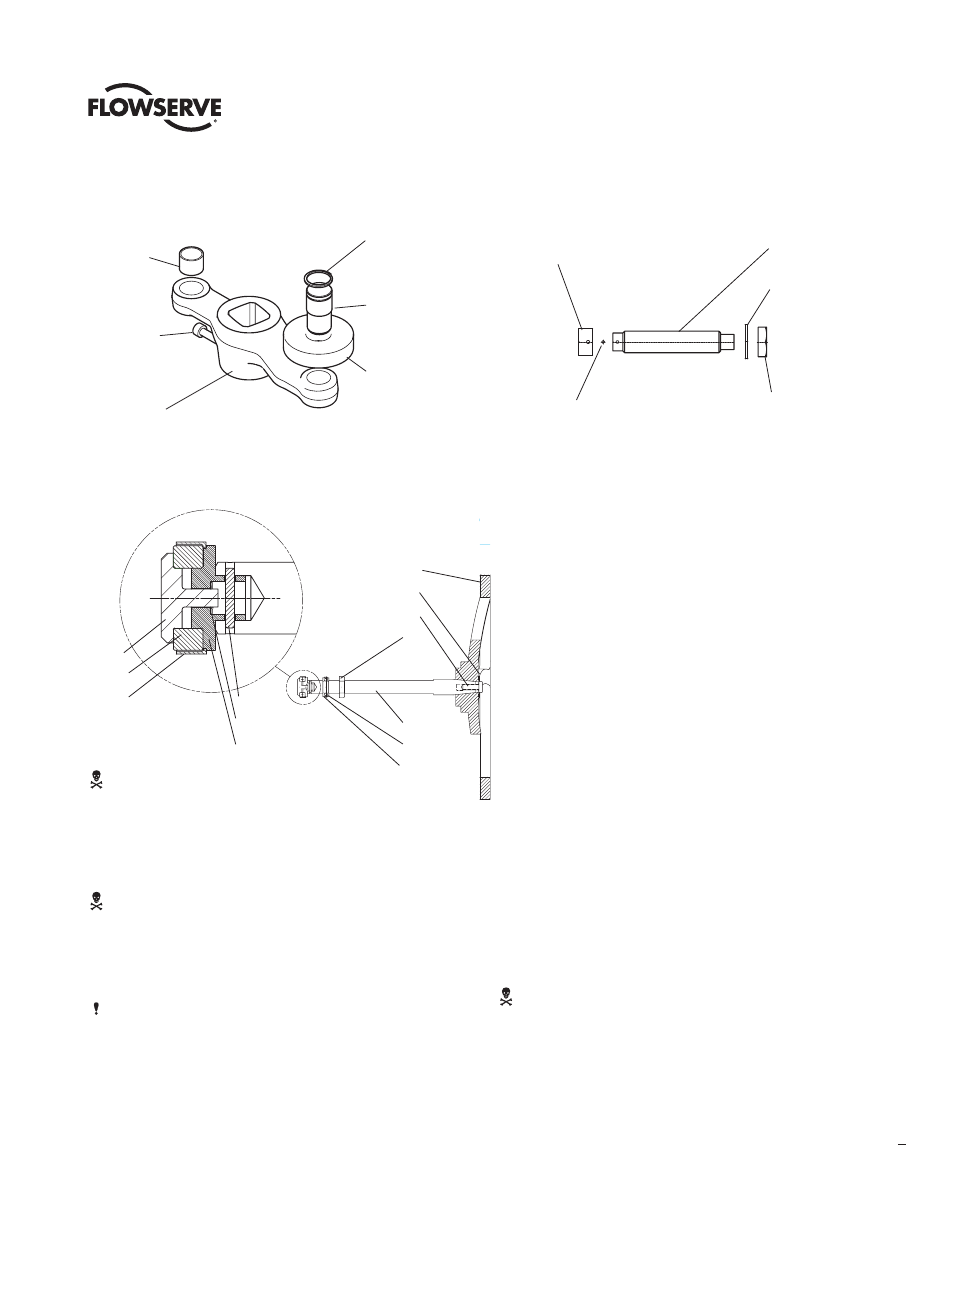
KIT #249 Lever Sub-Assembly
KIT #330 Limit Stop Sub-Assembly (Can be used in place of
handwheel)
Retainer Ring
Pivot Pin
Roller Bearing
Lever Arm
Bearing
Socket
Head Bolt
Crank Lever
Limit Stop Bolt
Lock Washer
Limit Stop
Bolt Nut
Stroke Stop Shoe
Stroke Stop
Shoe Pin
KIT #397 Handwheel Assembly
9
12
11
8
13
10
1
2
3
7
6
4
5
NR 1 & 2
Item # Description
1 Handwheel
2 Indicator Plate
3 Handwheel Bolt
4 Handwheel Lock Nut
5 Socket Head Capscrew (2)
6 Handwheel Shaft
7 Handwheel Stop Nut
NR 3
Item # Description
1 Handwheel
2 Indicator Plate
3 Handwheel Bolt
4 Handwheel Lock Nut
5 Socket Head Capscrew (2)
6 Handwheel Shaft
7 Handwheel Stop Nut
8 Shoe Pin
9 Support Pad Shoe
10 Base Shoe
11 Retainer Shoe
12 Ball Bearing
13 Retaining Clip
WARNING: Do not attach or insert extension bars
into the handwheel, for added torque.
WARNING: The actuator spring is under compression.
1. Position valve vertically
• It is easier to change the diaphragm with the valve in this
position.
NOTES:
• The diaphragm can be replaced by itself while the diaphragm
box is mounted to the transfer case, or the whole diaphragm
box can be removed and replaced.
• If a spring set change is desired, it is recommended that the
entire diaphragm box be changed out as described in the
“changing the air action” section.
2. Make sure the limit stop (See kit #330 Limit Stop Sub-Assembly)
and lever (See Kit #249 Lever Sub-Assembly) are engaged
• Make sure the limit stop is engaged with the lever, so the spring
is applying force to the limit stop (or HW).
• This limit stop will hold the diaphragm piston in place, and allow
you to change the diaphragm without having to relieve the
spring.
3. Remove the small diaphragm case nuts (351) and bolts (335) first
WARNING: Use lubricant on the long threads to avoid galling,
simplifies spring compression.
• As a safety precaution, remove the small diaphragm case nuts
(351) and bolts (335) first, then remove the thread covers off the
long bolts (334).
4. Apply lubricant to the long bolts (334)
• It is recommended to lubricate the long spring compression bolts
(334).
Replacing the Diaphragm, Without Removing the Diaphragm Box