Maintenance – Flowserve FPS 14 User Manual
Page 5
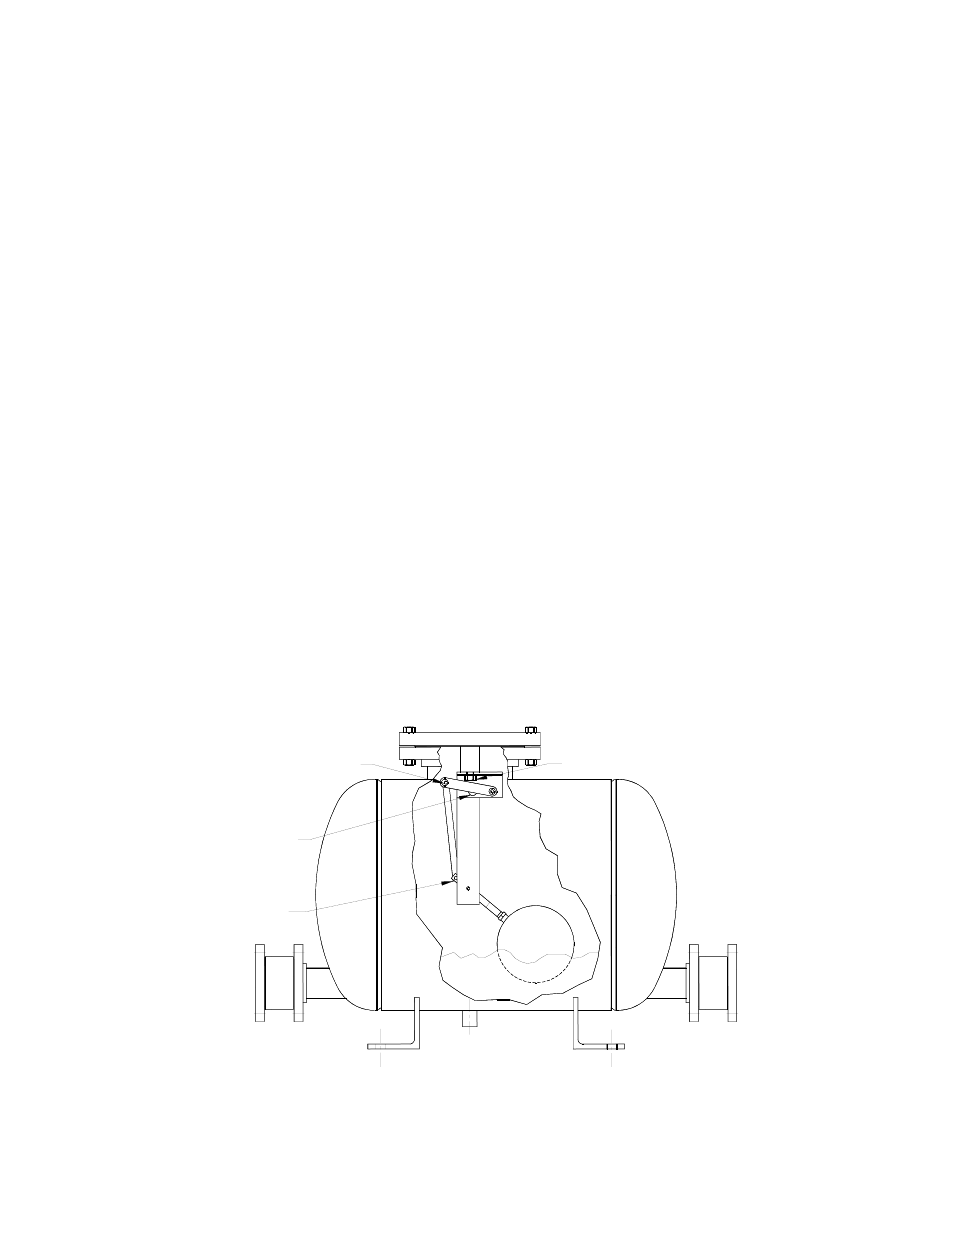
Maintenance
Turn off the motive gas pressure (steam, air, or gas). Close all isolation valves, and relieve the
pressure in the pump by opening the ½” NPT drain plug on the bottom of the tank, or one of the
two (2) ¼” NPT pipe plugs on the top of the cover flange. Remove the bolts from the mechanism
cover and lift the mechanism from the tank. A clearance of fourteen (14) inches is required to
remove the mechanism from the tank.
1. Be sure the mechanism is completely free of dirt and scale, and moves freely.
Remove any obstructions. Make sure the mechanism snaps at the top and the bottom of the
stroke. Check the integrity of the pivot and cotter pins.
2. Check the float ball for damage, pinholes, or water logging.
If the float ball is full of water, is cracked, or will not float it must be replaced.
If the float ball floats properly, it can be reinstalled on the mechanism.
3. With the float ball in the raised position (closest to the cover flange), check for an air gap
under the striking pin. There should be 1/16” or more clearance below the striking pin. If there
is no air gap under the pin, this is an indication that the valves may be worn.
4. Check the spring.
If the spring is broken or defective, it must be replaced.
To replace the spring, remove the float ball. Remove pivot pins #1 and #2 in that order. This
will free the spring for removal and replacement. After the new spring is in place, reinstall pivot
pin #2, using the float arm for leverage to compress the spring. After pivot pin #2 is in place,
reinstall pivot pin #1 and the float ball.
After the spring has been replaced it is important to recheck the air gap, as explained in step
#3 of the MAINTENANCE section. A proper air gap indicates that all of the components have
been reinstalled correctly.
PIN #2
PIN #1
AIR GAP
BOLT