Introduction, 1 general description, 2 procedure – radiographic – Fluke Biomedical 07-661-7662 User Manual
Page 5
Introduction
General Description
1
1-1
Section 1
Introduction
1.1 General Description
A common problem of x-ray units is the misalignment of the collimator light field and the x-ray field. The
Collimator Test Tool is designed to evaluate this light x-ray alignment according to National Center for
Devices and Radiological Health (NCDRH) specifications. The Beam Alignment Test Tool, when used
with the Collimator Test Tool, provides a simple test for beam alignment.
The Beam Alignment Test Tool is a plastic cylinder, 6" tall with a 1/16" diameter steel ball at each end.
When the tool sits upright on a level surface, the upper ball is directly above the one in the base. The
Collimator Test Tool is a flat plate with a rectangular outline and markings etched on its surface.
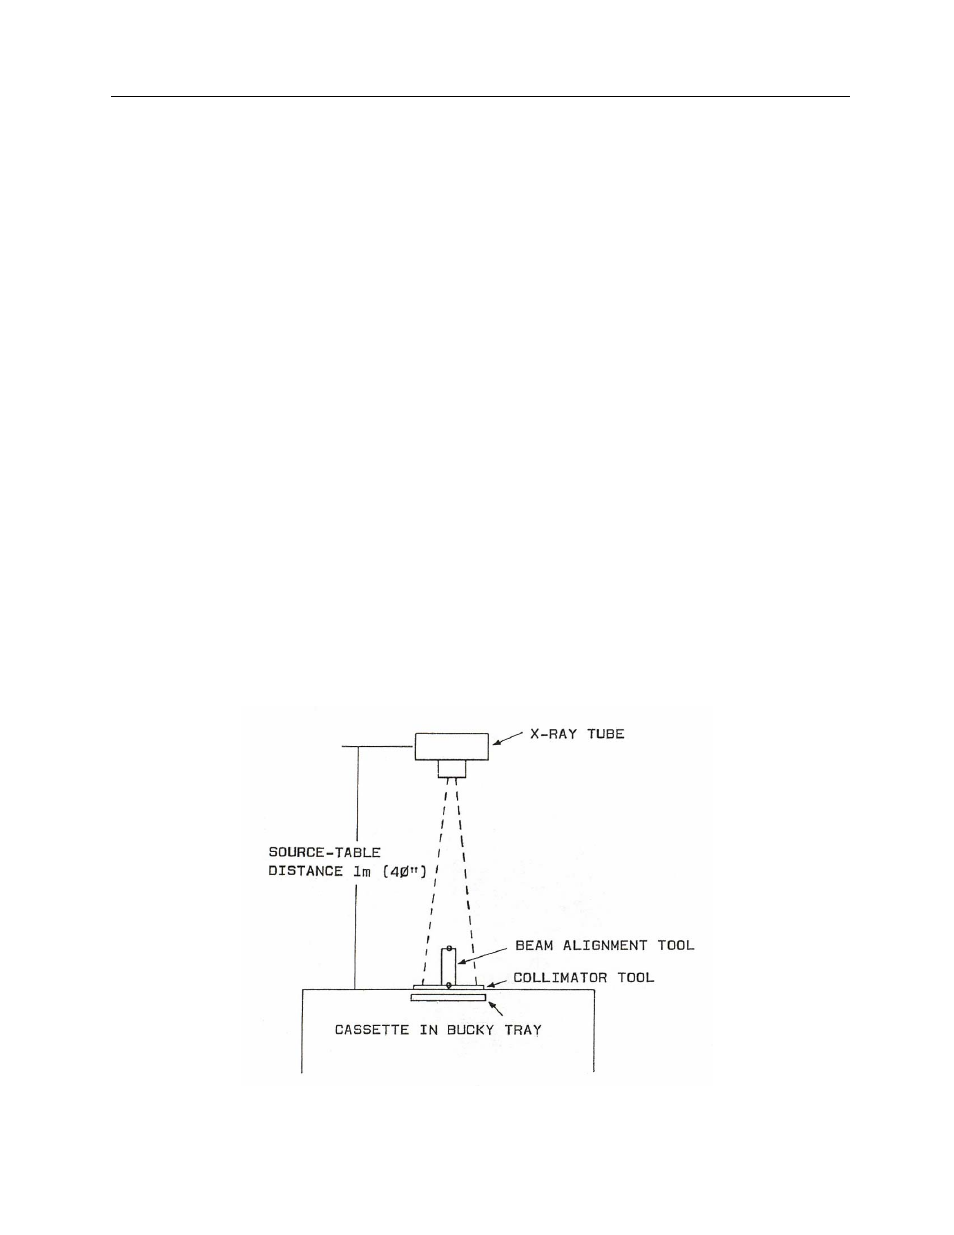
1.2 Procedure – Radiographic
Before using these tools, level the table and place the x-ray tube so the beam is perpendicular to the
table. A bubble level can be used for this purpose. Center the tube to the table and use a 40" distance
from the focal spot to the tabletop. Place the Beam Alignment Tool in the center of the Collimator Tool,
and put both in the center of the light field. Adjust the collimator shutters so that the edges of the light
field coincide with the rectangular outline on the Collimator Tool. Orient the Collimator Tool so that the
dot in the lower left corner corresponds to the position of a supine patient’s right shoulder. This allows the
direction of collimator error to be determined at a later time. Place an 8" x 10" cassette in the center of
the bucky tray. Align the tray to the x-ray tube and expose the cassette at approximately 60 kVp, 10 mAs
for RP film using the bucky (Figure 1-1).
Figure 1-1. Placement of Test Tools for Proper Exposure