Install leveling legs, Install shelves – Gladiator GAJG36FDZW The Jumbo GearBox User Manual
Page 4
4
6.
Using the hex key (provided), completely tighten all cabinet bolts
and nuts.
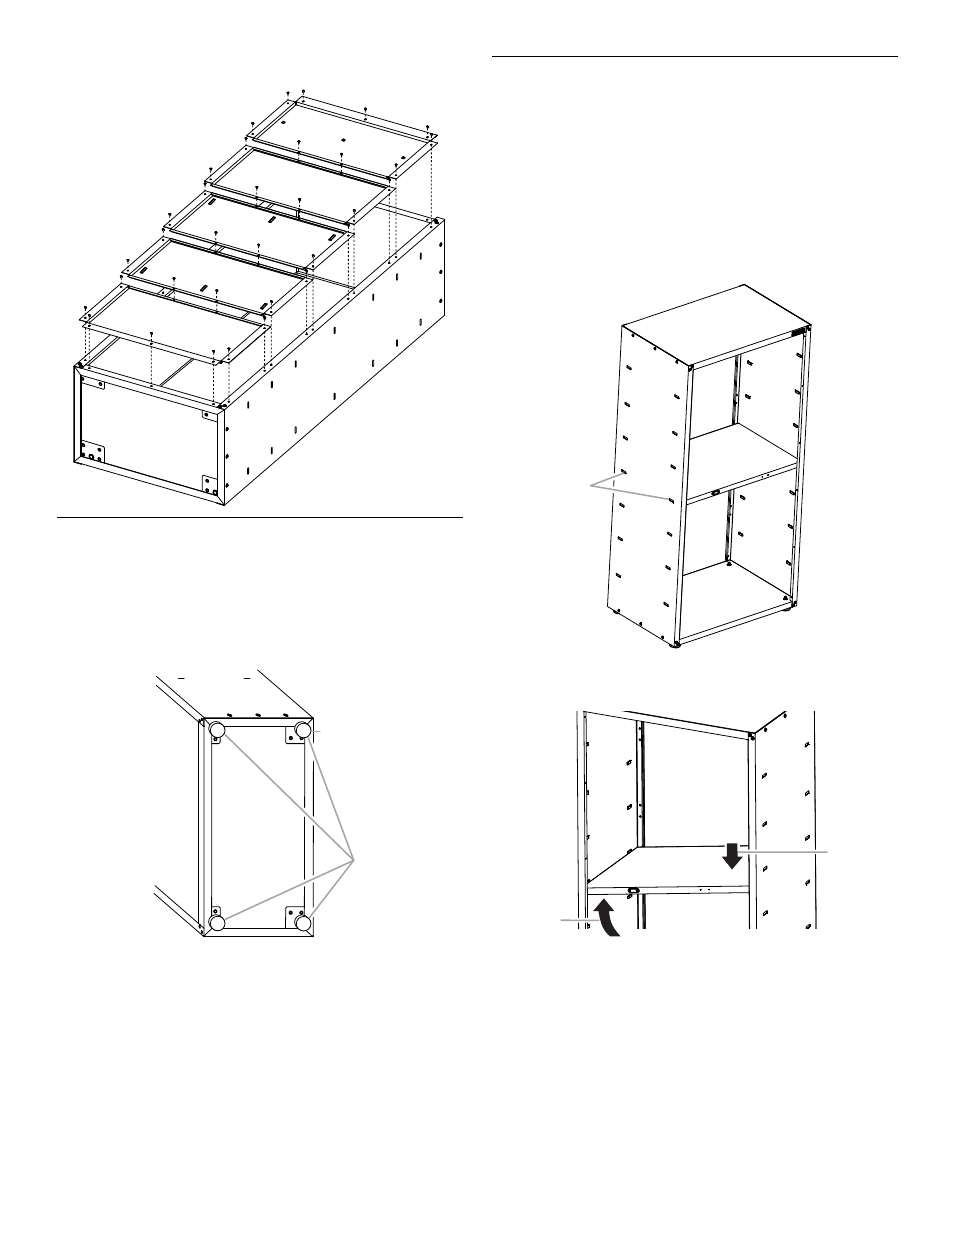
Install Leveling Legs
(optional)
IMPORTANT: If you are going to install the cabinet on Gladiator
®
GearWall
®
panels or GearTrack
®
channels, you do not need to install
leveling legs.
1.
Place the cabinet on its side.
2.
Screw a leveling leg (P4) into each of the four rivet nuts located at
the corners of the cabinet, as shown.
3.
Stand the cabinet upright.
4.
If you have not already done so, fasten the two bolts at each
front corner of the cabinet frame. Completely tighten all of the
cabinet bolts and nuts.
Install Shelves
IMPORTANT:
■
Use the pair of slots located in the middle of the cabinet sides to
install a center shelf (P5ml). The magnet should be on the left-
hand side and facing out when installed, so that the door closure
will make contact with the shelf, and the door will lock. The other
two shelves may be installed where desired.
■
The shelves are supported by the metal slots on the cabinet
sides.
■
Make sure that the shelf (P5ml) magnet is visible on the
left-hand side and facing out, as shown.
1.
Place a shelf (P5ml) so that the two tabs in the shelf ends are
aligned with the pair of slots in the middle of the cabinet sides.
2.
Tilt the shelf so that one end is higher than the other, as shown.
3.
Insert the shelf into the cabinet so that the higher end is directly
above the desired slots, and then push the shelf down into place
behind the side slots. Raise the lower end so it is directly above
the desired slots, and then push the shelf down.
A. Leveling legs
P1
P3
P1
P2
AAA
BBB
CCC
DDD
EEE
A
P3
P1
P4
EEE
A. Middle pair of slots in cabinet side
A. Push down.
B. Lift up.
P1
P2
P1
P3
P5ml
A
A
B