Installation instructions, Step 10 install framed panels – Kleenmaid ZSGS420IBS User Manual
Page 15
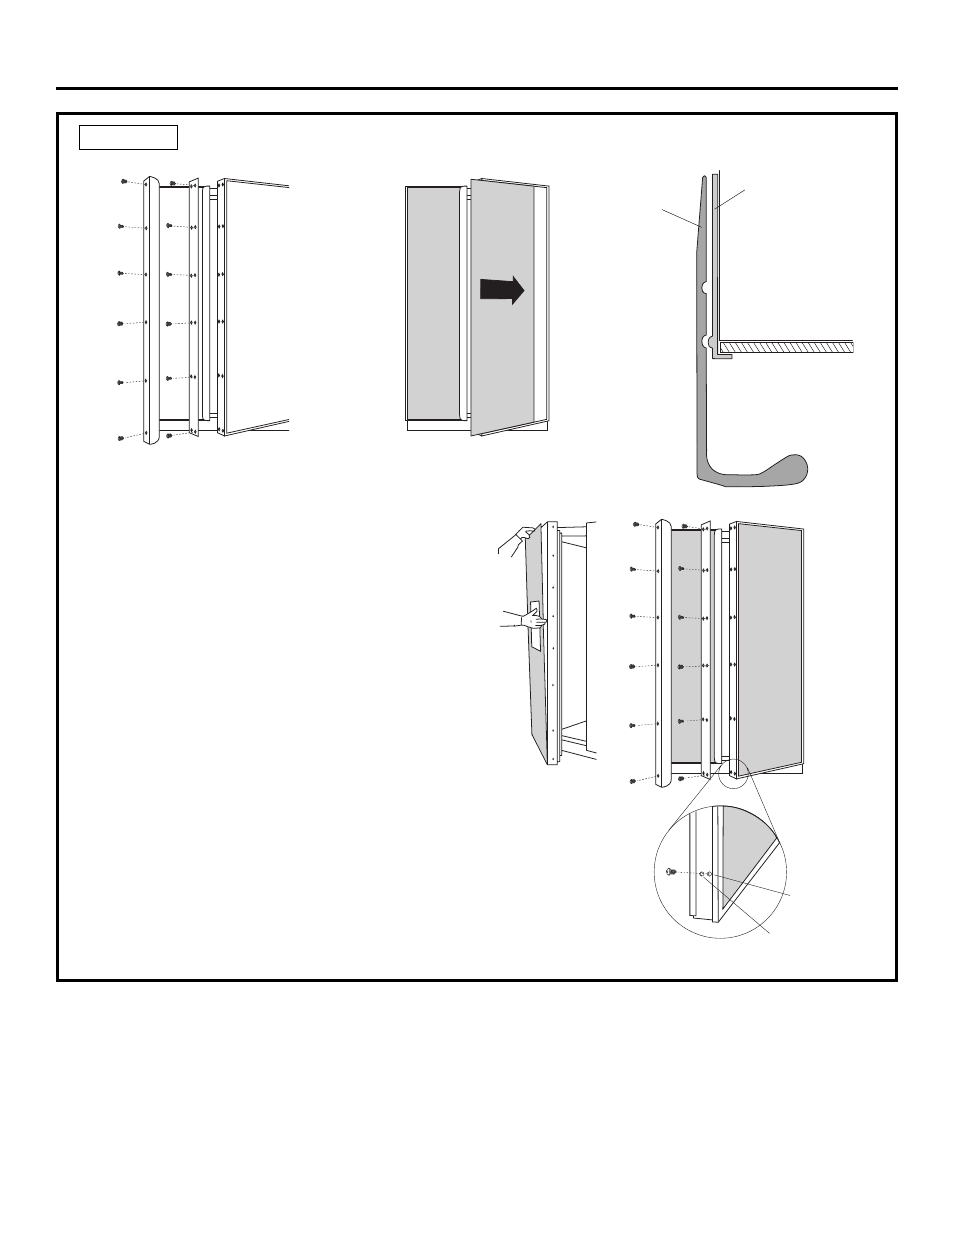
Use Rear Holes
to Secure Handle
Use Front Holes
to Secure Trim
Refrigerator
Door
Door Trim
Handle
Trim
Installation Instructions
15
STEP 10 INSTALL FRAMED PANELS
Install door panels:
• Open door to 90°. Remove the 6 Phillips head screws
from the door handle.
• Remove handle. Retain all screws.
• Remove 6 screws holding trim, lift off trim. Retain
screws.
• Slide framed panel into the door trim.
Dispenser Models Only:
• The dispenser controls protrude beyond the face of
the freezer door. To avoid damage to the dispenser,
the trim at the top of the door should be removed.
• Remove the screws holding the top trim in place.
• Place the freezer panel into the bottom channel and
slide into the hinge side trim.
• Reinstall the top trim piece with screws.
• There are two sets of holes in the handle side trim.
Replace handle side trim by installing the original
screws in the FRONT screw holes.
• Secure the handle to the door using the REAR screw
holes.
• Follow the same procedures to install the opposite
panel.
• Check to be sure handles are evenly aligned with each
other at the top. To adjust, loosen handle screws and
slide up or down. Tighten screws.
Go to Step 10A for Overlay Panels
Supplied
Handle Shown
in 6 mm Panel
Position