Sensor mounting and placement – La Crosse Technology 724-1710 User Manual
Page 4
Model: 724-1710 www.lacrossetechnology.com/support Page | 4
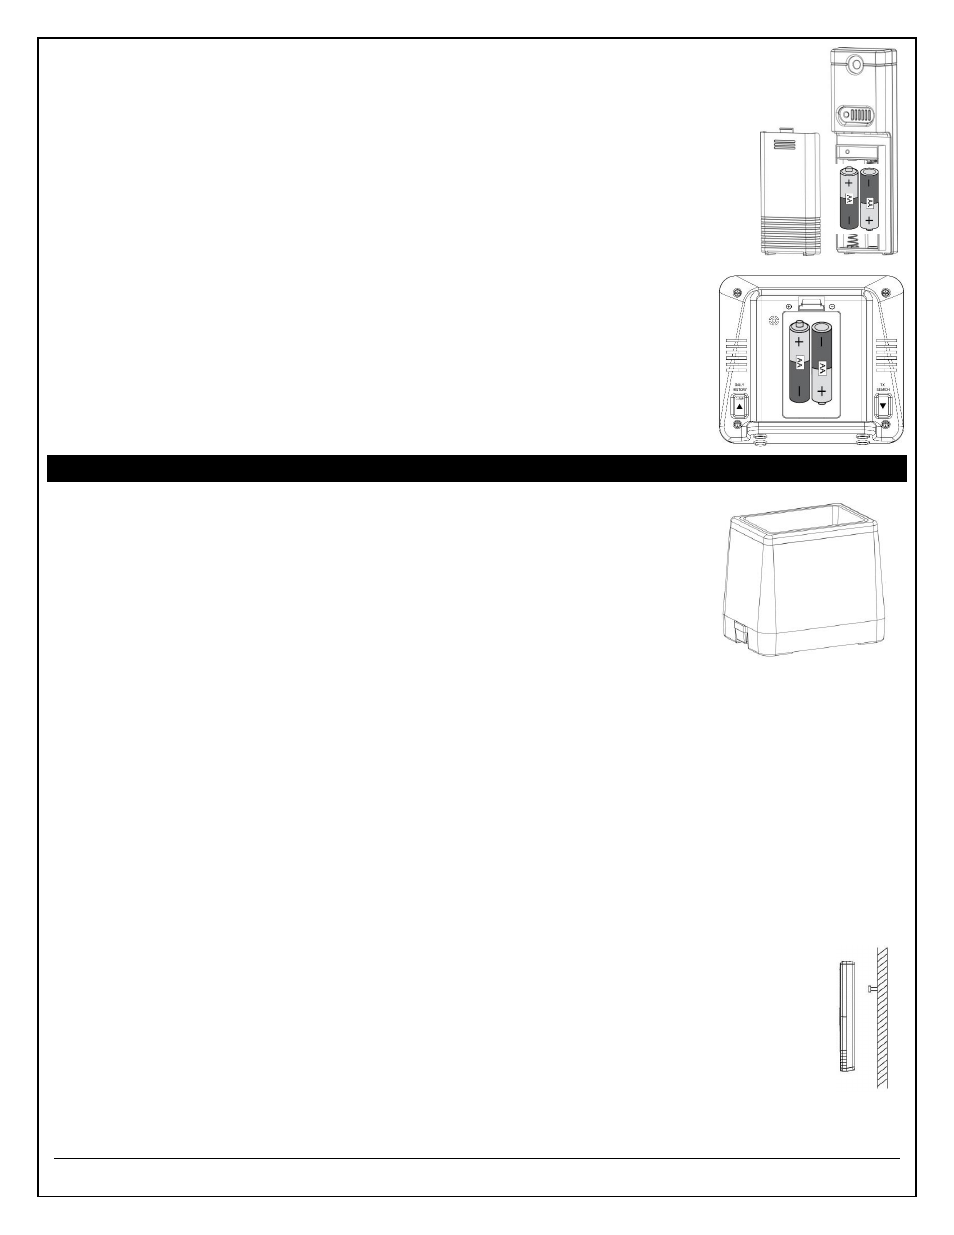
TX17T Temperature Sensor:
1. Insert 2 new AA batteries (not included) into the TX17T outdoor
temperature sensor. Observe the correct polarity.
2. The red LED will flash during transmission.
724-1710 Rain Station:
1. Insert 2 new AA batteries (not included) into the 724-1710 Rain monitor.
Observe the correct polarity.
2. Leave the rain monitor and sensors sit 5 -10 feet apart for 15 minutes
to lock in both sensors.
3. Both the temperature and the rain sensor should appear on the rain
station in the first minute.
4. Do not press buttons during the first 15 minutes.
5. You can tip the rocker of the rain sensor to simulate rain and receive a
reading to the rain station.
Sensor Mounting and Placement
Rain Sensor TX17R
Mount in an open area for a more accurate rain count.
Install the Rain sensor on a level platform that is stationary.
Insert two mounting screws (not included) through the holes in the
base of the rain sensor.
Ideally, the Rain sensor should be mounted at least 6 ft in the air
and have a direct line of sight to the display.
The rain sensor should be accessible to allow for periodic cleaning of
debris or insects.
The maximum wireless transmission range to the rain station is over 300 feet (91 meters) in
open air, not including walls or floors.
Temperature Sensor TX17T
Mount the Outdoor Sensor on a north-facing wall or in any well shaded area. Under an eave
or deck rail is preferred.
The maximum wireless transmission range to the rainstation is over 300 feet (91 meters) in
open air, not including walls or floors.
Be sure the outdoor sensor is mounted vertically.
Place the transmitter at least six feet in the air to improve signal transmission.
Option 1:
Install one mounting screw (included) into a wall leaving approximately ½ of an
inch (12.7mm) extended.
Place the transmitter onto the screw, using the hanging hole on the backside.
Gently pull the transmitter down to lock the screw into place.
Option 2:
Insert the mounting screw through the front of the transmitter and into the wall.
Tighten the screw to snug (do not over tighten).