La Crosse Technology TX5U User Manual
Page 3
3
DETAILED SET-UP GUIDE FOR THE WIRELESS RAIN GAUGE
I) Battery Installation
Note: Batteries will fit tightly. To avoid start-up problems make sure that the batteries do
not spring free.
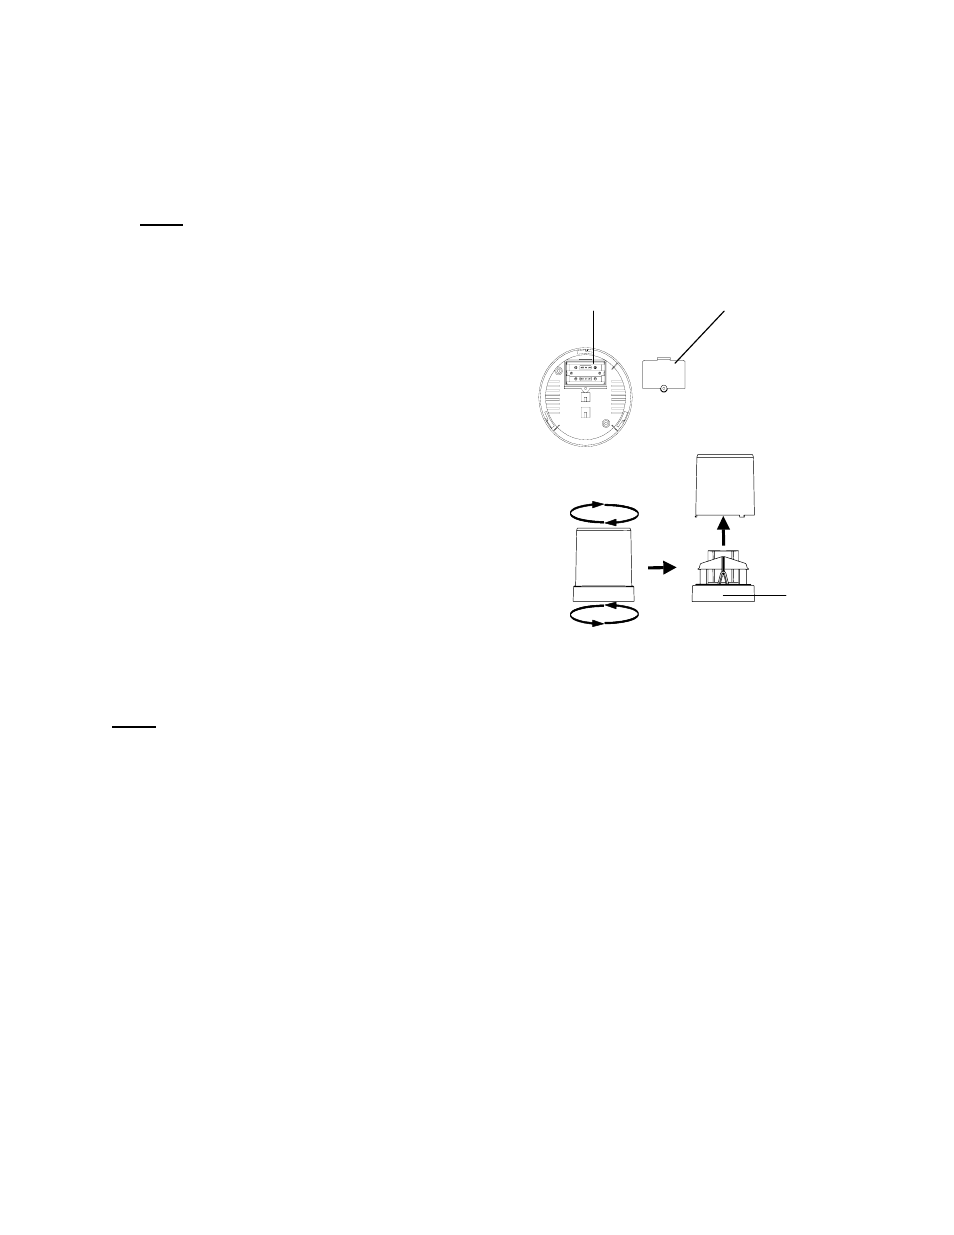
A) Remote Rainfall Sensor
1. Remove the flat-head screw and
battery cover located on the
underside of the base.
2. Observing the correct polarity
install two AA batteries.
3. Make sure the rubber weather seal
is in place and replace the battery
cover and screw.
4. Separate the base by turning the rainfall
collector in a counter-clockwise direction.
5. Remove the tape from the teeter-totter.
6. Replace the cover.
MOUNTING THE WIRELESS RAIN GAUGE
Note: To achieve true rainfall readings, avoid mounting in an area where rainfall run off will
land in the wireless rain gauge. We recommend that you mount the wireless rain gauge a
minimum of 12 inches off of the ground to avoid back splash from the ground. The sending
range is 80ft; obstacles such as walls, concrete, and large metal objects will reduce the range.
Place the wireless rain gauge in the desired location to test wireless reception before
permanently mounting.
I) Mounting The Rainfall Sensor
The rainfall sensor can be mounted in two ways:
• simply placing it in a desired location
• mounting it to a surface with screws
Ensure that the rainfall sensor is completely horizontal and stable.
1. Rotate the rainfall collector separating it from the base.
2. There are two cylindrical holes in the base to guide the mounting screws.
Battery compartment
Battery cover
Teeter-
Totter