La Crosse Technology WS-9133 User Manual
Page 3
9
Minutes (flashing)
Hours (flashing)
Display the alarm icon will be shown when the alarm is turned on. Or
when the snooze function is activated, the alarm icon will be flashing.
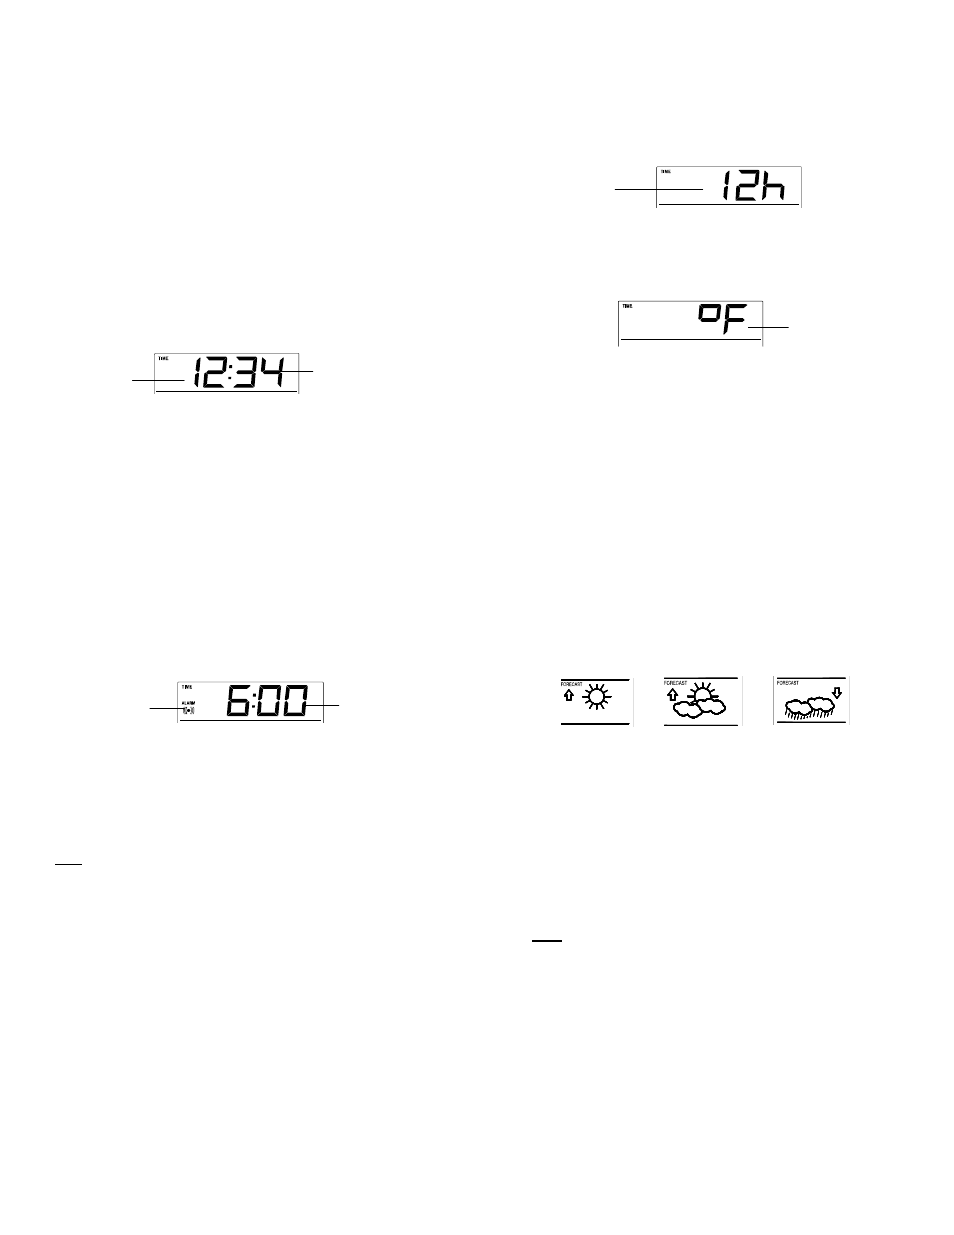
Section 2 - WEATHER FORECAST AND WEATHER TENDENCY ICONS
Display of the weather to be expected in form of three weather symbols
and two weather tendency indicators in form of an arrow, which change
their appearance depending on the air pressure development
Section 3 – INDOOR AND OUTDOOR TEMPERATURE
Display the current indoor temperature with MIN/MAX records
Display of low battery indicator (weather station)
Display the current outdoor temperature with MIN/MAX records
A signal reception symbol will be shown indicating that receiver is
receiving outdoor temperature
Display of low battery indicator (transmitter)
MANUAL SETTINGS:
The following manual settings can be done in the setting mode:
Time
12/24 time format
Temperature unit setting
Press and hold the SET key for about 3 seconds to advance to the setting
mode:
MANUAL TIME SETTING
To set the clock:
1.
The hour digits start flashing in the time display section.
10
Flashing
2. Use
the
+ key to adjust the hours and then press SET key to go to the
minute setting.
3.
The minute will be flashing. Press the + key to just the minutes.
4. Confirm
with
the
SET key and the enter the 12/24 hour time display
setting
12/24 HOUR TIME DISPLAY SETTING
The time can be set to display in 12h or 24h time format. Default setting 12h
time format. To change the setting:
1.
The current time format starts flashing
2. Use
the
+ key to select 12h or 24h time display.
3. Confirm
with
the
SET key and enter the Temperature unit setting.
TEMPERATURE UNIT SETTING (ºF/ºC):
The temperature unit can set to display temperature data in degree
Fahrenheit (ºF) or Celsius (ºC); default setting is ºF. To change the setting:
1.
The current temperature value starts flashing.
2. Use
the
+ key to change the unit.
3. Confirm
with
the SET key and exit the setting mode.
Flashing
11
Alarm icon (ON)
Alarm time
ALARM SETTING
To set alarm:
1.
Press and hold ALARM for about 3 seconds until the alarm time display
flashes.
2.
The hour digit and the alarm icon will be flashing. Press the + key to
adjust the hour.
3. Press
ALARM button once and minute digit will be flashing. User shall
then press + button to set the minute.
4. Press
ALARM button once to confirm the setting.
5.
To activate/ deactivate the alarm function, press the ALARM button
once. The display of the alarm icon represents that the alarm is "ON".
Note: The duration of alarm sounding is 85 seconds
TO ACTIVATE THE SNOOZE FUNCTION AND STOPPING THE ALARM:
1.
When the alarm is sounding, press the MIN/MAX RESET key to
activate the snooze function. The alarm will stop and re-activate after
the snooze interval of 10 minutes.
2.
To stop the alarm completely, press any keys other than the MIN/MAX
RESET key.
WEATHER FORECAST AND TENDENCY
THE WEATHER FORECASTING ICONS :
There are 3 weather icons in the second section of LCD which can be
displayed in any of the following combinations :
12
For every sudden or significant change in the air pressure, the weather icons
will update accordingly to represent the change in weather. If the icons do not
change, then it means either the air pressure has not changed or the change
has been too slow for the Weather station to register. However, if the icon
displayed is a sun or raining cloud, there will be no change of icon if the
weather gets any better (with sunny icon) or worse (with rainy icon) since the
icons are already at their extremes.
The icons display weather forecasts in terms of getting better or worse, and
not necessarily sunny or rainy as each icon indicates. For example, if the
current weather is cloudy and the rainy icon is displayed, it does not mean
that the product is faulty because it is not raining. It simply means that the air
pressure has dropped and the weather is expected to get worse but not
necessarily rainy.
Note :
After setting up, readings for weather forecasts should be disregarded for the
next 48-60 hours. This will allow sufficient time for the Weather Station to
collect air pressure data at a constant altitude and therefore result in a more
accurate forecast.
Common to weather forecasting, absolute accuracy cannot be guaranteed.
The weather forecasting feature is estimated to have an accuracy level of
about 75% due to the varying areas the Weather Station has been designed
Rainy
Cloudy with
sunny intervals
Sunny